| Seat Belts Made
Simple |
Imagine the scene: you are working on a quick aircraft model project, and all you want is a simple but decent cockpit to be seen through the closed canopy. You are about to glue the fuselage halves together, but then you realize you have to add the pilot's seat belts. You look for your PE parts and all the belts are gone. You think about doing tape belts. Nah! Simple, but not up to you model. Sure, you can order more PE belts, but besides having to wait until they arrive, PE parts can be more expensive than the kit you are working on.
What I'm going to show you in this article is a fine but extremely simple way to obtain very convincing seat belts. You can use these ideas in any scale, but I found they are more useful in 1/72 models. Sure, you can see the seat belts and buckles through the clear parts, just they do not need to be perfect in such cases, particularly with a closed canopy. In larger scales, a good quality PE item is unbeatable, I admit, as far as you are willing to pay the price.
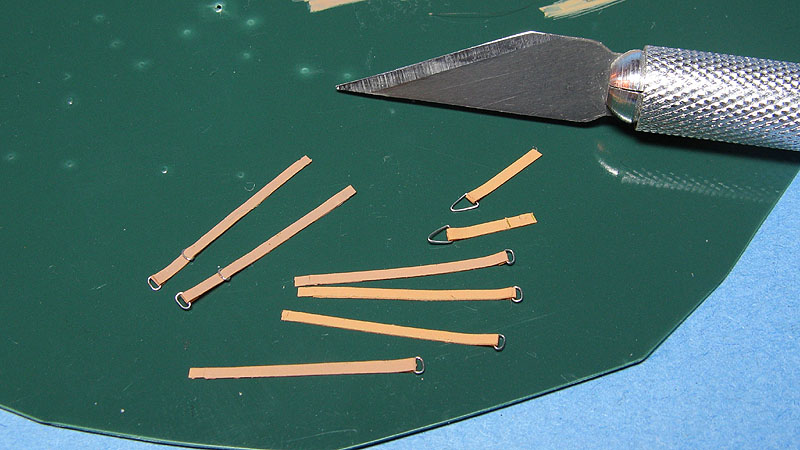
Let's start with the belts. I usually overlap two wide Tamiya kabuki tapes to make them more thick. Working on a plastic lid, I slice the tape according to the belt width. I like to leave a 1-2 mm non-overlapping end for easier folding over the buckles later:
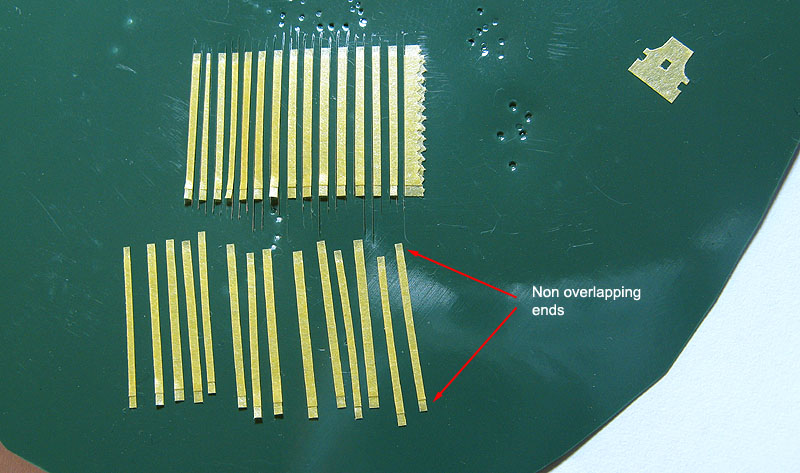
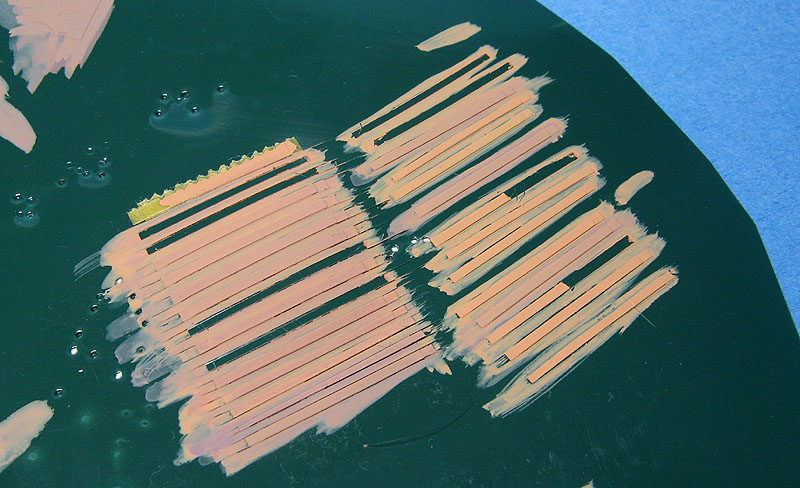
Next, user your favorite acrylic paint to give some color to the belts. This is supposed to be a quick job, so I don't even bother airbrushing them. I like to use Vallejo paints here because they dry fast and remain relatively flexible while still not fully cured.
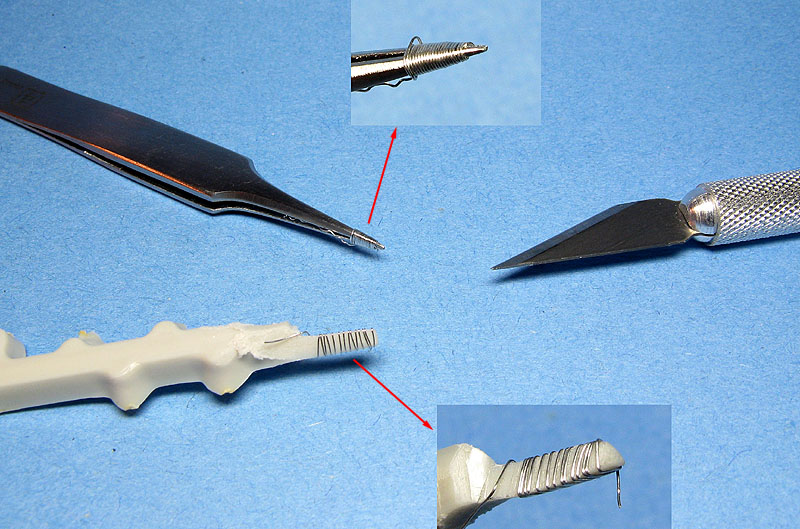
While the paint is drying, we can do the buckles. The idea is to roll fuse wire (choose one of suitable diameter) around something with the approximate shape of the buckles. The type of wire found in the core of TV cables works great, too. For oval buckles I use the ends of a fine tip tweezer, and for triangular buckles I sanded a piece of sprue. You can use virtually enything which fits you need:
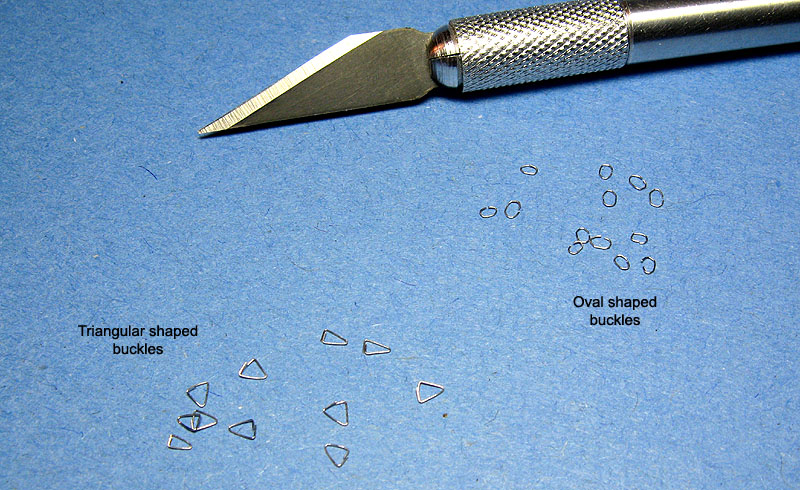
Next, use a sharp hobby knife to slice the wire along what will be the less visible side of the buckle. Fuse wire is soft, and will cut very easily. Be sure to wear eye protection - you don't want one of these tiny things flying in your eyes.
Select the ones with about the same size. Normally, one of the edges will be hidden under the tape, but it is a good idea to use a pair of tweezers to join the ends of each buckle, if necessary, :
By now the paint is dry enough to be handled. Remove the best ones from the backing lid and insert the buckles in the non-overlapping end in such a way that the sliced ends touch the stick surface of the tape. That will hold it in place while you fold the tape over it. Once folded, give some extra pressure with a tweezer or a toothpick. Because two sticking surfaces of the tape are in contact you don't need to worry about the end opening, so no glue is necessary. You can make variations by inserting buckles somewhere in the mid length of the belts, or adding a belt end hanging here or there. The idea is to cheat, but not much, therefore check your references before starting to make your belts visually resembling the real thing.
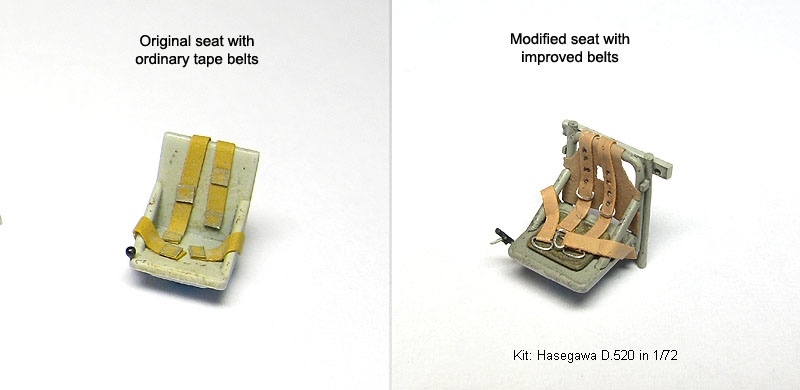
I used this method in the
seat of my Hasegawa Dewoitine D.520 in 1/72, along with an improved
kit's seat. I went a bit further and marked some grommets using a sharp
pencil (I could have added some paint wash, too). The sticking side
allow you to pose the belts anyway you want as you go. I usually apply
small beads of super glue to anchor the invisible ends of the belts,
just in case. The result is very convincing:

Even though the canopy will be closed in that particular model, it adds a lot to the cockpit. Of course I had improved the original kit's seat too, but even if I had not, the difference would be obvious:
Having used everything from PE items to decal printed seat belts, I really like to use spruce my models with quick and effective methods, but they are not that many. This method is simple enough to be tried by anyone. I spent around half an hour to make the example shown here. You can prepare a dozen or so of them during one night section and have ready to go belts for many models.
Someone asked me why not to make the buckles with stretched sprue like we make plastic rings. We could, but by using fuse wire we don't have to struggle with painting the tiny buckles - they are natural metal afterall. Second, it is a cheap option, let alone if you compare with PE parts. And look, these are genuinally self-adhesive parts, yet much more flexible than any metal item.
I hope you find this tip useful.
