| Tips on making
aircraft and vehicle lights - Part III |
Here is another
installment of tips to simulate
lights on your models. The present one is directed to aircraft models
mainly, but you can find other applications, of course. Here we focus
on how to make colored navigation and formation lights. It is far
easier to use clear colored plastic sanded to shape and polished to
make these items in larger scales. In 1/72 or 1/48, however, these
stuffs are very tiny, and the tips presented here will save you a lot
of time and frustation.
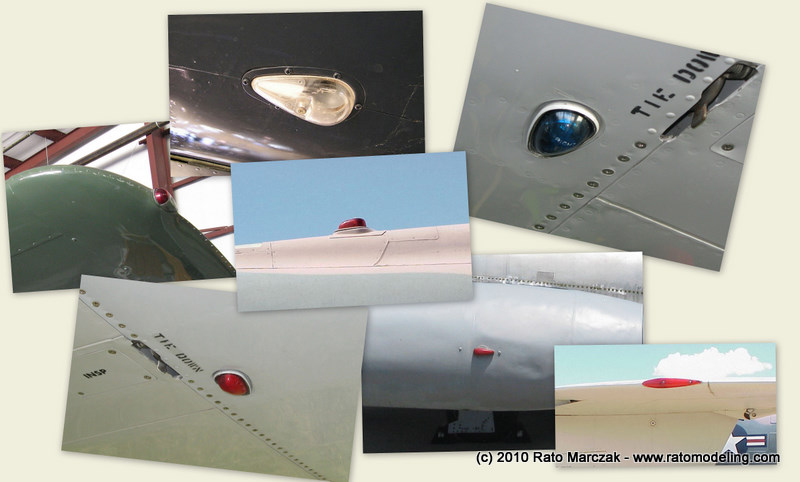
Formation and navigation lights are many times installed under a teardrop shaped clear cover. Therefore, the method of sanding clear pieces flush to the surface described earlier obviously will not work. In larger scales, you can go as far as include buld details inside the clear cover, but in 1/72, for instance, all you need is a reasonably well shaped clear part in the correct color. Remember, these items vary a lot from aircraft to aircraft, so check your references to be sure about their shape, color and position.
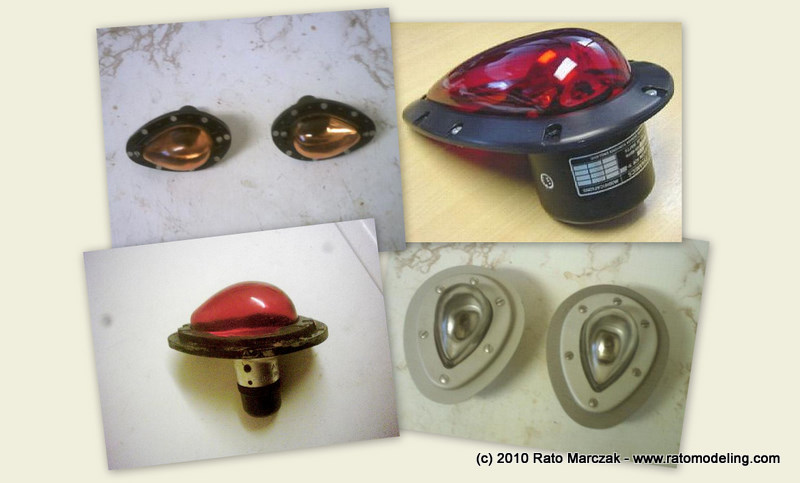
There are commercial items which are good options (like the one depicted below), but the method described here will consume only a few minutes, believe me.
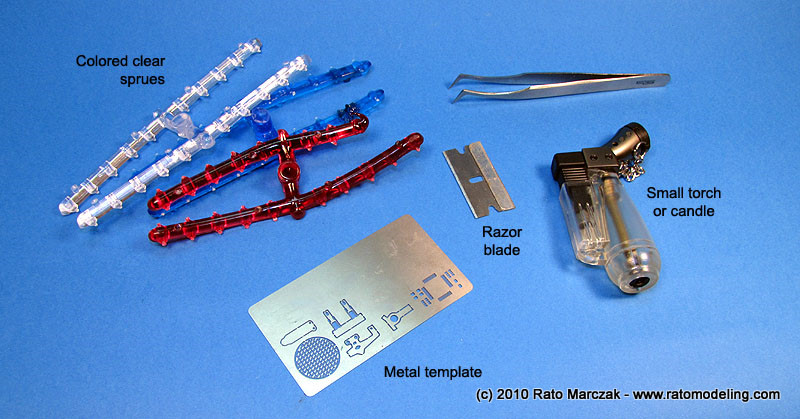
First, you need some pieces of clear plastic in the correct colors. In this article we are going to exemplify the method making the wingtip lights of my XF-84 conversion in 1/72 scale. You also need a good scalpel or razor blade, a torch or candel and a metalic template with the approximate shape of the light cover.
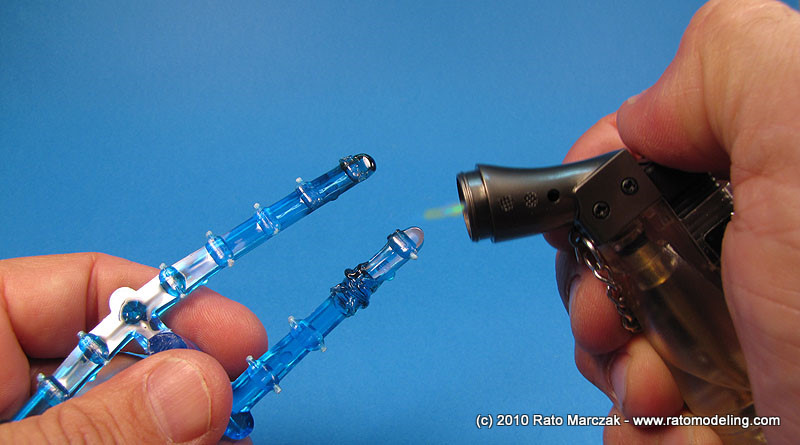
Start by melting an end of the clear rod. You don't want it burning, just enough heat to make it maleable.
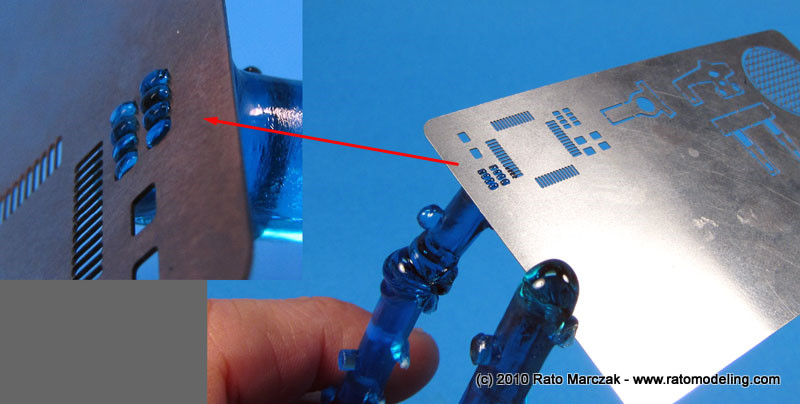
Now press the soft plastic against the metal template. Act fast, or the plastic will harden. I used a metal template which had some rectangular openings. Ideally, they should have a teardrop shape, but they are so tiny in my case that this will do (yes, there are commercial templates for this purpose!). Don't press too much or too little, just enough to squeeze some plastic to the other side of the template. And of course, you must use a metalic template...
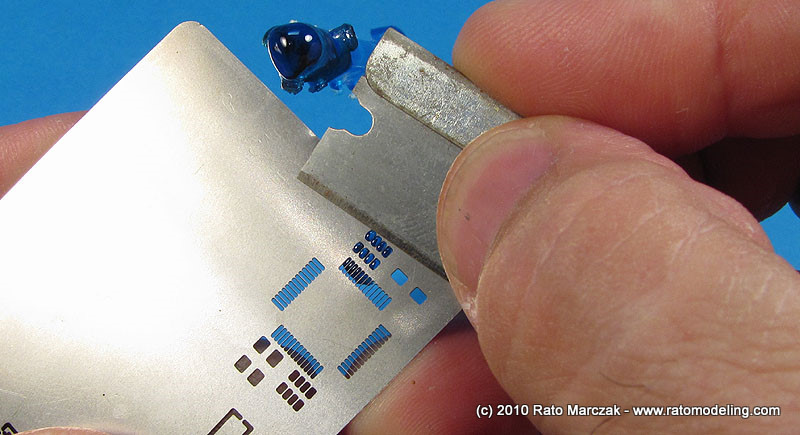
The small bubbles protuding to the other side will be our wingtip lights. Never pull the clear rod from the template or you will destroy both, your work and the template. Since the applied pressure squeezes the plastic, the bubbles just produced are actually larger than their holes. Use a sharp blade to carefully cut them off. It is just a matter of sliding the blade over the surface of the template, but try to make it as parallel to the template as possible:
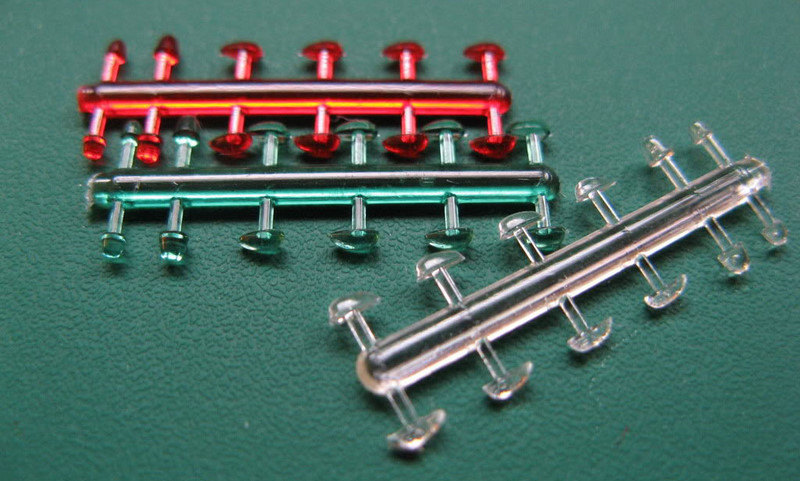
Here is the result:

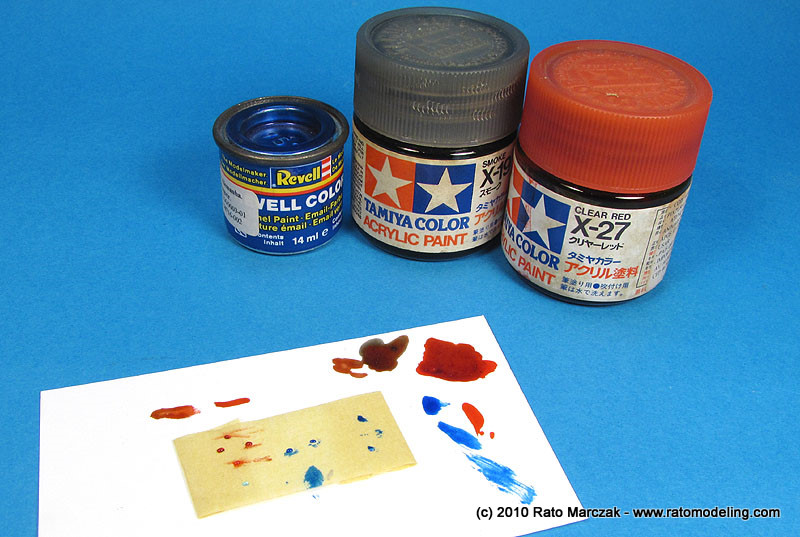
Because the amount of plastic in each part is so small, they may look much more translucent than in the original rod. In my case, the red ones resulted ok, but the blues ones were too clear. I corrected them by applying some clear paint over them. I retouched the red, too, just in case:
And now they look much better:
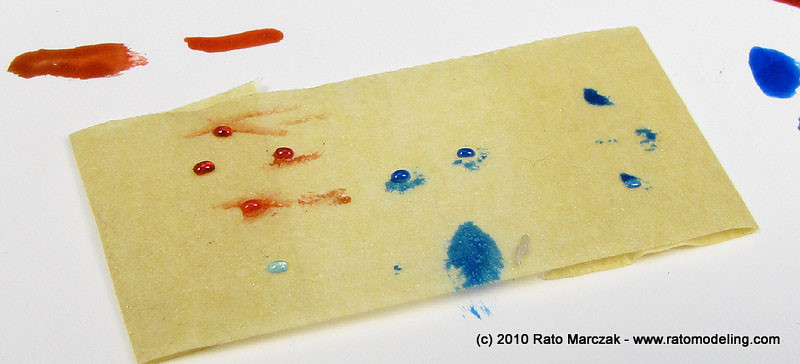
You have enough for your next couple of models, too. Note that they are not all exactly equal. Select the better ones which better match the shape and size of your subject.
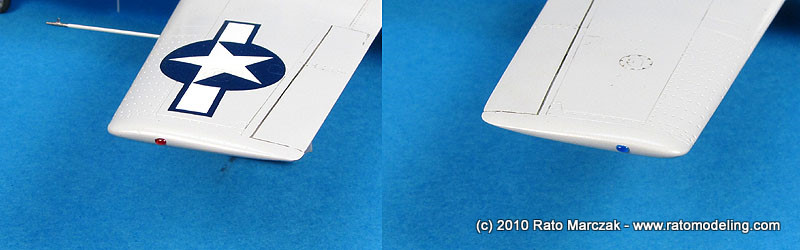
Time to glue the tiny lights. I've seen many well finished models marred by misglued small parts. You can use CA glue or something else as strong as - put your optivisor on and go ahead. But lights on aircraft models are one of those cases where you should not use strong glues. You don't have a positive fit or a slot to hold it, so any mistake can destroy the light or worse, can damage the model finish. White glue is a good alternative, because you can clean it with water if necessary. My tip is contact glue. I prefer Microscale Micro Metal Foil Adhesive. It is designed to glue metal foil but works like a charm here. Apply a small drop on the back of the light, and another on its intended position. Wait it dry a few minutes and just press the light in place:
I hope you find this article useful in your next project.
Rato
Marczak
© 2010Formation and navigation lights are many times installed under a teardrop shaped clear cover. Therefore, the method of sanding clear pieces flush to the surface described earlier obviously will not work. In larger scales, you can go as far as include buld details inside the clear cover, but in 1/72, for instance, all you need is a reasonably well shaped clear part in the correct color. Remember, these items vary a lot from aircraft to aircraft, so check your references to be sure about their shape, color and position.
There are commercial items which are good options (like the one depicted below), but the method described here will consume only a few minutes, believe me.
First, you need some pieces of clear plastic in the correct colors. In this article we are going to exemplify the method making the wingtip lights of my XF-84 conversion in 1/72 scale. You also need a good scalpel or razor blade, a torch or candel and a metalic template with the approximate shape of the light cover.
Start by melting an end of the clear rod. You don't want it burning, just enough heat to make it maleable.
Now press the soft plastic against the metal template. Act fast, or the plastic will harden. I used a metal template which had some rectangular openings. Ideally, they should have a teardrop shape, but they are so tiny in my case that this will do (yes, there are commercial templates for this purpose!). Don't press too much or too little, just enough to squeeze some plastic to the other side of the template. And of course, you must use a metalic template...
The small bubbles protuding to the other side will be our wingtip lights. Never pull the clear rod from the template or you will destroy both, your work and the template. Since the applied pressure squeezes the plastic, the bubbles just produced are actually larger than their holes. Use a sharp blade to carefully cut them off. It is just a matter of sliding the blade over the surface of the template, but try to make it as parallel to the template as possible:
Here is the result:
Because the amount of plastic in each part is so small, they may look much more translucent than in the original rod. In my case, the red ones resulted ok, but the blues ones were too clear. I corrected them by applying some clear paint over them. I retouched the red, too, just in case:
And now they look much better:
You have enough for your next couple of models, too. Note that they are not all exactly equal. Select the better ones which better match the shape and size of your subject.
Time to glue the tiny lights. I've seen many well finished models marred by misglued small parts. You can use CA glue or something else as strong as - put your optivisor on and go ahead. But lights on aircraft models are one of those cases where you should not use strong glues. You don't have a positive fit or a slot to hold it, so any mistake can destroy the light or worse, can damage the model finish. White glue is a good alternative, because you can clean it with water if necessary. My tip is contact glue. I prefer Microscale Micro Metal Foil Adhesive. It is designed to glue metal foil but works like a charm here. Apply a small drop on the back of the light, and another on its intended position. Wait it dry a few minutes and just press the light in place:
I hope you find this article useful in your next project.
