| Painting white banded tail wheel tires |
You
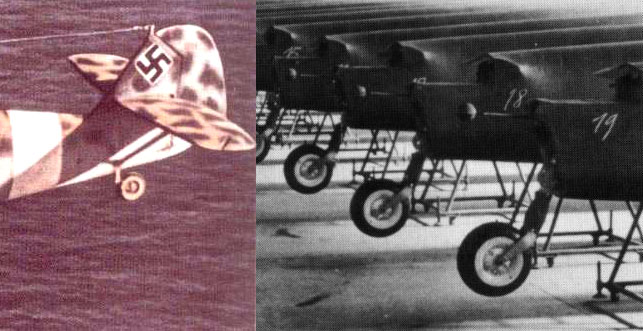
probably have already noted white banded tail wheel tires in many WWII
aircraft photos. During the 1930's the German industry mastered the
manufacturing of tail wheel tires containing wire strands embedded in
the rubber. This allowed the static electricity stored in the airframe
during flight to be discharged instantly upon contact of the tire with
the ground. These electric-condutive tires were differenciated from the
regular tires by a white band. They were extensively used by Luftwaffe
aircraft during WWII:
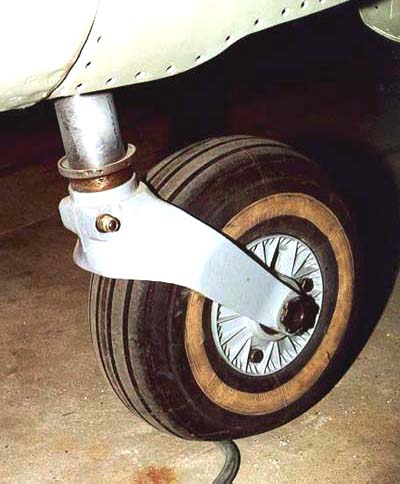
Recently I faced the problem of painting the white bands on the tail wheel of a Tamiya Bf-109E in 1/72 scale. I mean, a case where wheel and fork are molded together, as separate wheel hardly will be a problem to be painted. There are two or three relatively easy ways to accomplish that, and I'll describe here one of them. In larger scales this is not so critical, but in 1/72 it can be a real trouble to achieve a decent result. The particular subject I'm trying to depict is shown below, altough the wheel hub in the photo is from a Me-109G, and my particular model had the characteristic gloss black hub:
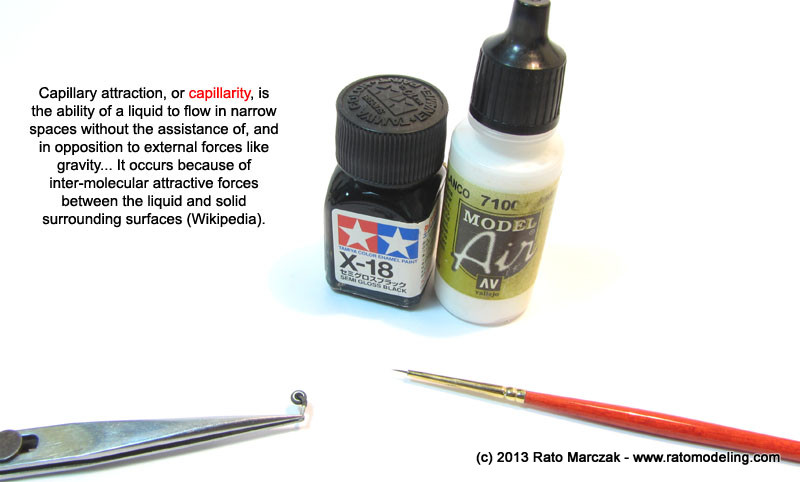
This method is based on capillarity and masking used together. In order to make use of capillarity, the wheel hub must be recessed, or at least contain a recessed boundary marking where the hub ends and where the rubber starts. The idea is to mask the outer diameter of the white band, only, while the hub will be painted by capillarity using well thinned paint.
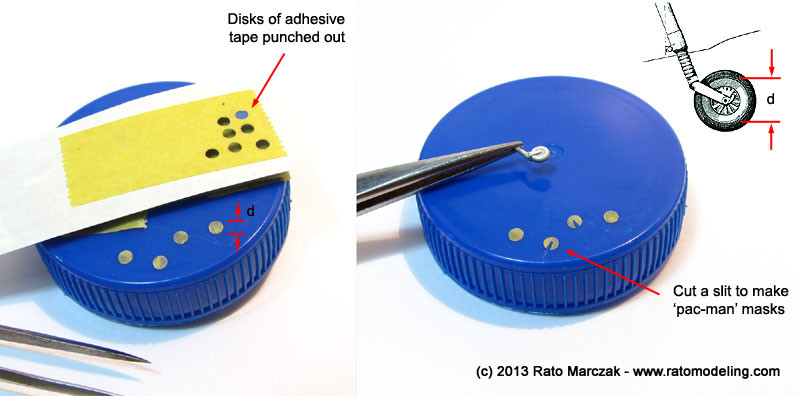
Before starting to shake your paint bottles, we need to prepare masks. Lay a length of masking tape over the non-sticking side of a adhesive backing paper, and punch disks of the appropriate diameter. These will be our masks, and it is important to cut the disks more or less of the same diameter than the outer measure of the white band we are about to paint. I made my masks using a punch and die set. Depending on the subject, you may not find a suitable punch in your set. Alternatively, you can use brass tubing with a sharpened end as your cutting tool. We don't need to be perfect, but gross differences will be visible.
Once the masks are done, proceed with the basic steps.
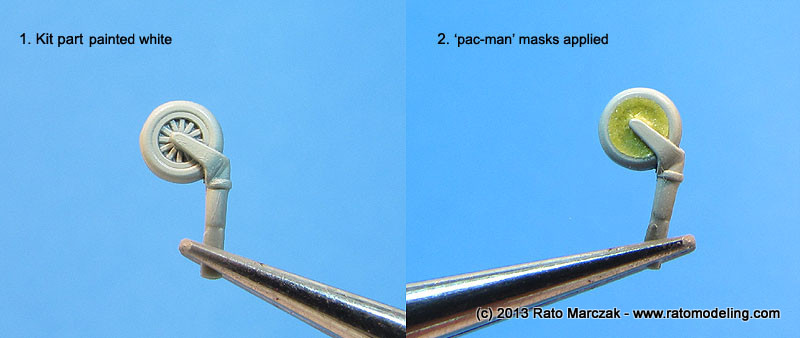
1. Paint the wheel white.
2. Apply the Pac-Man mask, trying to lay it as centered with the wheel as you can. Using a toothpick, press the tape around the fork arms, but again, you don't need to be perfect. Centering the mask is the important thing here.
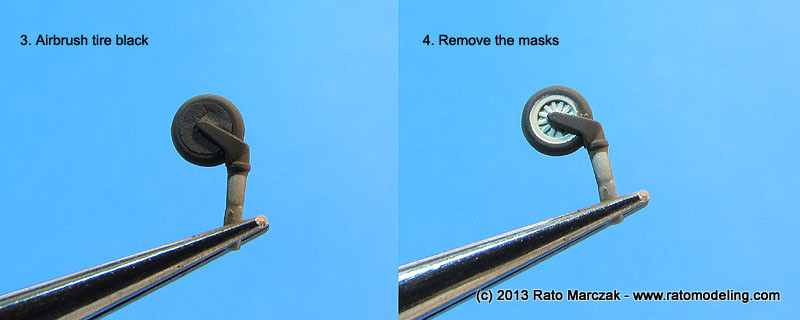
3. Airbrush your favorite rubber color.
4. Remove the masks.
You may have noted that I mentioned that you don't have to be perfect on a few places in this text. This is because we are relying on optical illusion. I mean, 1/72 tailwheels are so small that nobody will note small deviations or eccentricities. Mind you, the photos above are at least 8-10 times larger than the original part.
I'll be explaining another method in a next installment.
I hope you find this article useful in your next project.
Rato
Marczak
© 2013Recently I faced the problem of painting the white bands on the tail wheel of a Tamiya Bf-109E in 1/72 scale. I mean, a case where wheel and fork are molded together, as separate wheel hardly will be a problem to be painted. There are two or three relatively easy ways to accomplish that, and I'll describe here one of them. In larger scales this is not so critical, but in 1/72 it can be a real trouble to achieve a decent result. The particular subject I'm trying to depict is shown below, altough the wheel hub in the photo is from a Me-109G, and my particular model had the characteristic gloss black hub:
This method is based on capillarity and masking used together. In order to make use of capillarity, the wheel hub must be recessed, or at least contain a recessed boundary marking where the hub ends and where the rubber starts. The idea is to mask the outer diameter of the white band, only, while the hub will be painted by capillarity using well thinned paint.
Before starting to shake your paint bottles, we need to prepare masks. Lay a length of masking tape over the non-sticking side of a adhesive backing paper, and punch disks of the appropriate diameter. These will be our masks, and it is important to cut the disks more or less of the same diameter than the outer measure of the white band we are about to paint. I made my masks using a punch and die set. Depending on the subject, you may not find a suitable punch in your set. Alternatively, you can use brass tubing with a sharpened end as your cutting tool. We don't need to be perfect, but gross differences will be visible.
- Once you have punched a few (we will need only two, make a couple more just in case), cut a slot passing through the center of the disk to make the mask look like a 'Pac-Man' (if you are under 40, Google it). The slot will roughly contour the fork arm.
Once the masks are done, proceed with the basic steps.
1. Paint the wheel white.
2. Apply the Pac-Man mask, trying to lay it as centered with the wheel as you can. Using a toothpick, press the tape around the fork arms, but again, you don't need to be perfect. Centering the mask is the important thing here.
3. Airbrush your favorite rubber color.
4. Remove the masks.
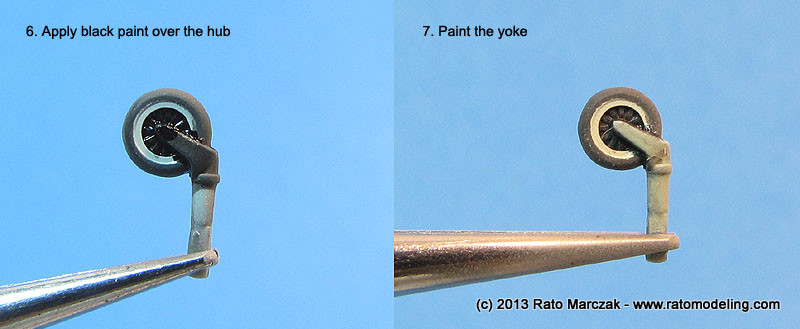
6.
Now, using a well thinned black enamel and a fine brush, deposit some
paint in the hub recess. The paint is not as diluted as you would do
for a wash, just enough to make it flow by capillarity around the hub.
Since the paint is thin, you may need to retouch raised details later
for a complete coverage.
7. Once the hub is dry, paint the fork with the appropriate color (RLM 65, in my case). If you want, apply a oils wash and/or drybrushing to highlight the details.
7. Once the hub is dry, paint the fork with the appropriate color (RLM 65, in my case). If you want, apply a oils wash and/or drybrushing to highlight the details.
You may have noted that I mentioned that you don't have to be perfect on a few places in this text. This is because we are relying on optical illusion. I mean, 1/72 tailwheels are so small that nobody will note small deviations or eccentricities. Mind you, the photos above are at least 8-10 times larger than the original part.
I'll be explaining another method in a next installment.
I hope you find this article useful in your next project.
