| Projekts Boeing AGM-86B + Revel Hs293 ALCMs in 1/72 |
| Started: January / 2008 Finished: April / 2008 |
Ok,
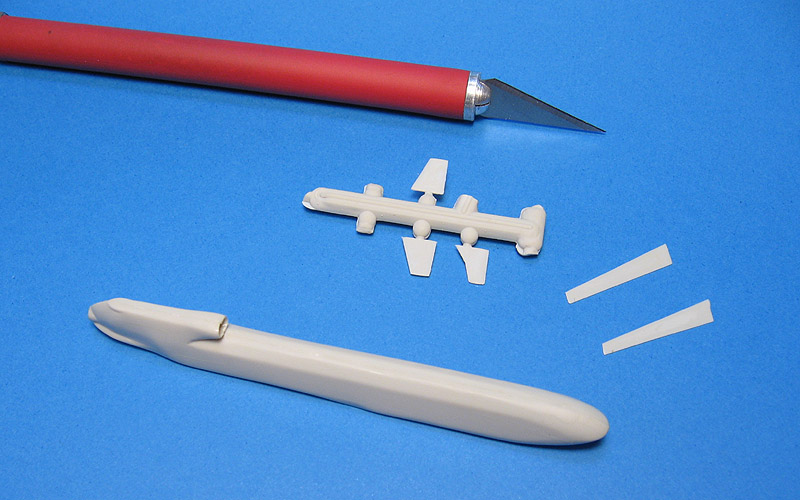
talk about simple models... This one has seven parts!!! Our friend
Felipe handed me over this little kit of the famous Boeing air launched
cruise missile (hence ALCM) AGM-86B. If you don't know what I'm talking
about, here's a pic of the real stuff:
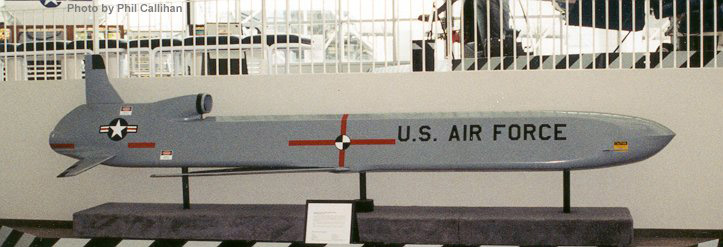
Back to the kit, Felipe told me that he got this kit from the editor of the Brazilian IPMS journal in Rio de Janeiro during early 80's. That's a lot of time... I decided to try this model as part of my endless AMS treatment. The kit consists of a reasonable well model grand total of seven parts (two fuselage halves and five control surfaces), not counting a beautiful stand. The details were raised. I started by glueing the fuselage halves and sanding off all raised details (taking a lot of care to preserve the shapes):
I recall the very same photo
of this missile illustrating various books when I was young. Even
today, I wasn't able to find many photos of it. Anyway, this is a
famous weapon. It was designed to be launched from a B-52H and fly like
a guided aircraft to the target.
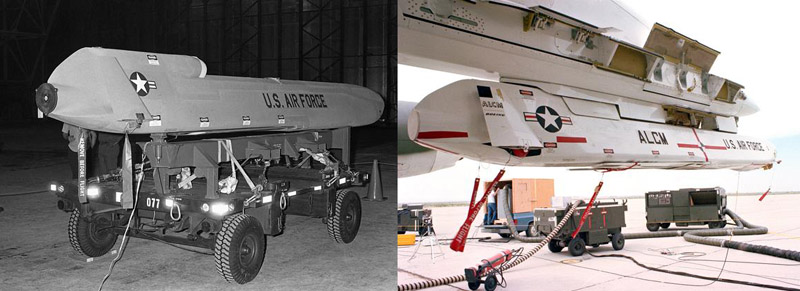
Interestingly, all five control surfaces are folded to store the AGM-86
in its pods. From what I was able to check, the current version is the
AGM-86C/D, and it replaced all dash-Bs, now retired from active
service. Although in service for more than 20 years now, there's still
a lot of secrecy about the technical details of the AGM-86.
Back to the kit, Felipe told me that he got this kit from the editor of the Brazilian IPMS journal in Rio de Janeiro during early 80's. That's a lot of time... I decided to try this model as part of my endless AMS treatment. The kit consists of a reasonable well model grand total of seven parts (two fuselage halves and five control surfaces), not counting a beautiful stand. The details were raised. I started by glueing the fuselage halves and sanding off all raised details (taking a lot of care to preserve the shapes):
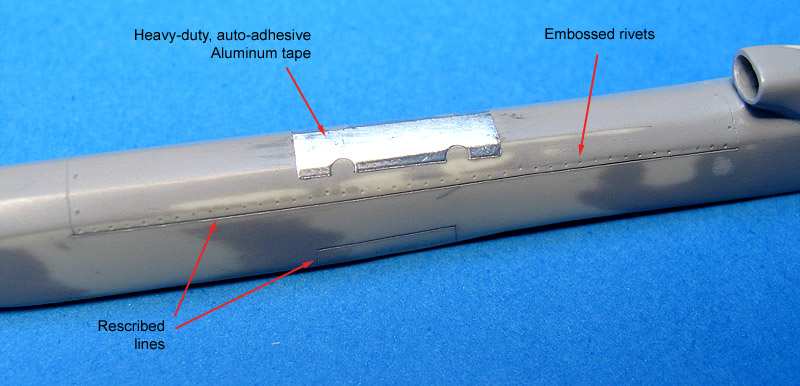
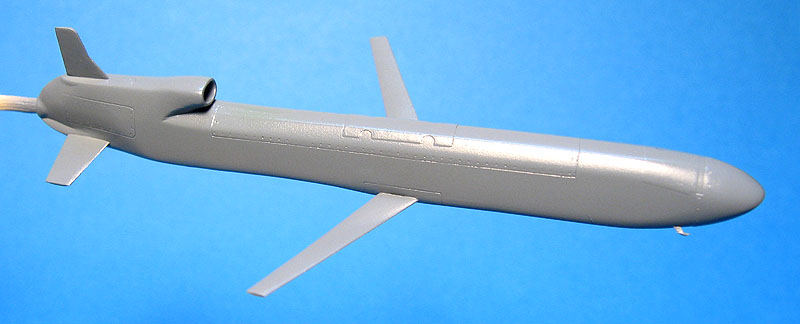
Next, I decided to rescribe the evident panel lines. Nothing too fancy, but I foresaw it would be a pain in the ass to scribe on something so small. Anyway, the fuselage back had a large panel to access the ogive. That panel was scribed and decorated with rivets, after what I saw in the photos. Another panel, with four circular cut-outs, should be scribed inside this one, but it would be too difficult to scribe such panel. I cheated here by cutting a piece of heavy-duty self-adhesive Aluminum tape and attaching it to the little Boeing's spine:
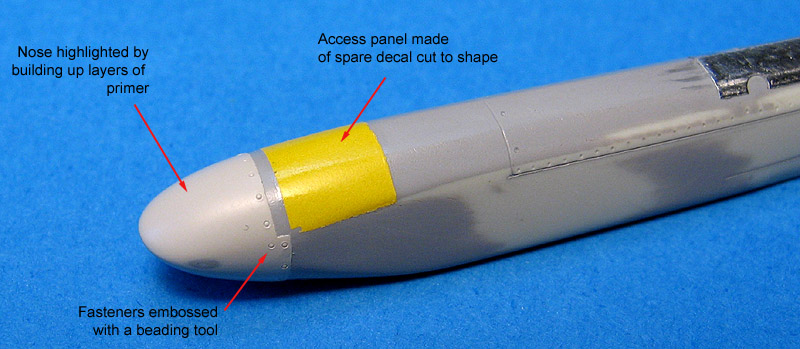
The chacracteristic shark-nose of the AGM-86 is correctly captured in the kit. However, on the real thing the nose is actually a fiber cap fastened in place. Since here too I wouldn't be able to do an accurate scribing, I used the primer & tape technique to produce a step simulating the cone lines. Once dry, I carefully sanded the excess (it still is a tad too high) and embossed the fasteners. Right aft the cone, there is another panel to give access to the directional gear of the missile. Here I simply cut a piece of spare decal and installed in place.
I also scribed a few other access panels on the belly and engine area of the fuselage:
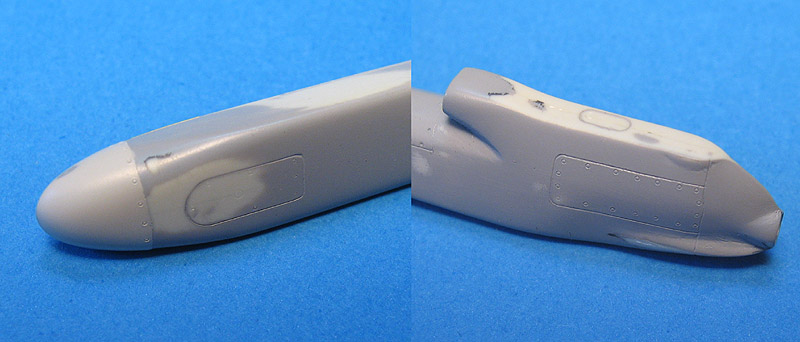
I know, I know, nothing here ended perfect, and fidelity is not the strongest point of my access panels, but I hope it will be passable under a coat of primer:
The model was reprimed and checked for faults. Next, I prepared a mix of the old Aeromaster Dark Blue Grey (#9100) and Light Blue Grey (9101) roughtly in 1:1 ratio to simulate the Ghost Grey I've seen in the photos of the real stuff. It was followed by a generous coat of Future to prepare the surfaces for the decals.
The kit decal sheet was unusable and out of register. I elected to make my own decals, well, at least the black and white ones, using the method described elsewhere in the Antrvm. I started preparing the artwork and resizing it according to the original decal sheet.
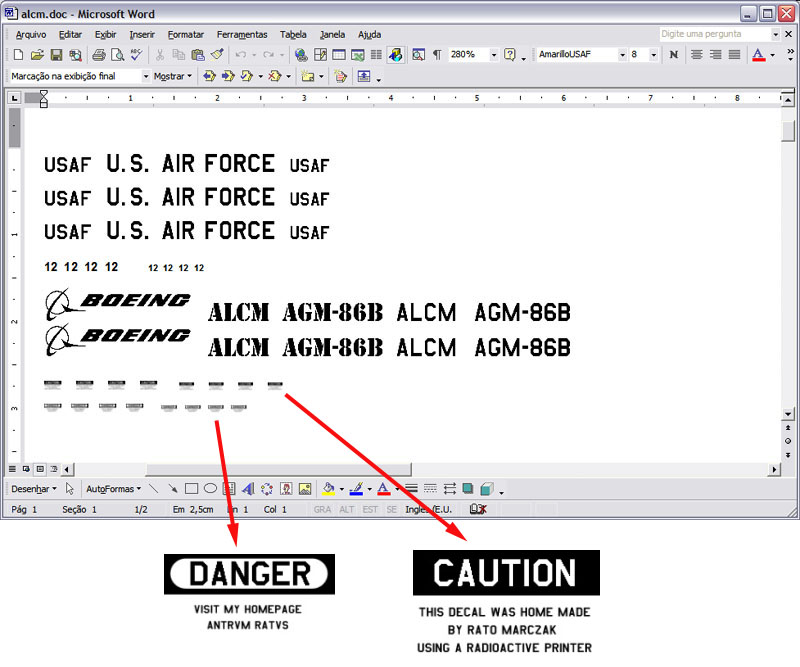
The printed decals turned out ok. Some warning signs had to be printed in white and yellow decal paper, so cutting will be more difficult in those cases.
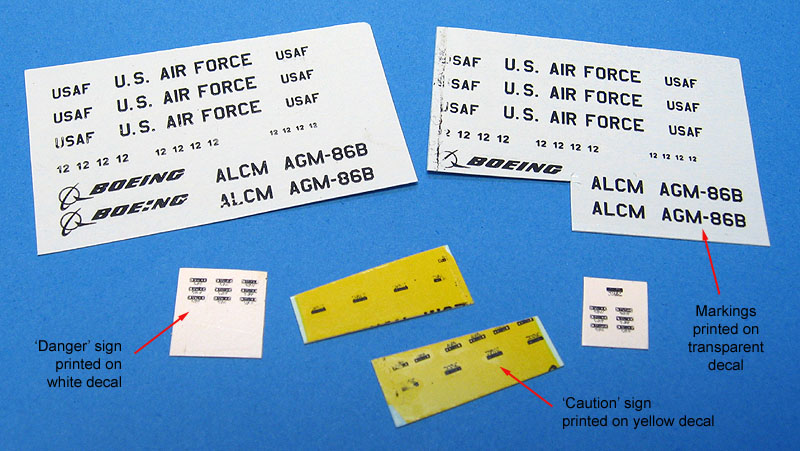
I applied the decals to the model without using any kind of protective coat, and they conformed well. The toner hasn't chipped, neither, even after applying a coat of Micro-Sol:
While I was awaiting for a good soul to help me out with the liliputian insignias, I decided that the sole AGM-86 in a display would sound a little boring. Checking out the still new Revell Fw-200 Condor in 1/72, I noticed that petit Hs-293 romote controled gliding bomb in one of the sprues.
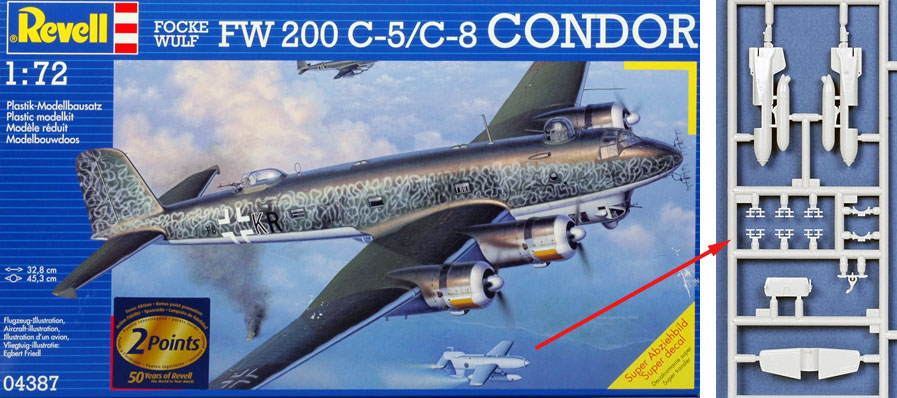
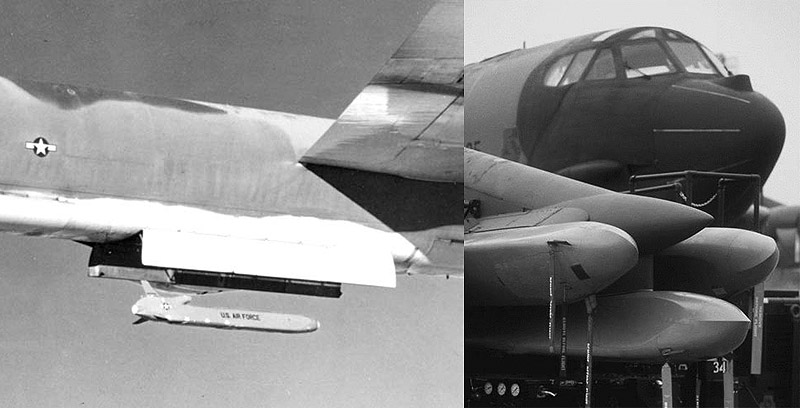
A quick research proved that both, the Hs-293 and the AGM-86 belong to the same weapon lineage, i.e. both are ALCMs. I then decided to include the Hs-293 side by side with the AGM-86 in a "Dad & Son" display. Sounds like a neat idea. And so I googled some intel on the Hs-293 to finish the fastest research (modeling wise) I've ever done. The Revell piece is well molded, no flash, and is a fine representation of the German missile indeed. The wartime pic below show the few points to refine:
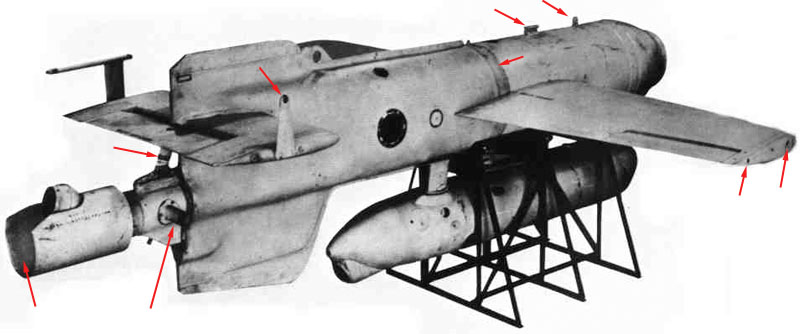
- Carve the exhaust nozzle opening
- Add fuel dump nozzle and control surfaces actuating arms.
- Add the 'fuselage' belt on the upper side (not molded on the kit parts)
- Drill a number of holes and openings
- Add the mounting points.
- Deepen
control surfaces lines
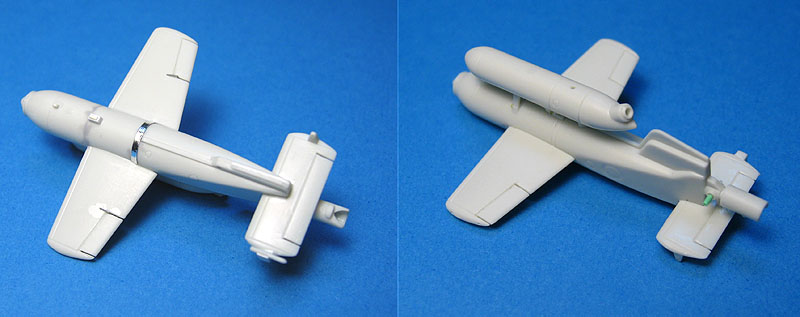
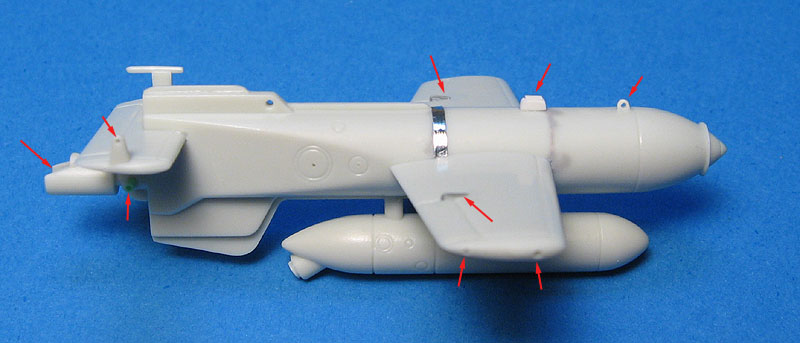
The prominent fuselage belt was added with a heavy duty self-adhesive Aluminum tape (much better than rescribing it). The small dump nozzle was made of a small section of plastic tubing, while the other details were added from plastic bits and stretched sprue.
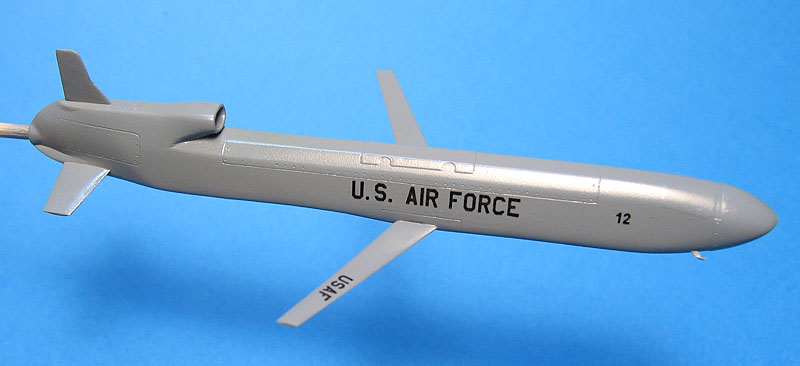
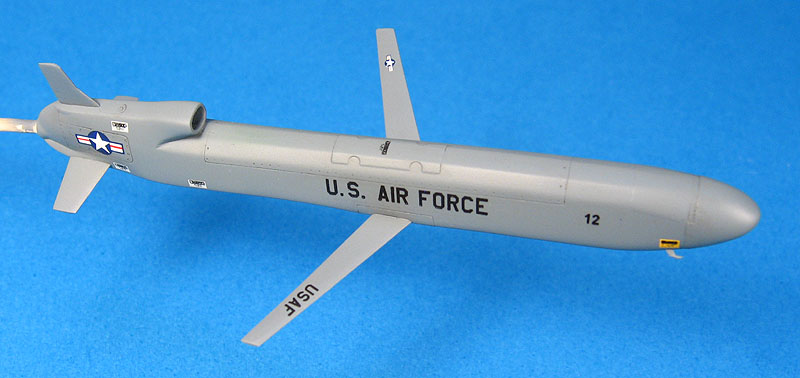
Thanks to our friend Flávio, the AGM-86 got her insignias. They came from a 1/350 carrier air wing, and the sizes matched pritty well the original decals. I applied them as well as the caution/danger stencils and sealed everything with Future in preparation for the wash.
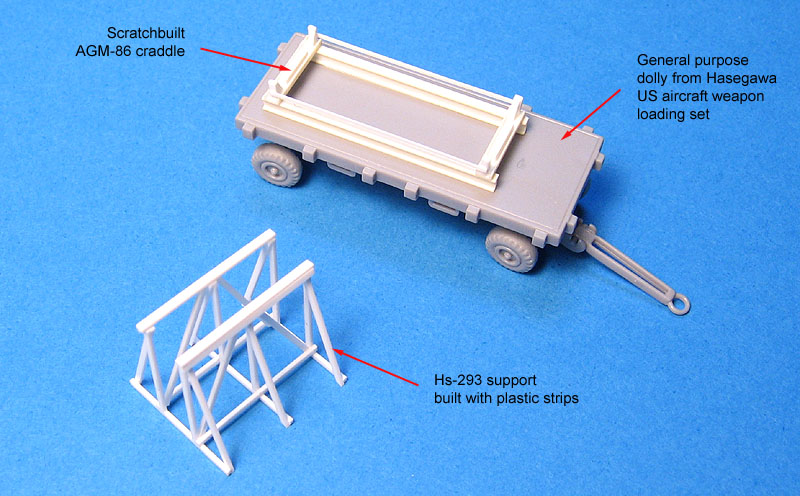
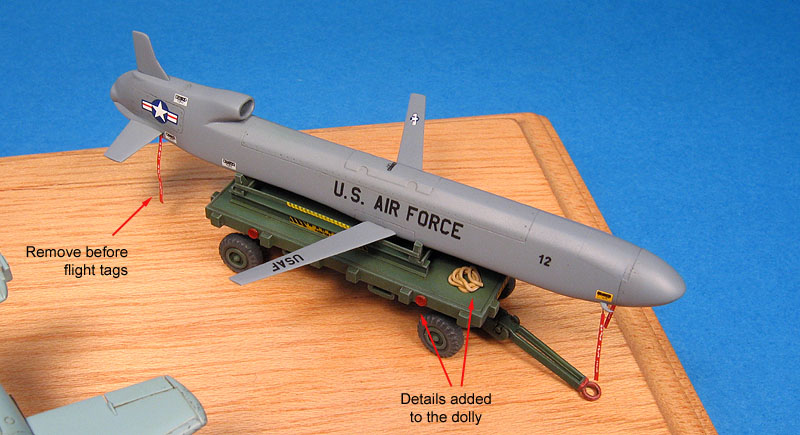
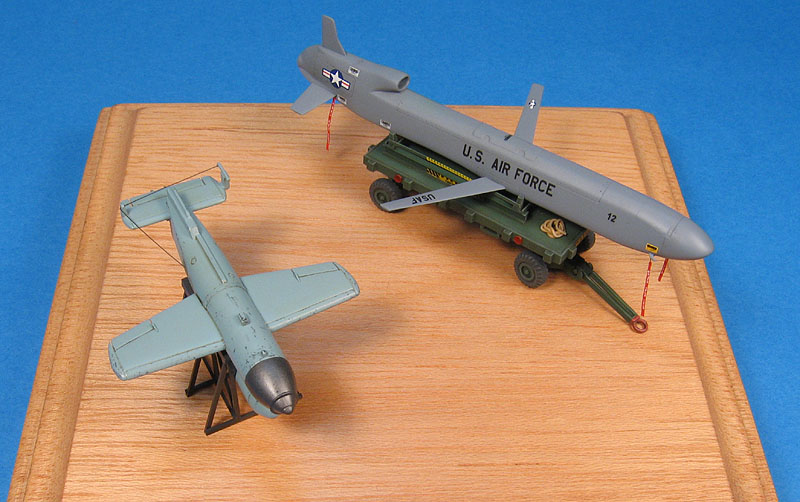
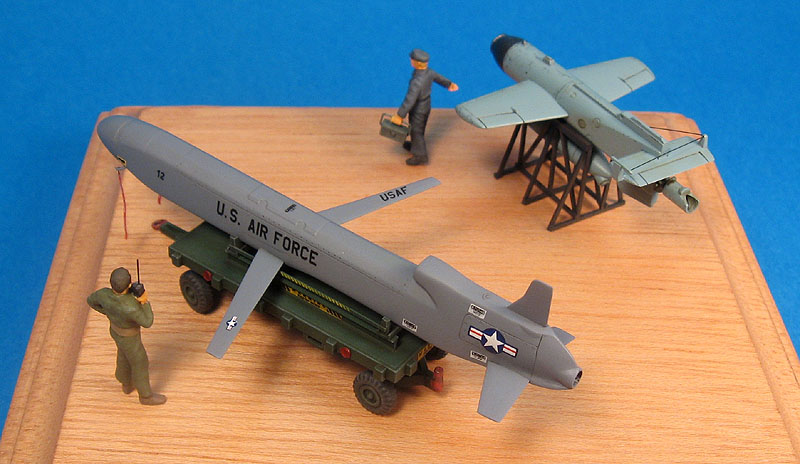
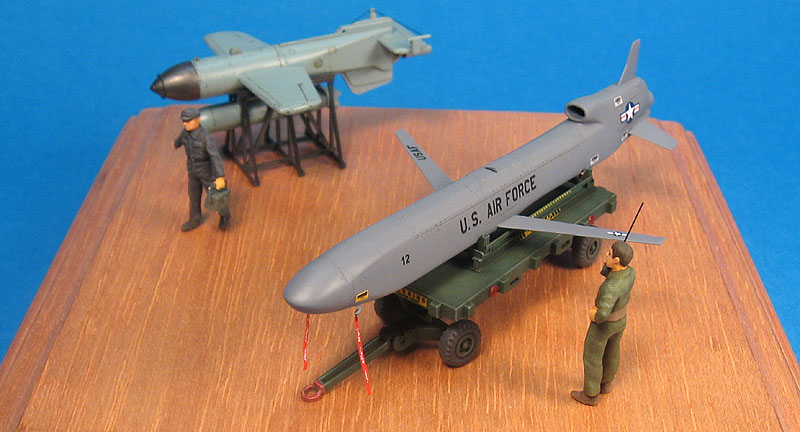
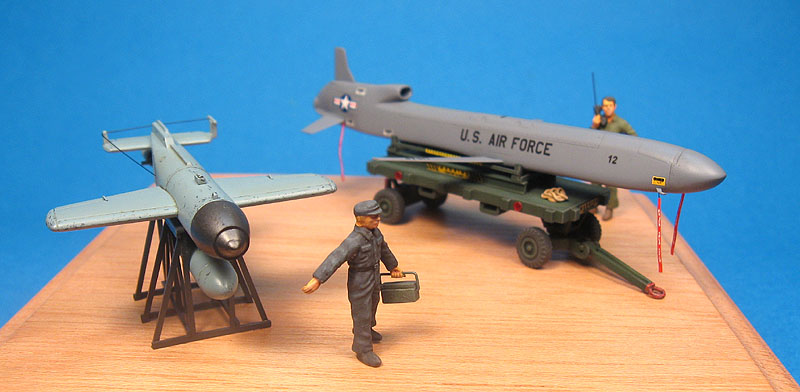
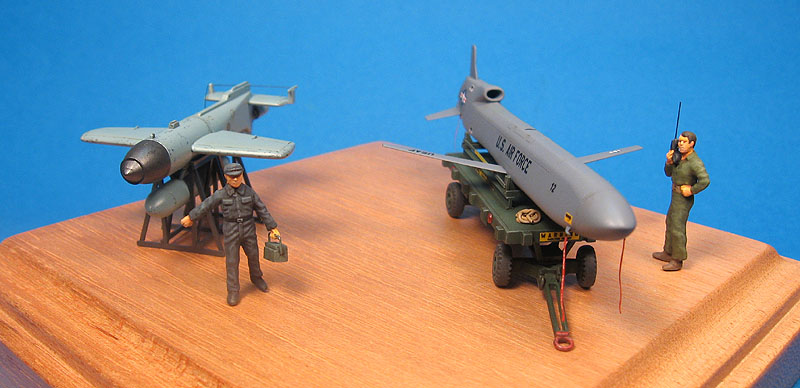
My original intention was to keep the display very simple, with both the AGM-86 and the Hs-293 flying side by side (I would use brass rods to support them). But after dugging my stash, I found the Hasegawa 1/72 US aircraft weapon loading set (kit #X72:5), and the general purpose dolly seemed suitable to put the Boeing missile on it in an inspection scene. These stuffs in general were transported with retracted flying control surfaces, but it is a hypotetical maintenance scene, so... All I added was a dolly to fit the belly of the AGM-86. As for the Hs-293, I had to do something compatible, and then I scratchbuilt a support truss similar to the one depicted in the wartime photo above. I used almost exclusevely 0.5 x 0.75 mm plastic strips, reproduced with my trusty Northwest "The Chopper" to keep the lengths equal.
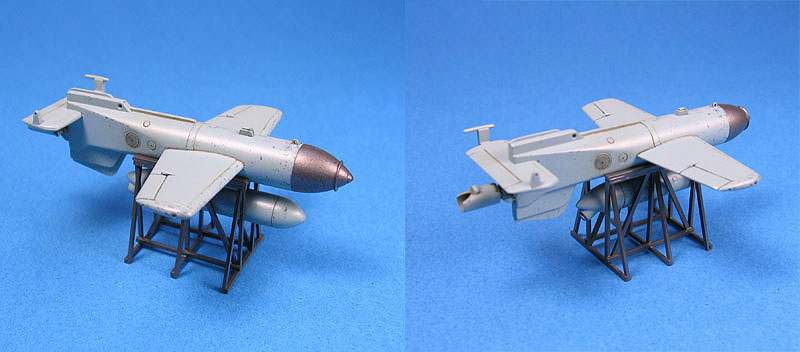
The Hs-293 was painted in RLM 65, except for the head, where I used Model Master Titanium metalizer, to add some interest. In fact, I used Gunze #117 (which is RLM 76), but the was would darken the tone a bit, bringing it closer to RLM 65 (to my eyes, at least). After a coat of Future and a basic wash with oil colors, I coated the little model with Testors Dullcote. Next, a 4B pencil was used to add chipping and scratches along non-wood surfaces, following loosely what I've seen in wartime pics. The supporting truss was painted with a dark metallic grey:
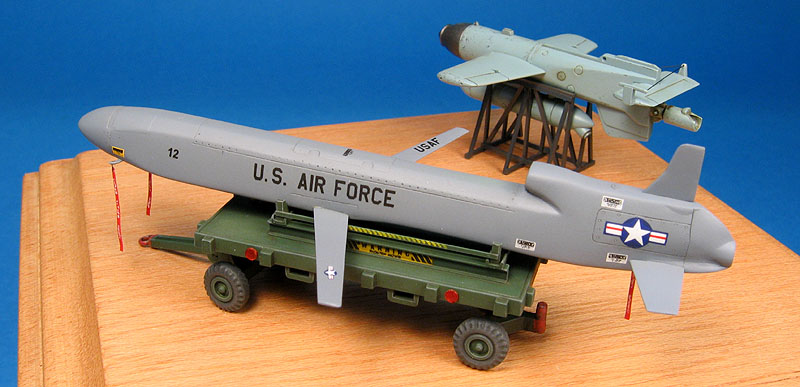
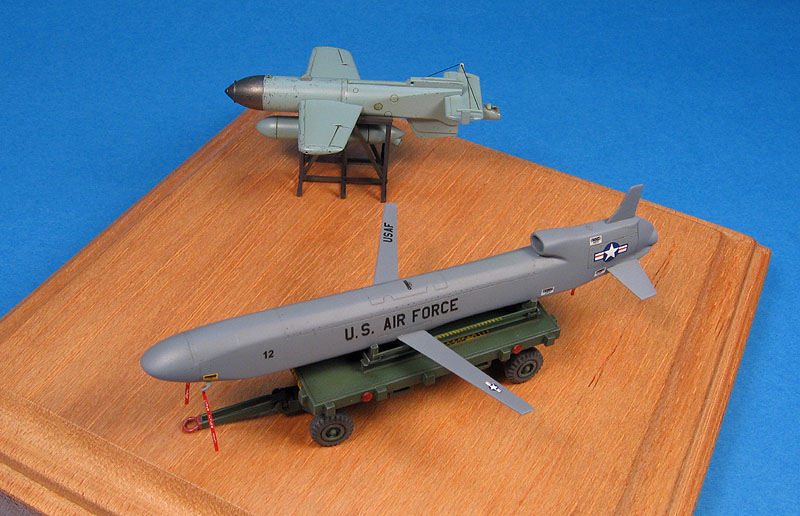
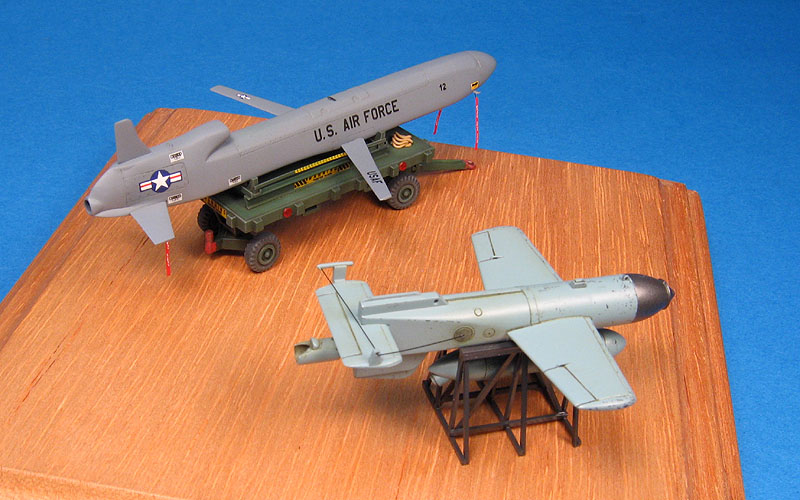
While my airbrush was still loaded with Dullcote, I shot the AGM-86. Actual photos show a very flat surface on operational examples, so Dullcote is a good choice, although not that dead flat the AFV guys use. This one was declared finished:
Back to the AGM-86 dolly trailer, I applied a basic FS 34092 green over the wheels and the body using Gunze lacquers. I also added yellow warning stripes with the help of a photoetched template. The tires were hand painted using the old Aeromaster tire rubber lacquer. A coat of Future prepared it for the wash (at the time, I didn't know I would add some decals):
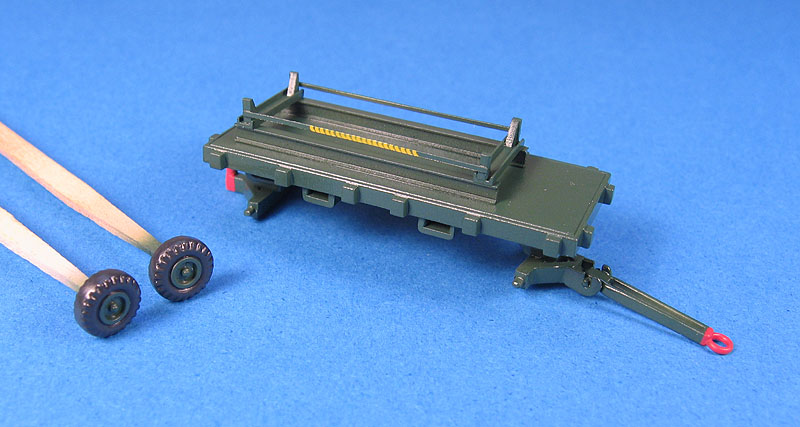
A few days laterI decided to decorate it a bit, since this particular item of the Hasegawa kit doesn't come with any decal. And being a specially modified vehicle, it is better to warn the crews. I simply printed some warning signs on a left over piece of yellow decal:
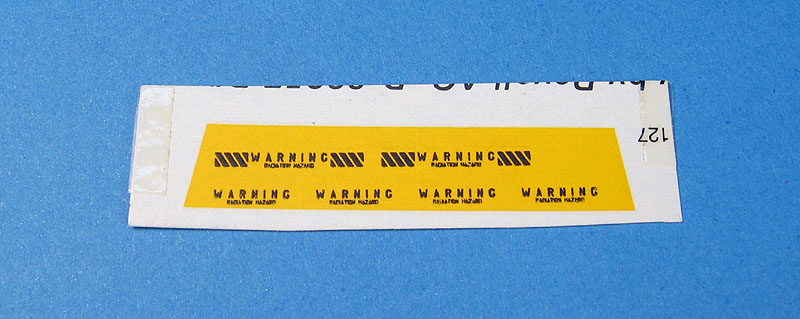
They were carefully cut and applied on selected spots around the trailer. I also applied some highlights with a mix of the FS 34092 green and some drops of white. A brush coat of Future sealed everything. Once dry, a sloopy wash was applied using black, burnt umber and burnt siena oils. Finally, everything was dulled with Testors Dullcote and drybrushed with oils.
At this point I added the "remove before flight" tags to the AGM-86. They were made with thin stripes of red decal folded over itself. The stencils were simulated with white paint and a sharpened toothpick.
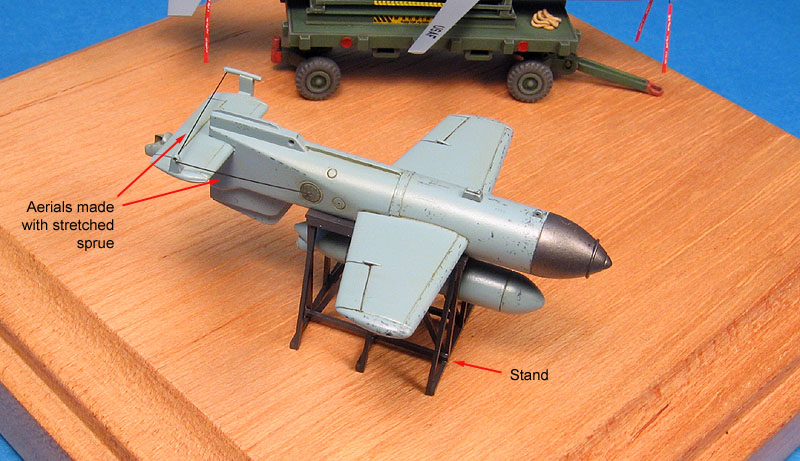
To finish off with
the Hs-293, I added the aerials to the tail using stretched sprue and
mounted the bomb to its stand.
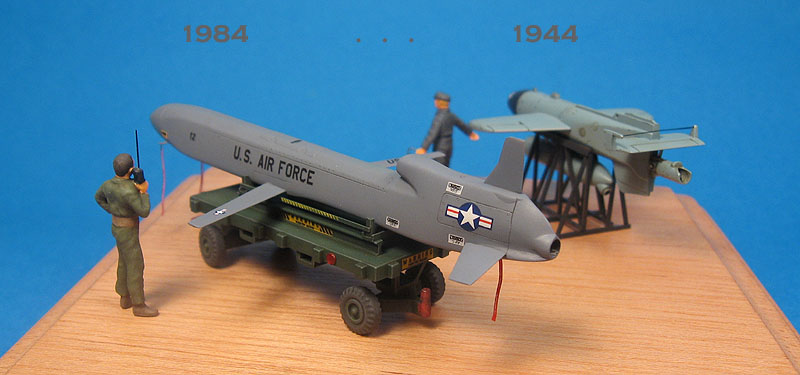
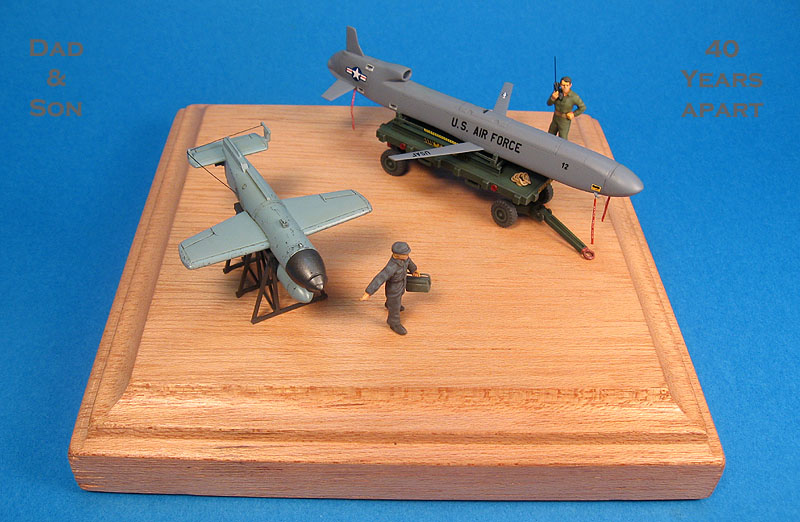
Now the only things
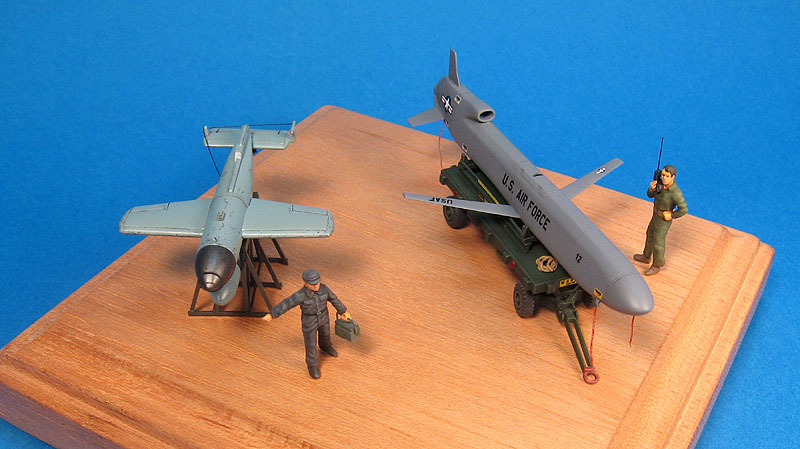
missing are a couple of figures to give an idea of relative size and the plaque.
But you already have a picture of the display:
As for the figures, I have a good assortment of those vinyl figures from Airfix and Italeri, but they don't accept paint very well, and being so flexible, the paint coat may crack under the slightest movement. I selected a couple - one modern and one from WWII, and copied them in resin. Now they are much easier to clean and sand. I took me some days to paint the figures, and this is really not my league... Anyway, they added some character to the display, as well as some sense of scale.
My sincere thanks to Felipe for the AGM-86 kit. Thanks man (I bet you have always doubted I could finish this one, eh?) !!!
| Technical file | |
| Kit:
|
-
Projekts Model Co. #????? - Hs-293 from the Revell Fw-200 in 1/72 (kit #04387) - General purpose dolly from Hasegawa Weapon Loading Set (kit #X72:5) |
| Additions:
|
-
Figure copied in resin from Italeri and Airfix figure sets. |
| Basic
colors: |
-
Primer: Acrylic automotive primer - Ghost grey (AGM-86): 1:1 mix of Aeromaster #9100 (Dark Blue Grey) & #9101 (Light Blue Grey) enamels. - Green (AGM-86 trailer): Gunze Mr.Color FS 34092 (#302) - RLM 76 (Hs-293): Gunze Mr.Color RLM76 (#117) - Titanium (Hs-293 warhead): Testors Model Master Titanium (#1404) - Flat cloat: Testors Dullcote Lacquer (#1160) |
| Notes: |
-
AGM-86 surface details rescribed. - Home made decals using a laser printer. - The dollys for the AGM-86 and the Hs-293 were scratchbuilt |
Rato Marczak © 2008
