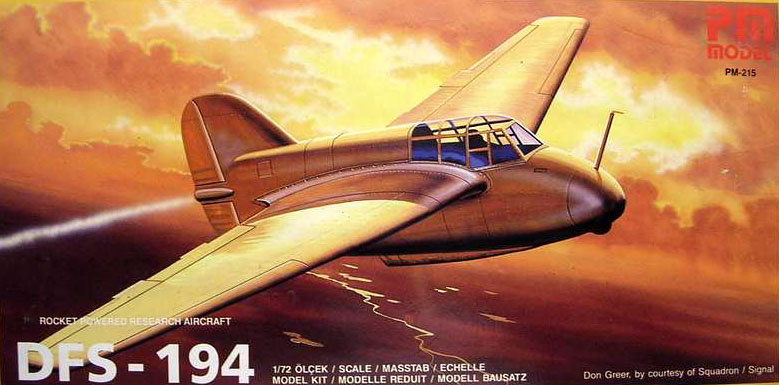
| PM Model DFS-194 in 1/72 |
| Started: Sometime in 2010 Finished: August/2011 |
This
is another project that I started a while ago and was moved to the
shelf of doom. It is the somewhat obscure DFS-194, a german design based
on Alexander Lippisch Delta series of tail-less
designs. DFS stands for Deutsche Forschungsanstalt für
Segelflug (German Institute for Sailplane Flight).
Flown
for the first time in 1940, the project exceeded many of the
anticipated flight characteristics and paved its way to become the
famous Messerschmitt Me-163 years late.
The model is a PM Model offering in 1/72 scale, with very few parts.
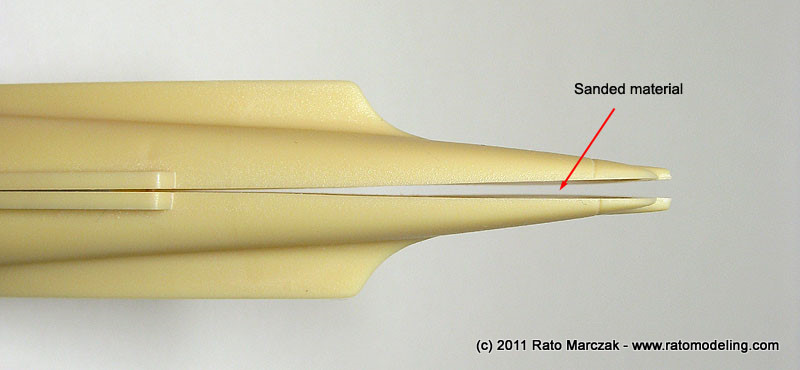
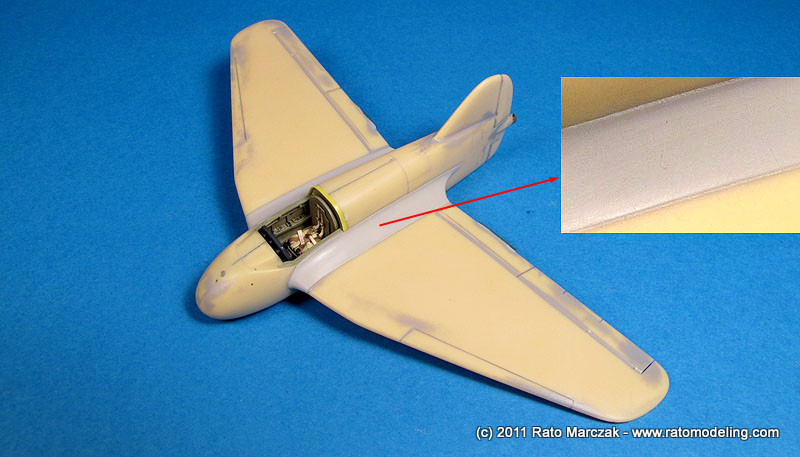
Before closing the fuselage I discovered that the vertical stabilizer was irrealistically thick. After examining the rocket exhaust, I found out that I could sand the rear fuselage halves to correct the problem and, as a bonus, the exhaust would be much more cylindrical after that. And I had to sand a lot:
The model is a PM Model offering in 1/72 scale, with very few parts.
After an
initial work on this
model, I wasn't much happy with its overall RLM27 finish. So I
decided to do something different. More on that later.
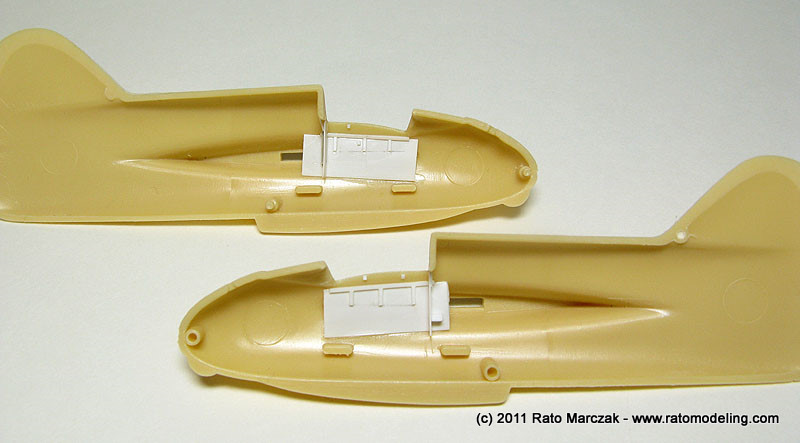
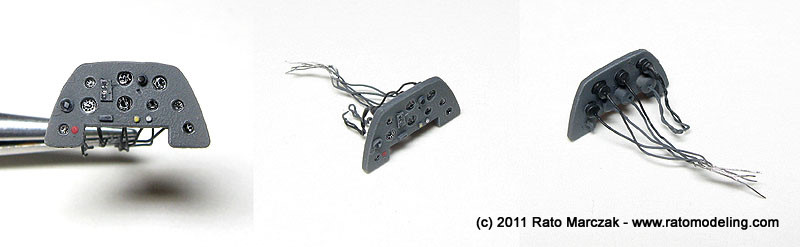
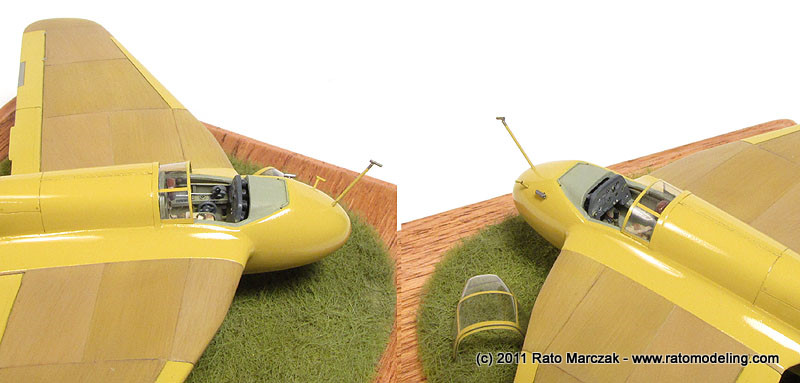
I started scratchbuilding many new items for the cockpit, since the kit one is very spartan. The fuselage halves received new sidewalls made with plastic bits. Only later during this project I found photos of the DFS-194 indicating that the upper cockpit walls were open, allowing one to see the cavern inside the wings' leading edges. By the way, this is probably not the only mistake in the cockpit, because I had a miserable time trying to find photos of the actual cockpit. In the end, some things had to be an educated guess, while others were based on the cockpit of the Me-163 prototype.
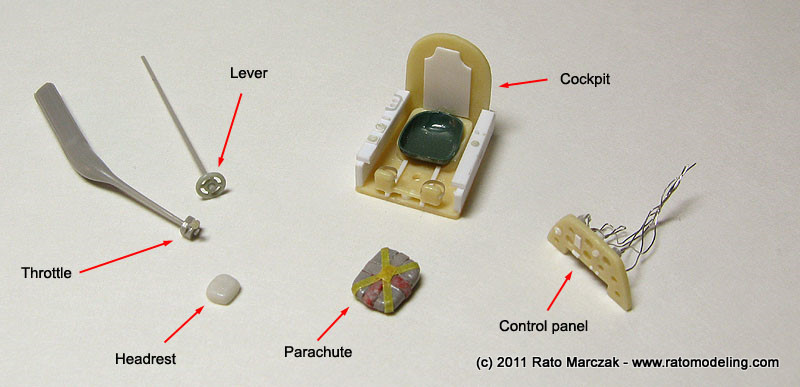
Anyway, the parts made for the cockpit included reworked side consoles and control panel, levers, throttle quadrant, and a parachute pack to be glued on the pilot's seat.
I started scratchbuilding many new items for the cockpit, since the kit one is very spartan. The fuselage halves received new sidewalls made with plastic bits. Only later during this project I found photos of the DFS-194 indicating that the upper cockpit walls were open, allowing one to see the cavern inside the wings' leading edges. By the way, this is probably not the only mistake in the cockpit, because I had a miserable time trying to find photos of the actual cockpit. In the end, some things had to be an educated guess, while others were based on the cockpit of the Me-163 prototype.
Anyway, the parts made for the cockpit included reworked side consoles and control panel, levers, throttle quadrant, and a parachute pack to be glued on the pilot's seat.
Before closing the fuselage I discovered that the vertical stabilizer was irrealistically thick. After examining the rocket exhaust, I found out that I could sand the rear fuselage halves to correct the problem and, as a bonus, the exhaust would be much more cylindrical after that. And I had to sand a lot:
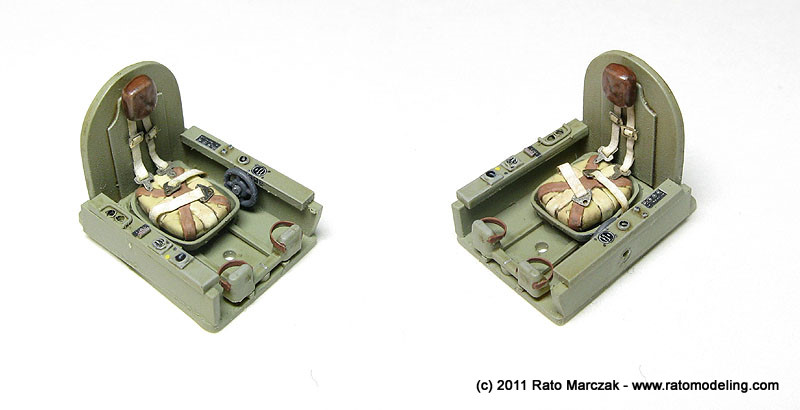
Once happy with the little surgery, I started to paint the cockpit, mostly in RLM02. This was followed by painting the cockpit parts. I glued individual instruments to several instruments, and highlighted details with acrylic colors:

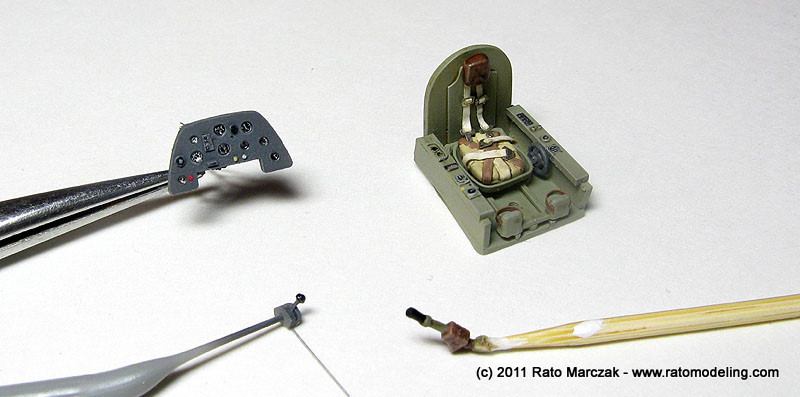
The cockpit was installed inside the fuselage and the stubby shape of the little bird became more evident. Note that the throttle arm runs backward - I guess it should be linked to something inside the Walter R I-203 rocket engine. I also replaced the rocket exhaust by piece of brass tubing of suitable diameter.

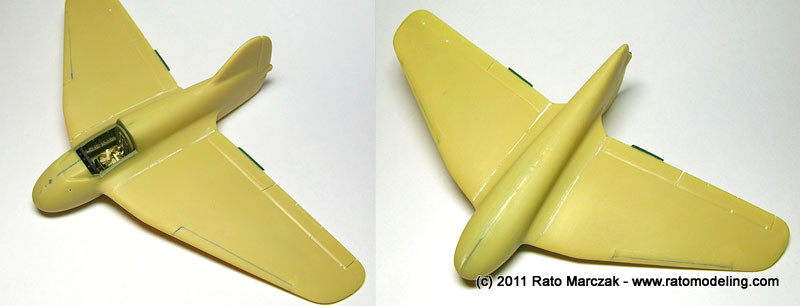
The wings came next. Nothing fancy, just glued the halves and added the aileron hinges, the missing trim tab and rescribed some lines:

The wings were fixed to the fuselage, paying attention to the symmetry. I had to use some filler along the seams. At this point, the model hibernated for several months...
When
I resumed work on this model, the lack of relief on all surfaces
started to bug me. I knew the plane was built mostly of wood, but I
also new that there were some inspection hatches and engine accesses. I
ended up rescribing the engine access panels behind the cockpit and a
couple of other hatches. Researching a bit more on the real aircraft, I
found that the fairings along the wing roots should be clearly visible
(as it is in most aircraft of the 40's), but mine were completely
flush. So I resourced to old trick that I used in my Heinkel
He-170:
to produce the overlapping effect with automotive primer. It all
started by masking the wings' fairings following their
contour
with thin strips of tape. Then I followed with more masking
to
protect everything except the fairings. Using an ordinary automotive
grey primer, I shoot three thick layers of it, spaced by about 10 min
each.

The larger masks were removed and I started sanding the fairings until the contour tapes surfaced. At this point I could remove them and a beautiful overlapping panel appeared:
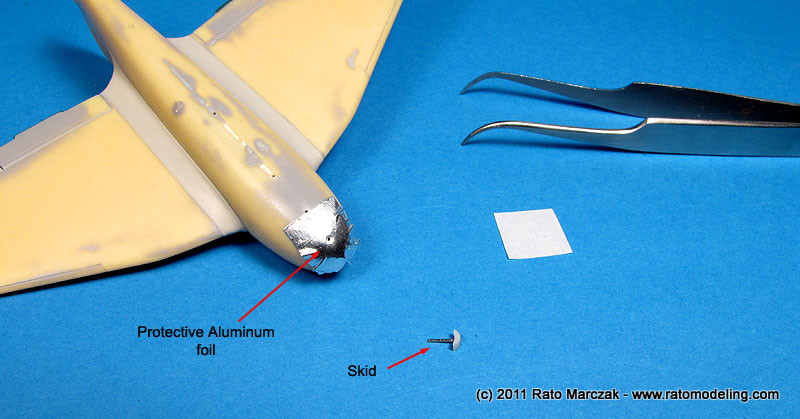
The DFS-194 used a wheeled cart to take off (released after leaving the ground) and landed on a fuselage skid. Both came molded with the fuselage. They were carved out to be scratchbuilt later. There was a protective skid also under the nose (made of wood in the real aircraft). I shoved it off and made a new one carved from a piece of sprue. I couldn't think in a way to make a tight joint between the new one and the fuselage, so I devised the following method: Protect the fuselage with a piece of Aluminum foil, making sure the foil is following well the contour of the nose without wrinkles in the area of interest:
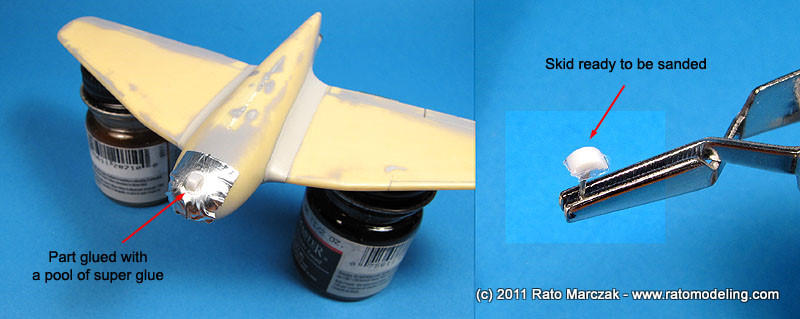
Next, the new skid was glued with copious amount of super glue and set to dry. Since the super glue won't stick to the foil, I could remove the skid without harm to the fuselage. Now I have the skid following perfectly the contour of the nose. It is just a matter of trueing the sides to remove the excess of super glue and, of course, remove the protective foil from the fuselage:
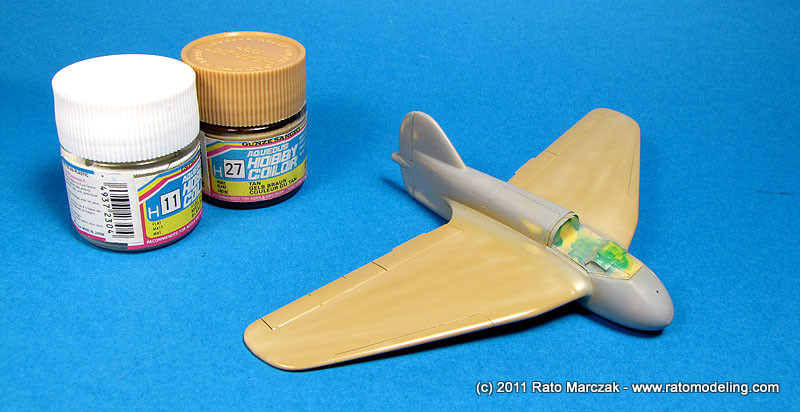
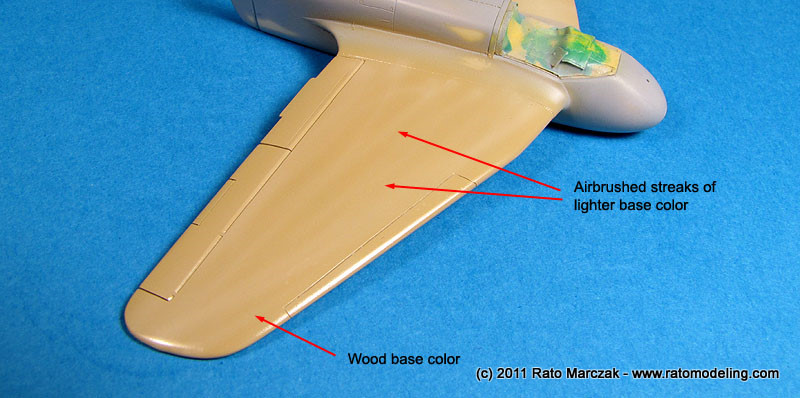
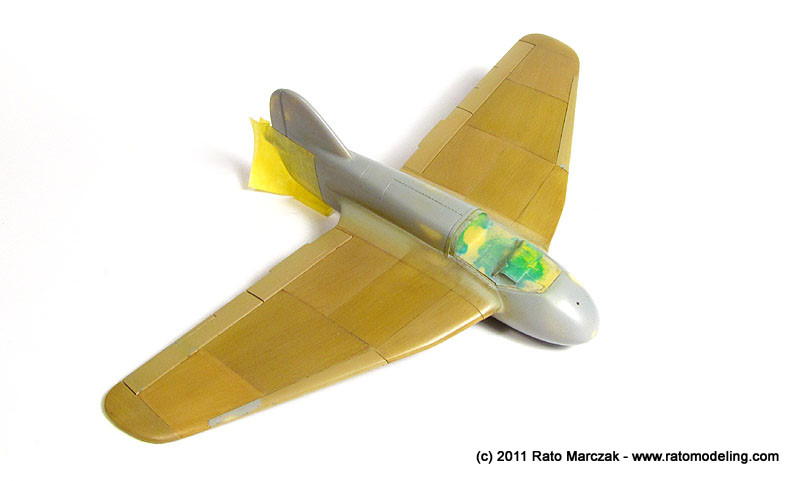
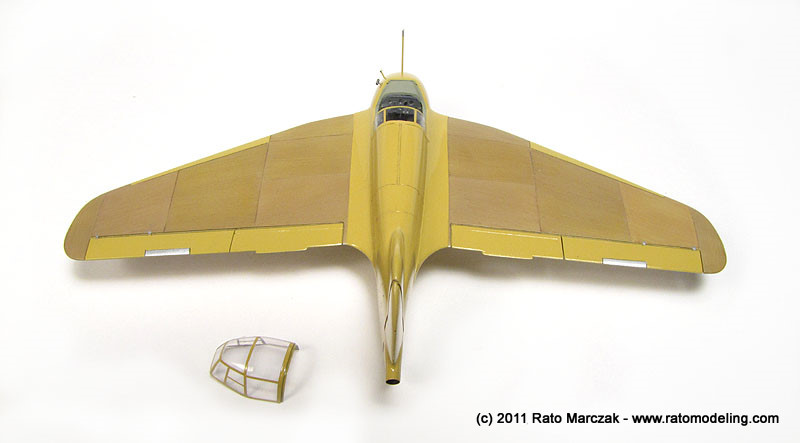
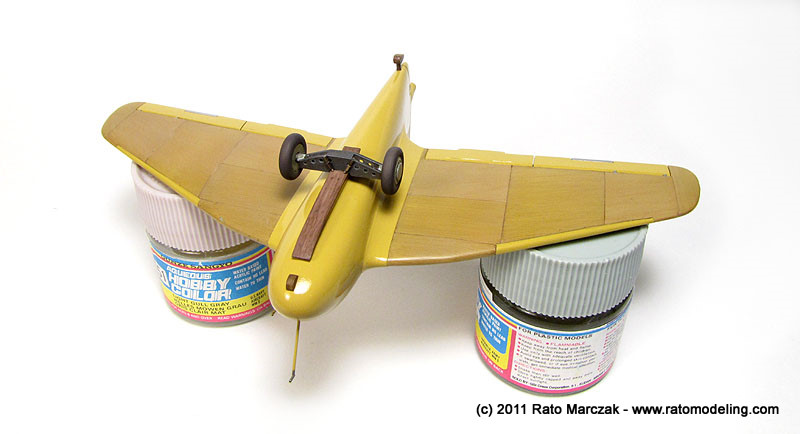
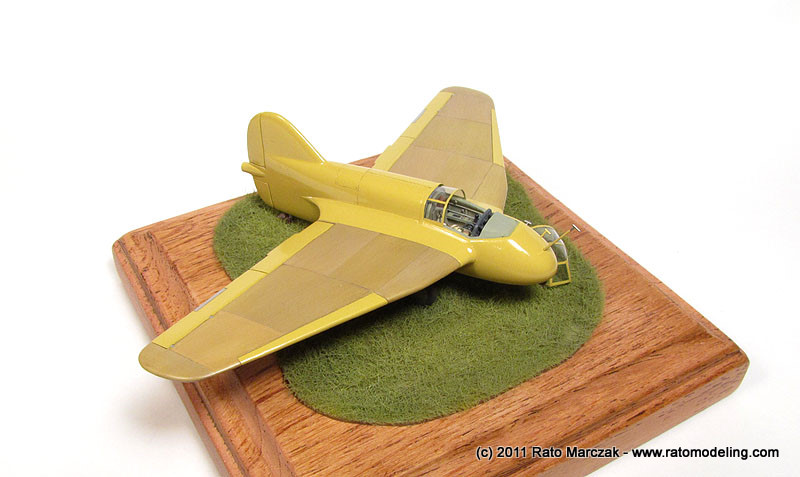
The model was primed and checked for faults. And then I started the interesting phase (for me, at least). As I mentioned before, the DFS was painted with RLM-27, a brownish yellow color. You can imagine how boring would be a small model painted with a gloss yellow color. So I remembered that it was manufactured almost entirely with wood. I also recalled seeing several models depicting natural wood by talented modelers (for instance, Ricardo Ramos' IL-2). I've done that in the past, but in larger scales. I decided to simulate the wings still in bare wood. There are a number of techniques to simulate wood panels, you know. I wondered in this case it should be approached with care, because in 1/72 scale it is very easy to overshoot your goal. I started airbrusing an overall basecoat of acrylics wood color, made by mixing Gunze Tan (H-27). When done, some Gunze Off White (H-21) was added to the H-27 remaining in the airbrush cut and random streaks of this much lighter color was applied spanwise.
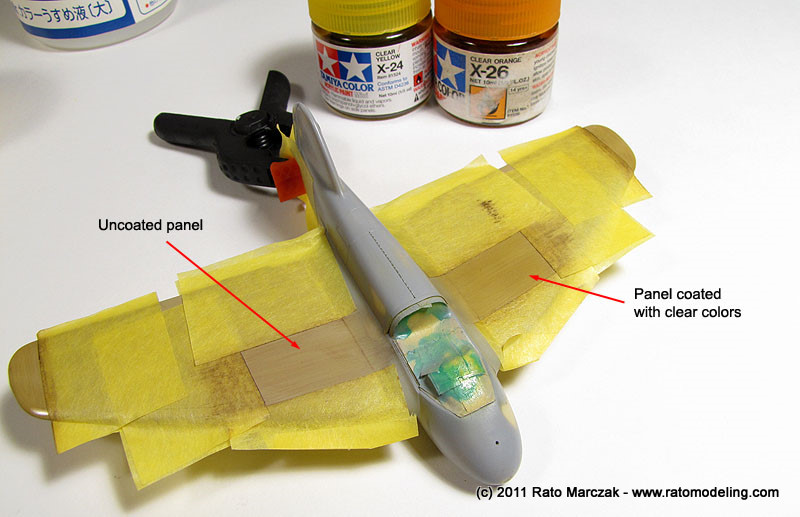
In retrospect, I should have used a lighter shade for the base color. Anyway, the method I used for simulating the wood grain is well known, and it is based on spreading dark colored artists oils (I used Burnt Sienna) with a flat brush. Using white spirits or lighter fluid as a thinner, the oils are progressively removed running a brush along the intended wood grain direction. A hard bristle, battered brush works better for this. That's why it is important to use a acrylic or lacquer paint on the base coat - the oil thinner would attack enamels. Once finished, the oils need at least 48 hours to dry. Then a ligh coat of yellow or orange translucent colors was airbrushed on the panels with the masks still in place. I used Tamiya X-19 Smoke, X-24 Yellow and X-26 Orange, sometimes mixed for variation. Since I was after a paneling effect, I had to work on a group of panels each time. Mask, apply the oils, clear coat, unmask and start a new group. I spend almost ten days in this process. I guess different methods/paints would speed up the process. The only problem with this method, besides the time, is the oil paint accumulated along the mask borders. You can take advantage of this, though, since it results a kind of panel line between the panels, but it is a bit overdone to my eye. Here is a photo of the work in progress:
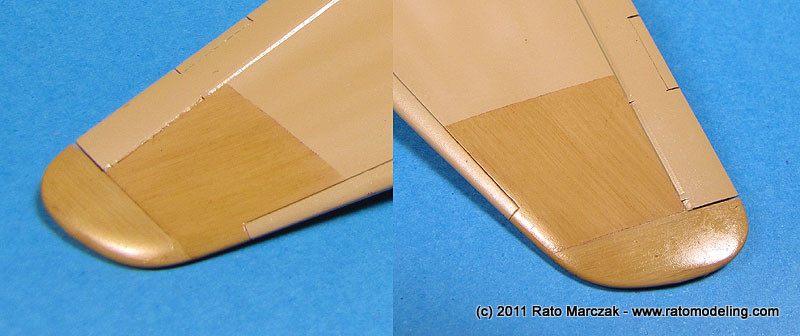
The secret is to leave only ramnants of the oil paint, simulating the wood grain. Also, remember to make the grains more or less perpendicular to the fuselage (makes more sense for a structural part). The result is convincing, if you don't look too close:
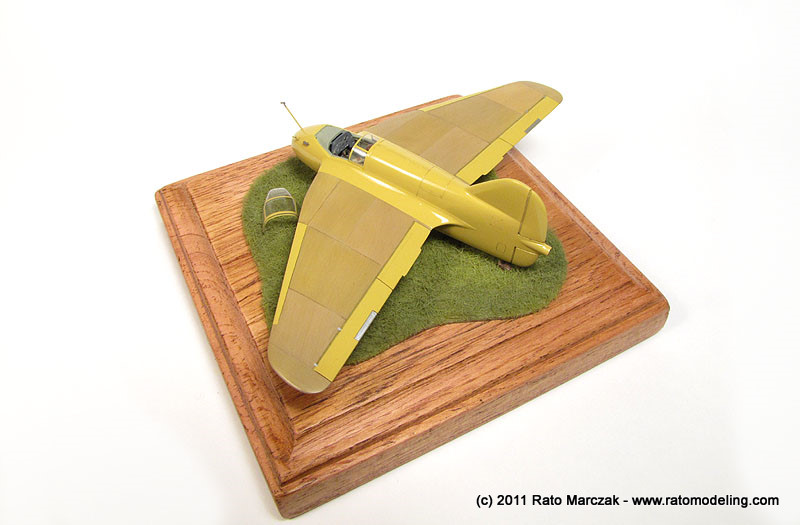
The same was done on the undersides:
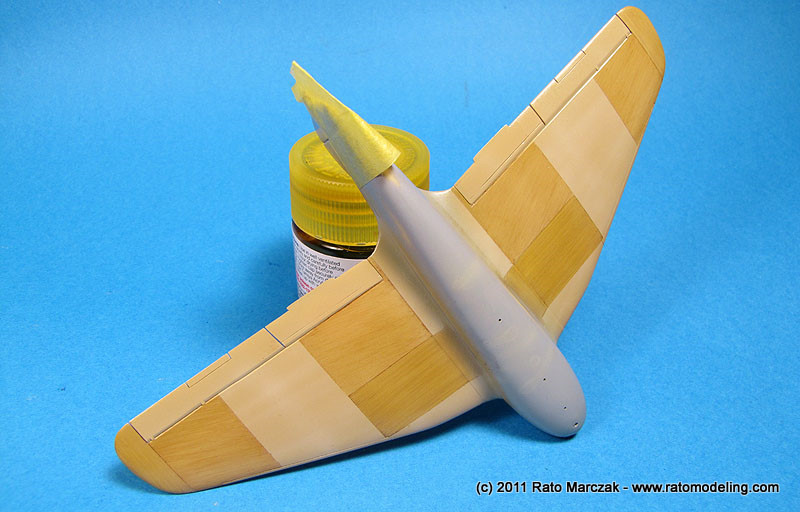
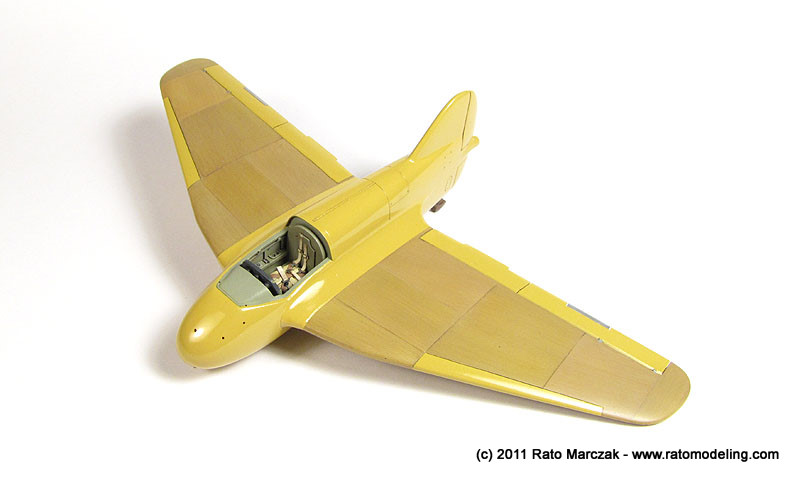
Once all panels were treated, an overall coat of semi-gloss (more flat than gloss) clear lacquer was applied to seal everything. This is the result so far:
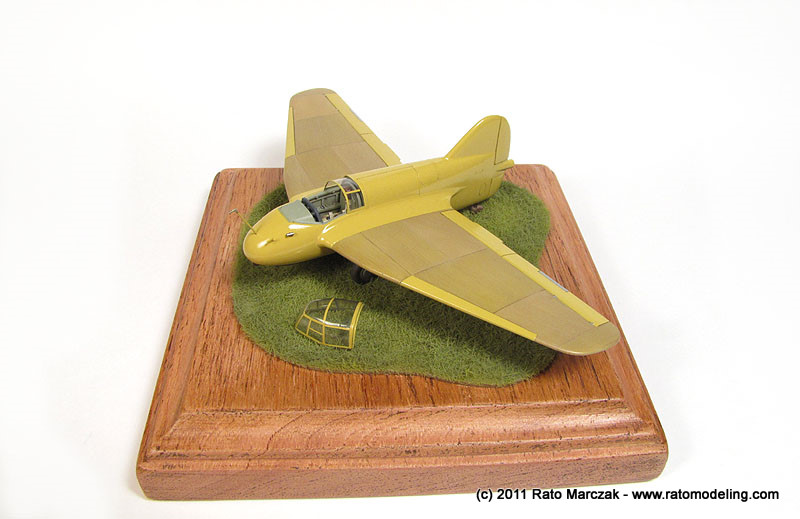
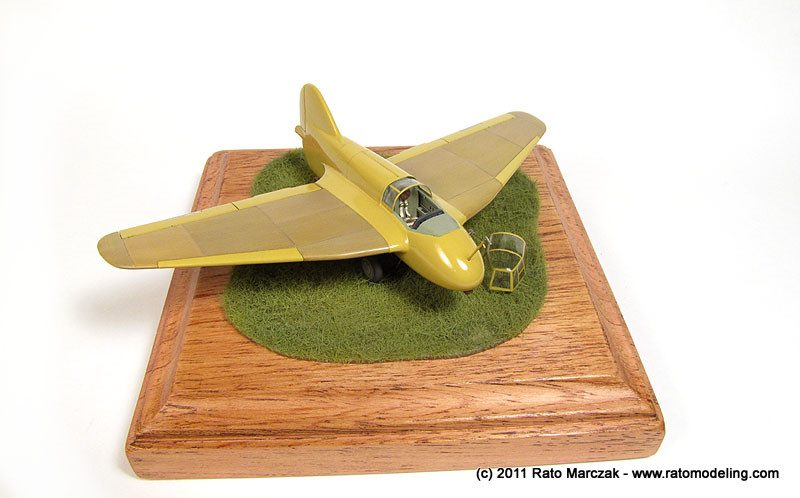
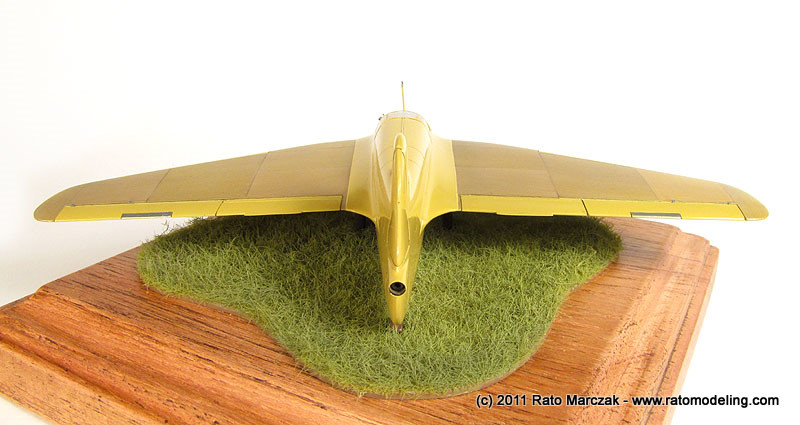
Next, I had another boring masking section, this time to protect the wood areas. Time to paint the airframe color. My not-so-deep-research indicated that the DFS-194 was painted with RLM 27, kinda RLM 04 pushed a tad to a cream color (FS 33637 is a good color to start with). I made mine by mixing Gunze H-27 Tan and H-34 Cream Yellow, roughly 40%-60%, but I could have added some white to my mix. Anyway, these are gloss acrylics and I could skip a gloss varnish application afterwards. The paint went on smoothly, thanks to Gunze's Mr.Retarder added to Mr.Leveling Thinner. On the other hand, I new before hand that a gloss finish would highlight any surface defects. And it did later on, but you have to look really close to see my glitches. After unmasking the cockpit, I applied a gentle wash of water soluble inks along control surfaces and engine panels:

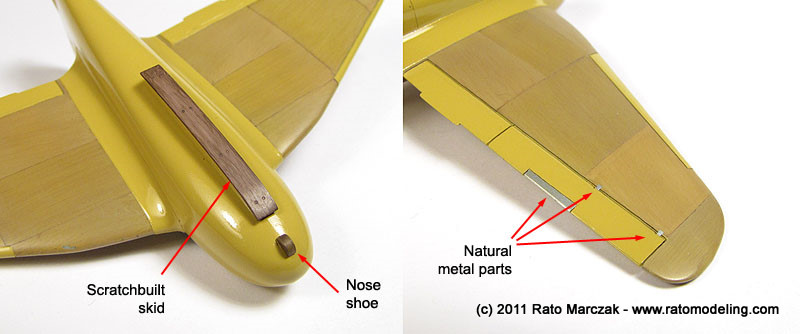
I also drilled a second and a third hole on the nose to install another probe and the Venturi tube. The belly skid was made from a strip of plastic with bolts embossed on. I painted it and the nose shoe with a darker wood effect and superglued them in place.
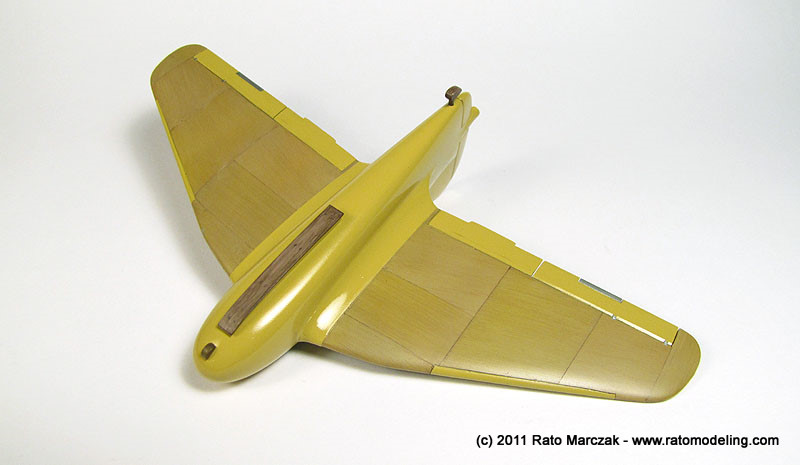

A final touch was to highlight the trim tabs and airelon hinges with natural metal, to simulate unpainted metal parts:
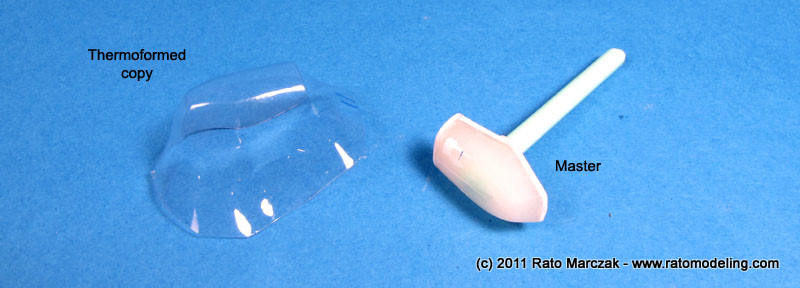
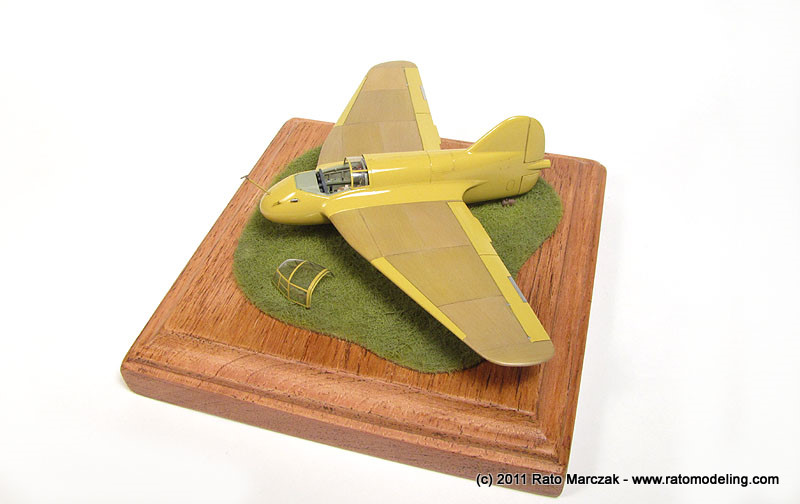
Then, the details. I made the nose probes using hypodermic needles and stretched sprue. The kit's canopy is terrible, so I made a new one using the kit part as a master:
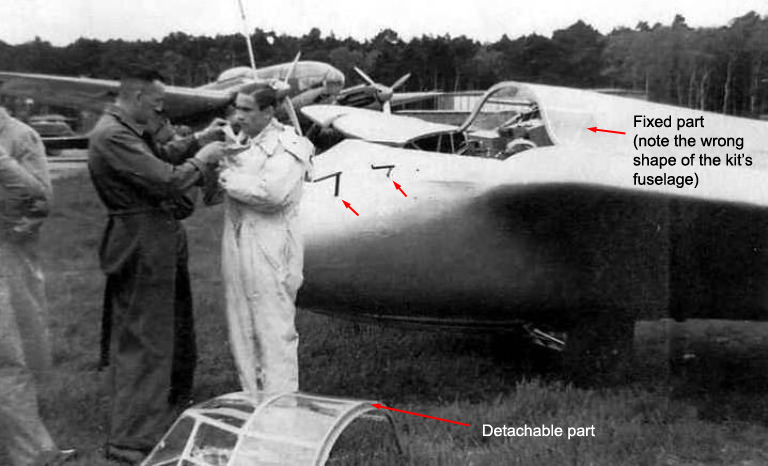
After trimming the new canopy, they were cut in two sections. The front part seemed to be detachable in the real thing...
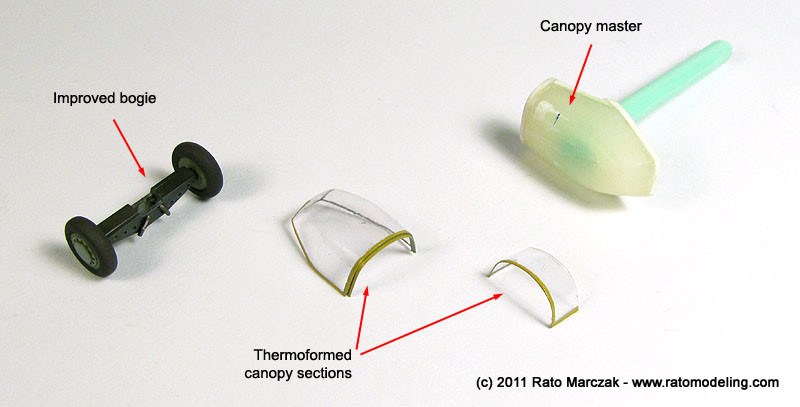
...so I trimmed the new sections accordingly. These parts are very difficult to mask, so I painted only the boundary frames. The other frames will be added later using painted decal strips. I also took care of the take-off bogie - actually I made a new one from scratch, since the kit's one is just a chunk of plastic. The wheels are from the kit:
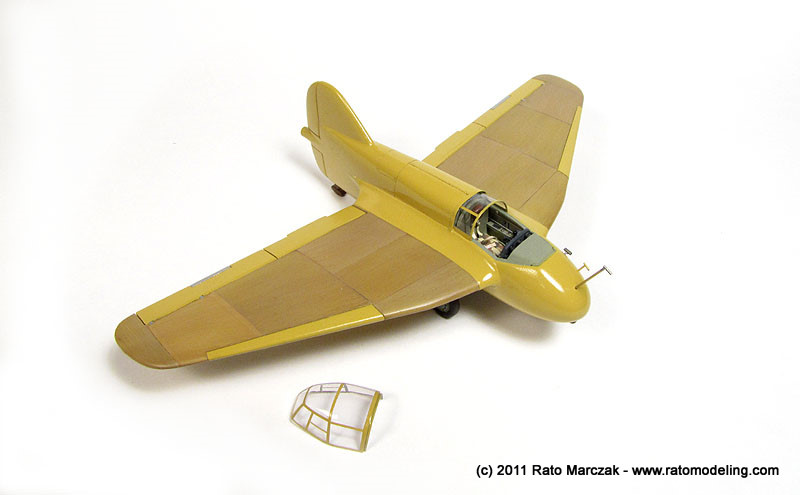
Finally I glued the probes to the nose and added the missing frames to the clear parts. The non-detachable part of the canopy was glued in place, and everything was done:


| Technical file | |
| Kit:
|
-
PM Model kit #PM-215 |
| Additions:
|
|
| Basic
colors: |
-
Primer: Automotive grey primer - RLM 02: Model Master Acryl #4770 - RLM 27: 60% Gunze Aqueous Cream Yellow (H-34) + 40% Gunze Aqueous Tan (H-27) - Wood base color: Gunze Aqueous Tan (H-27) |
| Notes: |
-
Scratchbuild much of the cockpit, landing skid and windscreen. - Exhaust pipe replaced for brass tubing. |
Rato Marczak © 2011
