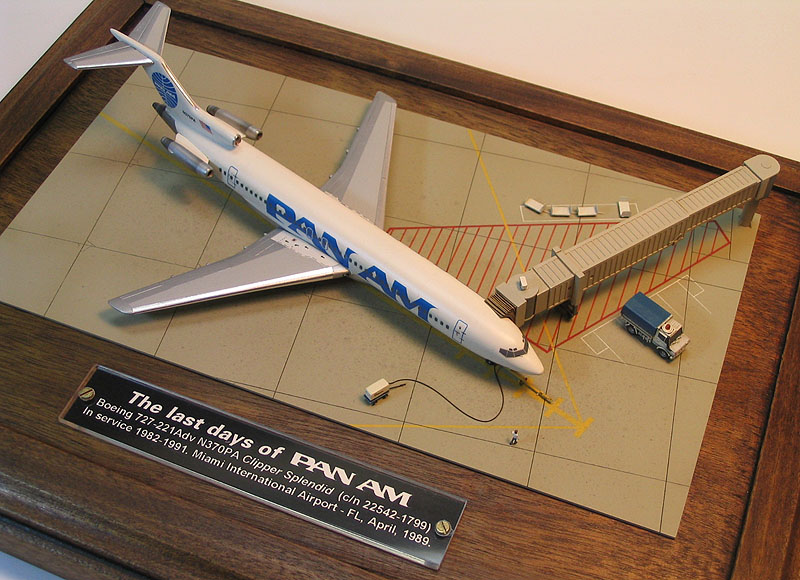
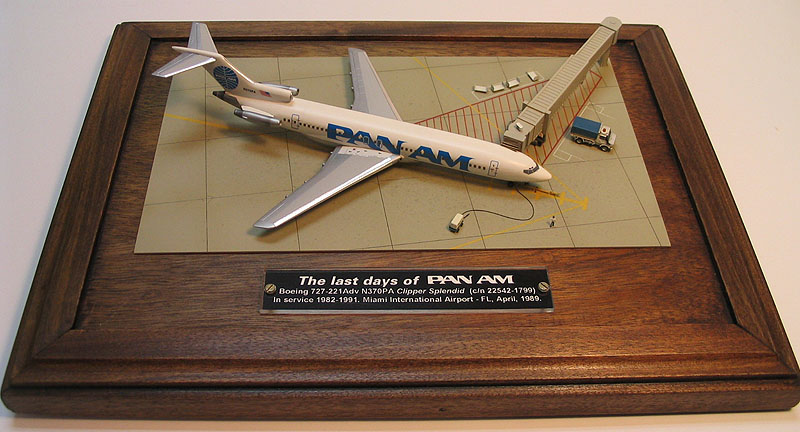
| The Last Days of Pan Am Revell Boeing 727 diorama in 1/280 scale |
| Started: July / 2001 Finished: December / 2002 |
Sometimes, due to other priorities of then, you simply don't have the guts to start a serious project, and divert to another thing ("Just for a momentary fun"). This project was one of such cases. I was finishing my Ph.D., so I would feel bad wasting a lot of time on modeling. On the other hand, I needed some modeling to keep my mental sanity (if any, ever...). Kinda vicious circle. I then found this little kit on the toys shelves of a supermarket and thought "Why not? It will take just a week." Well, I started working on it during July/2001 and finished some six months later. It's about a very well know aircraft in an odd scale. Don't ask me why 1/280. I guess Revell-Germany doesn't know either, but sure I would love to see more airliners in this scale. I've always had a fond for Pan Am. Its logo brings me memories from my childhood. Back then, Pan Am, Coke and Marlboro were possibly the most recognizable trademarks in the world. When it went definitely broken in 1991, the company was worth no more than a couple of their aircraft. Yet, the Pan Am logo has stood well during the next fifteen years, but I doubt it means something to the younger. And before we start, my apologies in advance for the bad quality of many photos here. They were taken using a very old Mavica camera.
Part 1 - Building the Revell's 727

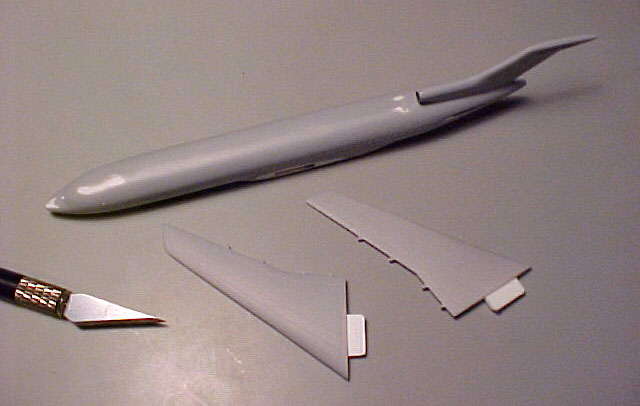
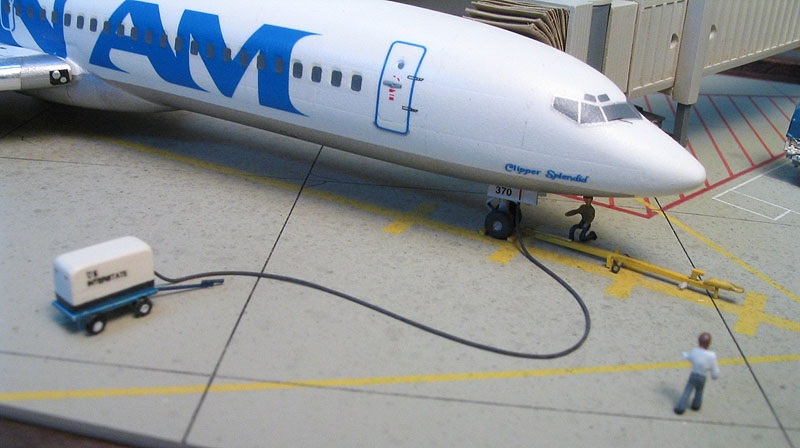
Back to the kit, after glueing six parts the fuselage and wings were ready for priming. I decided to leave the wings separated until the last steps for easy painting and handling. The passenger windows are molded as depressions along the fuselage. Given that they are also printed in the decals as black squares, I filled all windows using crayon to provide some solid ground for the decals.
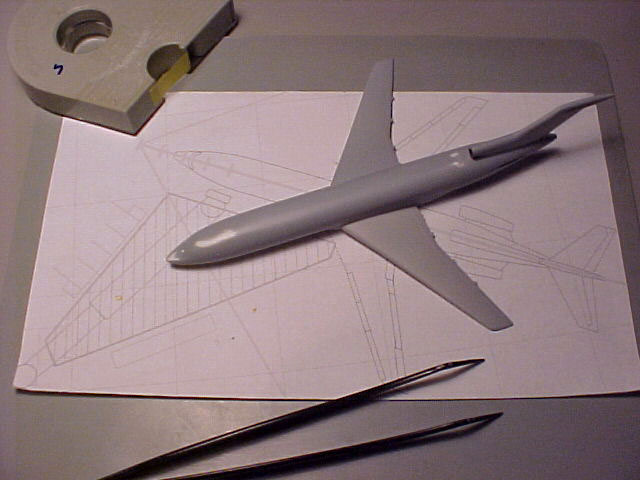
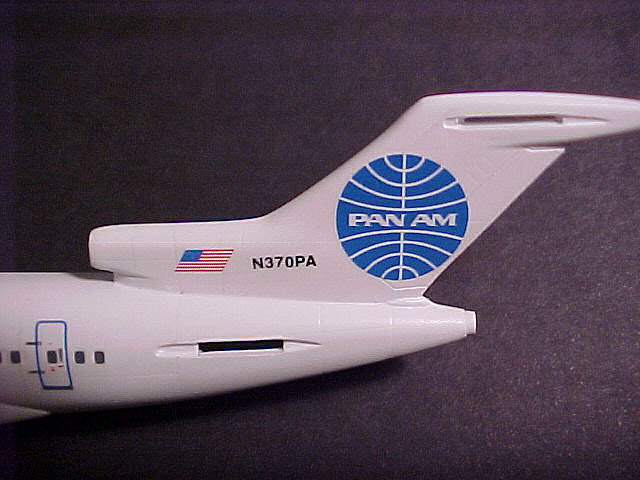
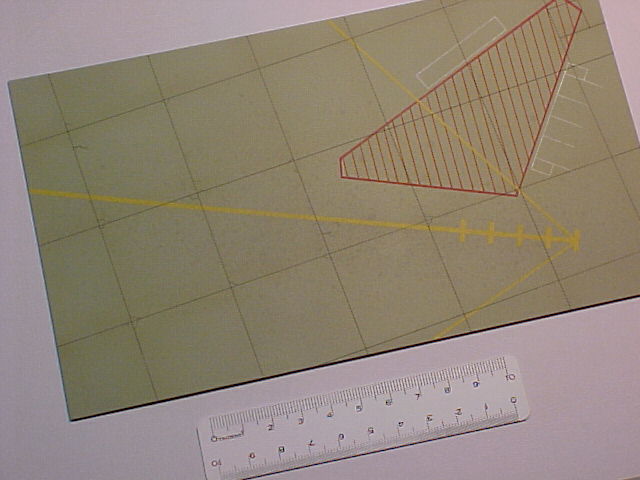
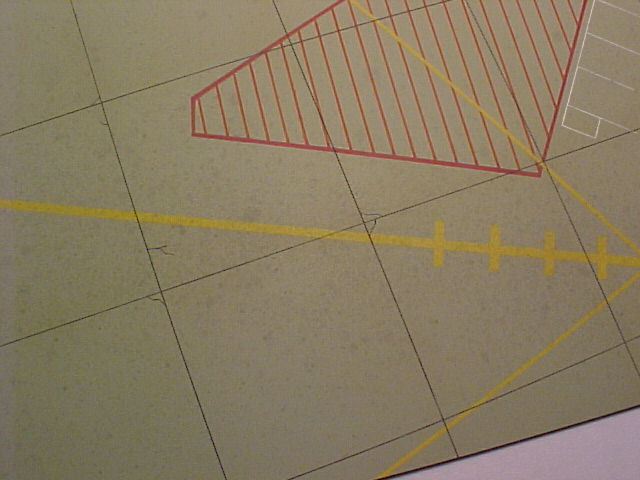
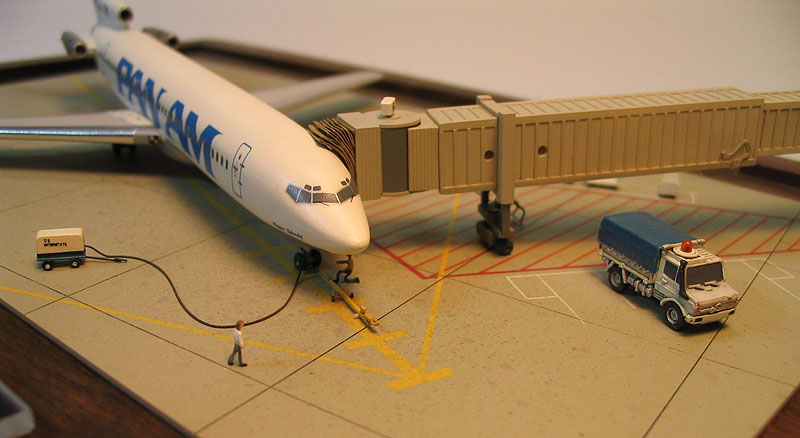
I thought about this project as a diorama from the outset. The idea was to show one of the last Pan Am's Boeing 727 parked on an international airport sometime before it ceased its activities. The model depicted in the Revell kit is the N370 PA, a 727-221Adv c/n 22542-1799. After some homework, I discovered that it flew from 1982 until 1991 for Pan Am, and so it would fit (besides, where would I find a different decal sheet for this model?). Some additional research was necessary to learn about airport equipment and passenger fingers. The parking area, tarmac dimensions and the passenger finger were drawn and printed in scale before proceeding.
I then resumed the work on the model. I started painting the fuselage and wings with Humbrol Metal Cote Aluminum, which was slightly polished with a cotton rag. The fuselage belly was masked and Tamiya flat white (XF-2) was applied. After dry, the white areas were polished using a facial paper tissue. The wings were also masked and received a coat of my own Boeing grey mix from Testor enamels. The same treatment was applied to the stabilizers.
Before removing the fuselage masks, I airbrushed a coat of Future in preparation for the decals. Revell-Germany decals are always of the highest quality, and this time was no exception. Unfortulately I discovered too late that the decal representation of the windows didn't match perfectly the correponding depressions along the fuselage. Despite being filled, the discrepancies can be seen if you look closely.
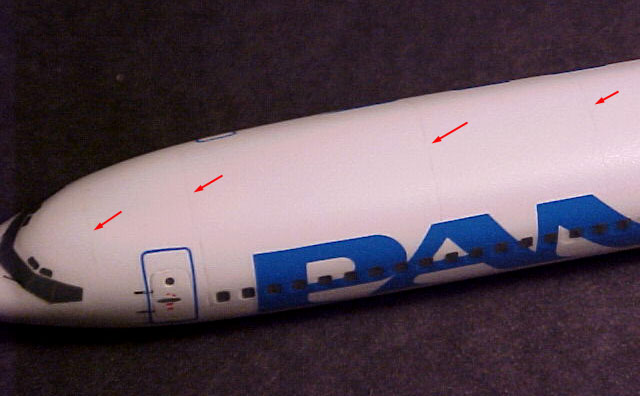
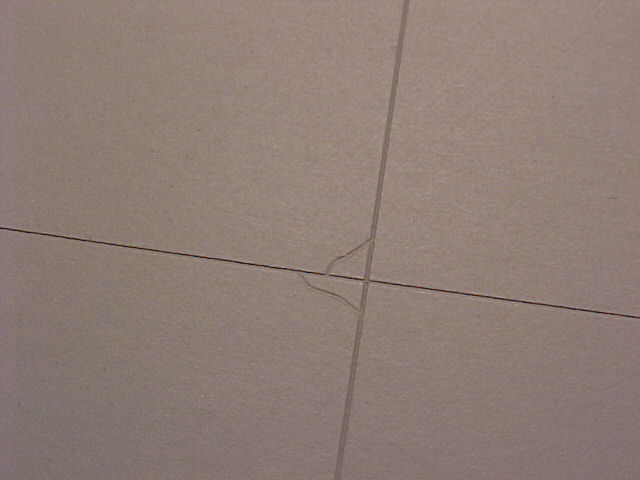
Since any attempt of engraving panel lines in this scale would result overly exaggerated, I simply simulated some panels along the upper fuselage by drawing a very light line using a 0.3 mm drafting pencil. On the fuselage belly, I masked along the panel lines and slightly 'burned' the panel lines using powdered graphite burnished with a cotton swab over the mask. This produces a visual difference across each panel line:
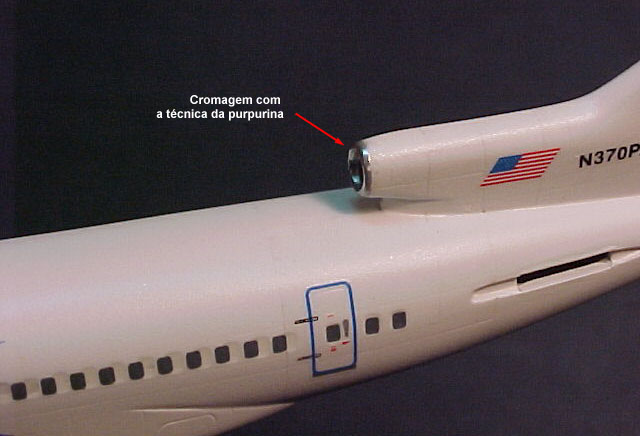
As in most
Boeings of the time, the leading edge of the engine intakes had a
characteristic polished effect. I simulated that using a well known
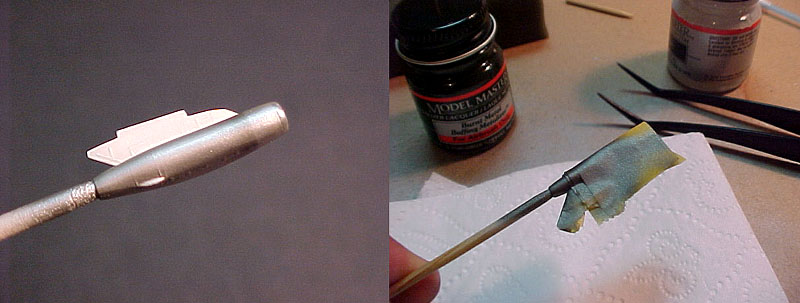
chrome plating technique. The
method is based on applying an enamel coat on the area to be plated. I
use regular all round enamel bought at any hardware store. The usual
full drying time of this type of paint is around 12 hours (test your
brand!). I airbrush it using mineral spirits and wait 4 to 5
hours. After this period, the paint is dry to touch, but not that much.
I mean, if you touch the surface with your finger, it won't be tacky,
but will leave your fingerprints on it. That's what we're looking for.
Now, using cotton swabs, I apply fine glitter (similar to SNJ powder)
in circular movements. The glossier the base paint coat, the shinier is
the finish. It is a very simple method that allow you to obtain any
degree of chrome plating. Here's the result on engine one intake:
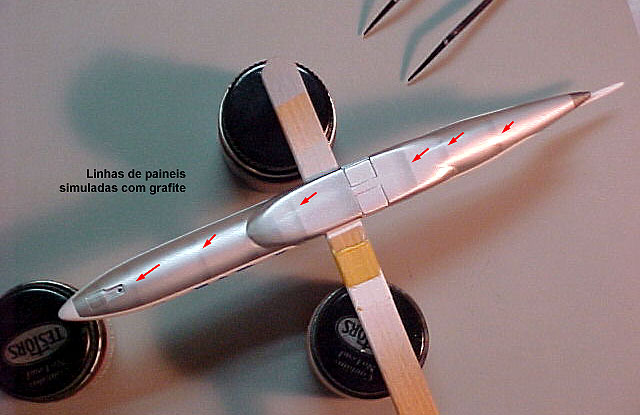
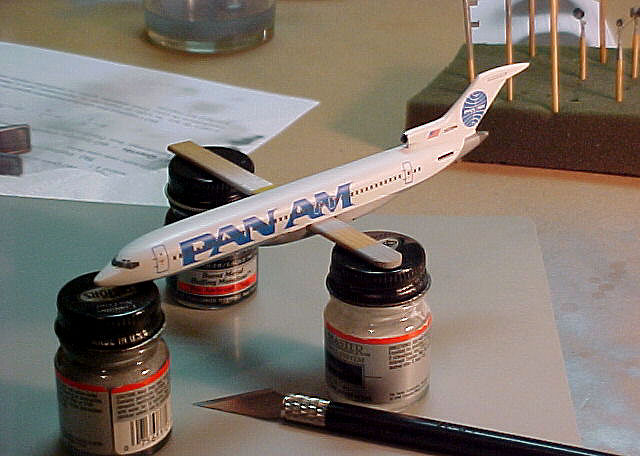
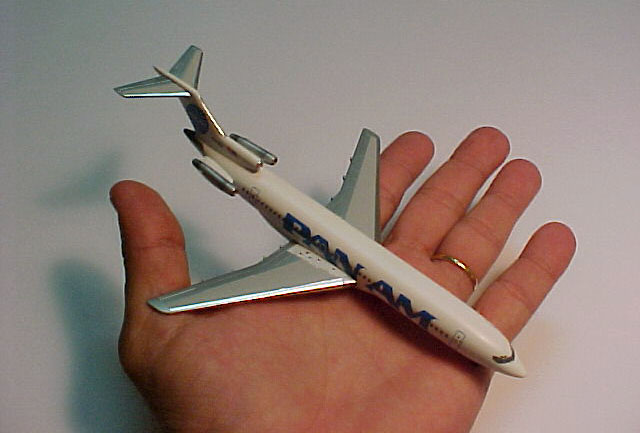
This practically finished the works on the fuselage, then only
waiting for the stabilizers, engines two and three and the main wings.
The Testors bottles below give you a good idea of the size of this
model:
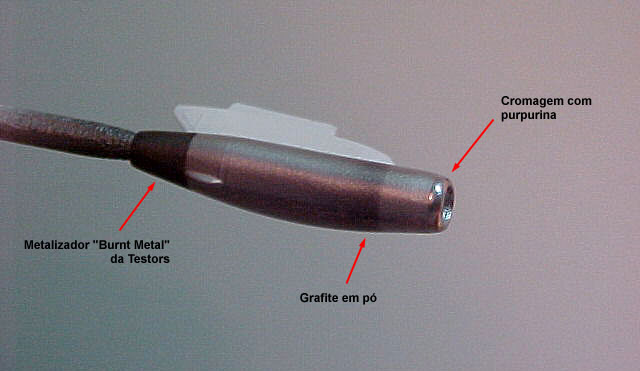
Next, I applied the same treatment of the main engine to the intakes of
engines two and three. I used Testors Burnt Metal buffing metalizer for
the exhausts and rubbed graphite to provide some panel differentiation.
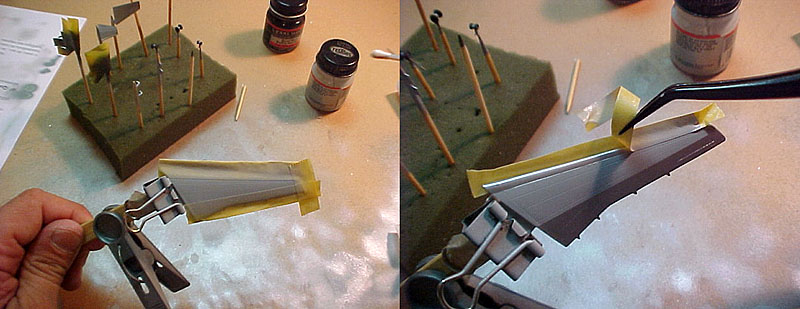
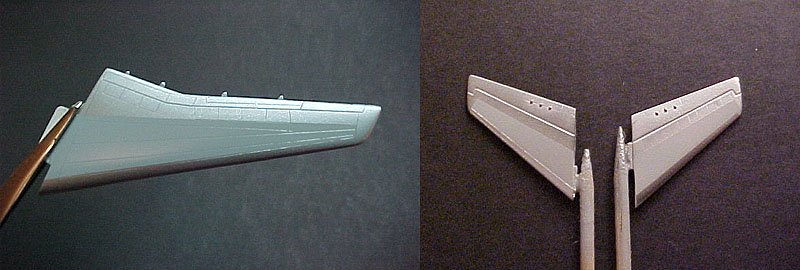
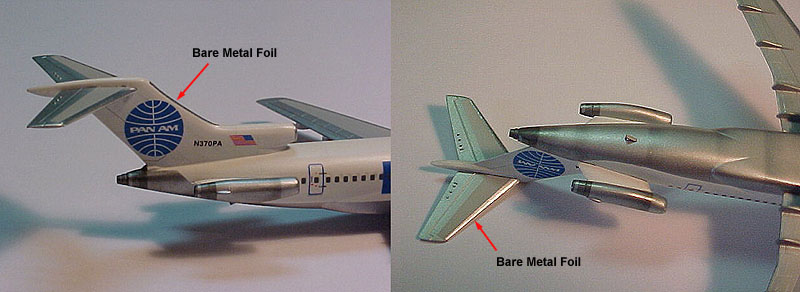
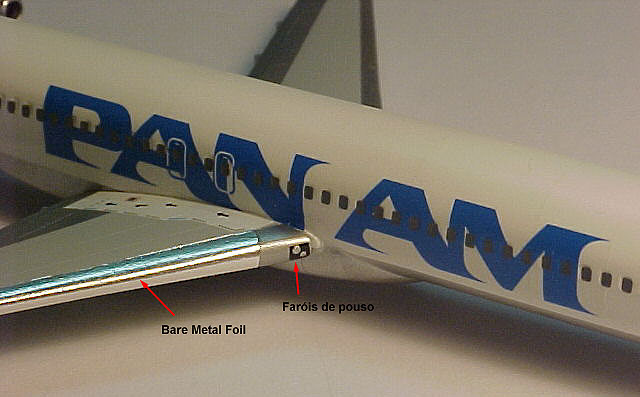
I couldn't help myself in masking the leading edges of the vertical and horizontal stabilizers. In the end, I just used the old plain Bare Metal Foil, cut in thin stripes and applied with a toothpick. Enventually, they were burnished with a cotton rag. I used the same procedure to the main wings slats. A simulation of the landing light was also added to the main wing roots, using a black decal with some chrome dots profusely coated with Future. The lateral engines were installed, then the main wings and the horizontal stabilizers. I think it is the first time I don't have to bother with wing roots joints...
The kit langing gear is fairly good for the scale. I only added a couple of details from stretched sprue to the gear legs, but discarded the wheel doors for stractbuilt new ones made from plastic cards of more suitable thickness.
I made a simple anti-skid device under the tail, installed the landing gears, and that's it. The model is finished. Now, onto the diorama...
Part 2 - The diorama
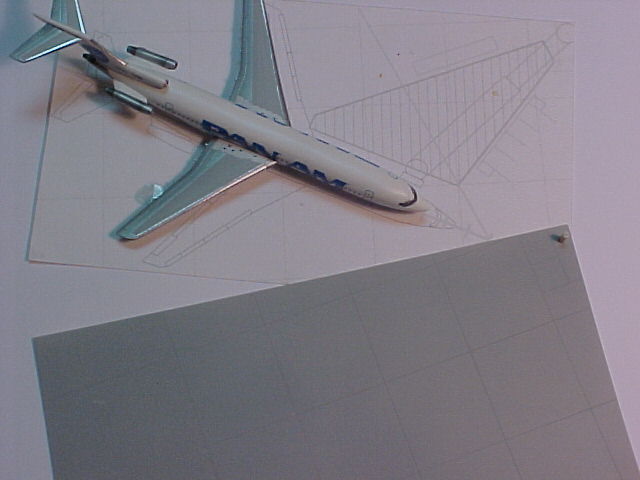
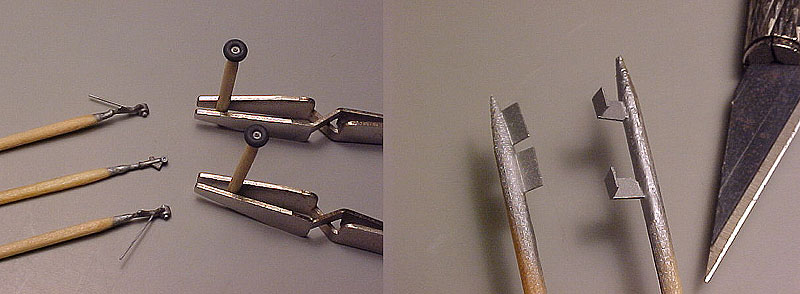
The base was painted with Tamiya and Gunze acrylics, using my own mixes of concrete color, reds and yellows. The hatched area (red) destined to be the passenger finger working area has its perimeter masked and painted. To paint the parallel lines on inside, masking was obviously discarded. I ended using those pens for overhead projects. Worked beautifully and fast, but I had a bad time applying the final flat coat without dissolving the (alcohol based) lines. A wash of burnt umber oil paint was applied over the base to bring out the scribed details and simulate the tar used in the joints. The final touch was to apply the oil/fuel/dirt stains using an old toothbrush dipped in some dirty thinner (or wash). The effect was achieved by scrubbing the bristles of the toothbrush with a handle perpendicularly to the base surface. This produces a reasonably controlable spill pattern hitting the surface of the base.
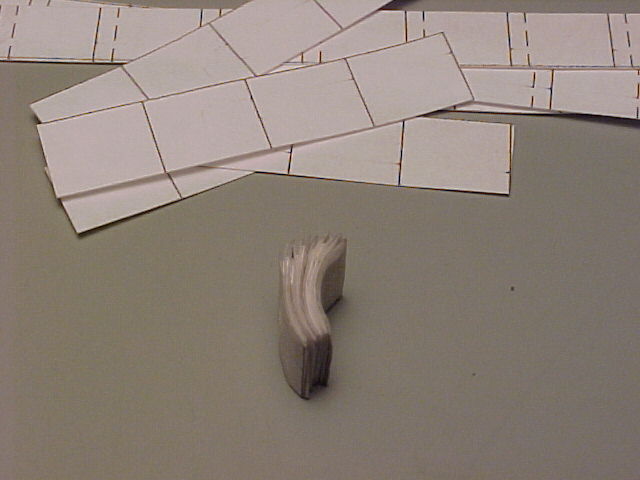
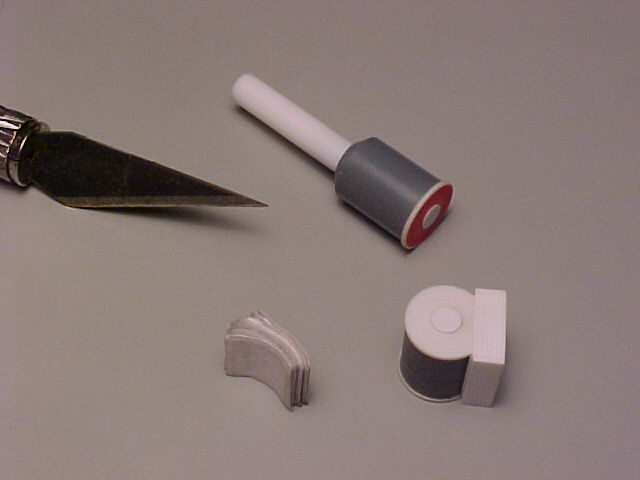
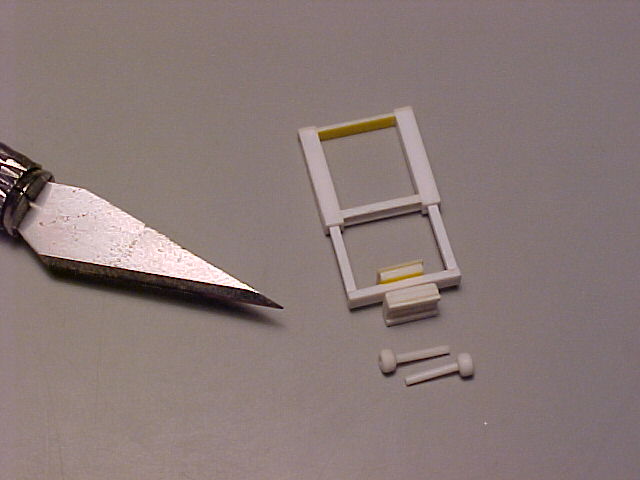
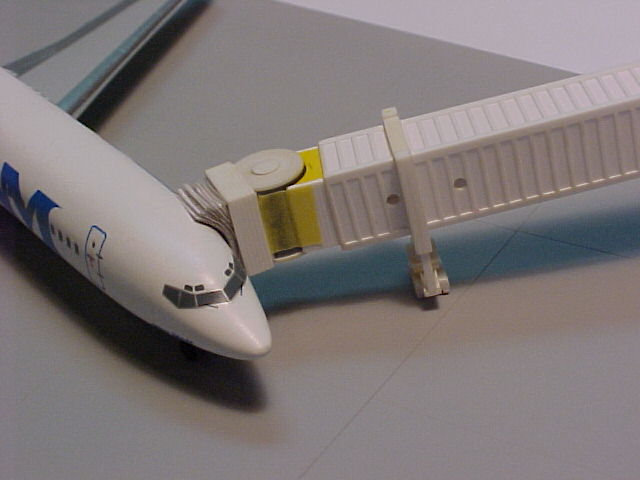
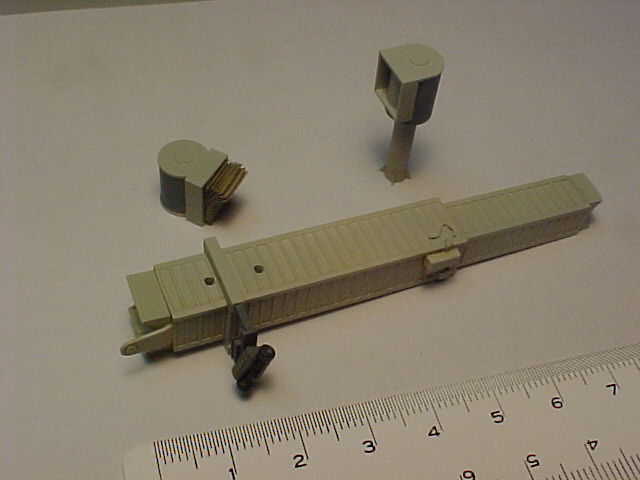
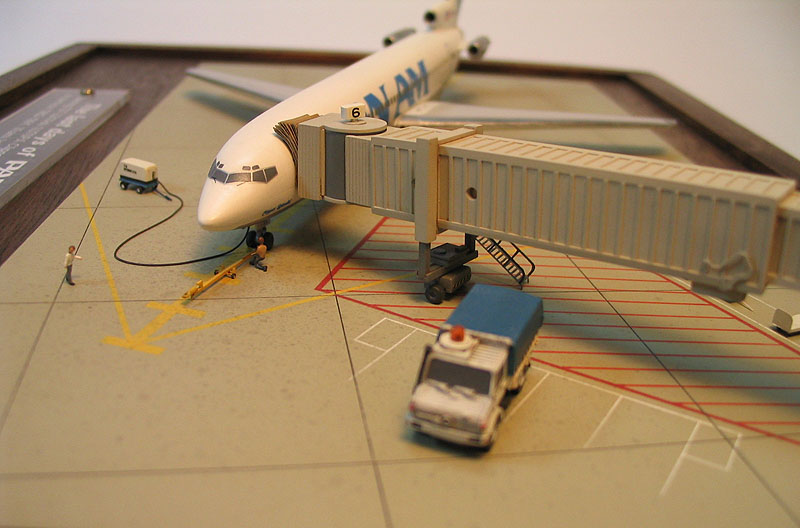
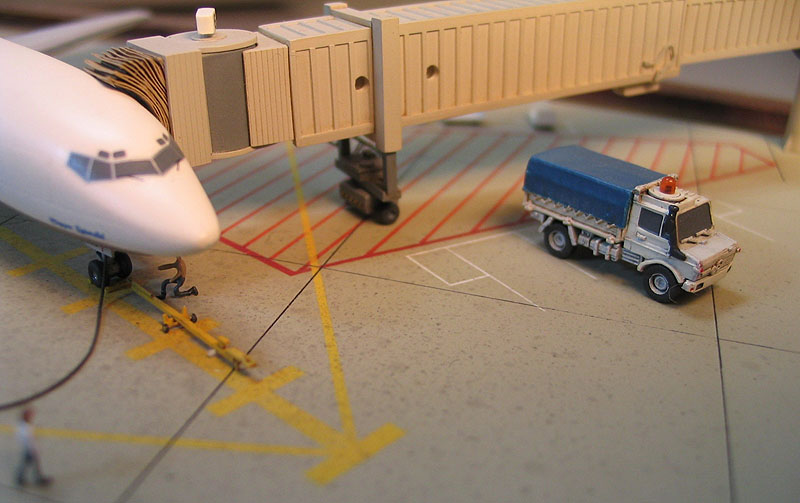
The finger was made mostly from Plastruct. I used photos of airports during the late 70's as a reference. The smaller details were scratchbuilt using plastic tubing and stripes of several gauges. The flexible cover which conforms to the fuselage around the passenger door was made of small rectangles cut from regular paper, glued together and shaped around a dowel while the glue was still wet. Once dry, a bath in Future sealed everything and added stiffness to the part.
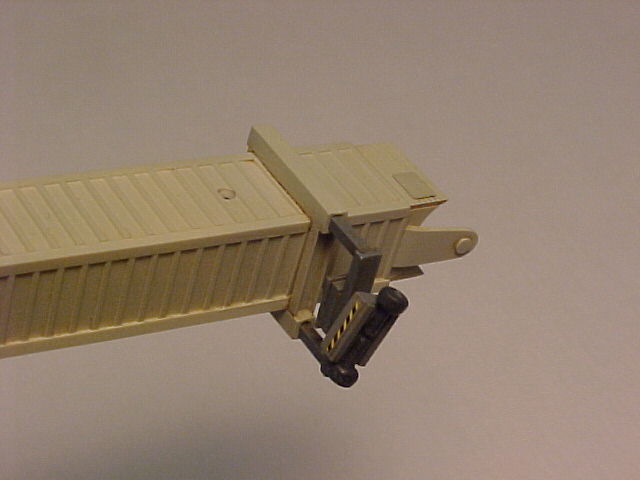
The finger boogey was also scratchbuilt using several plastic shapes. The elevation mechanism was made workable, so I could adjust the finger to the 727's height later during the final steps.
With all the subassemblies finished, the whole thing was dry fitted to allow small adjustments before the painting phase.

Next, I prepared some custom mix of Tamiya colors to match what I saw in the photos, airbrushed it, sealed with Future, applied a light wash and covered everything with a semi-gloss coat of Testors Acryl varnish.
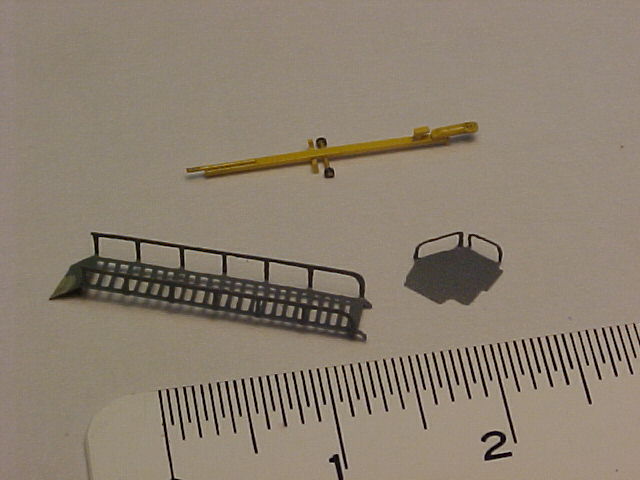
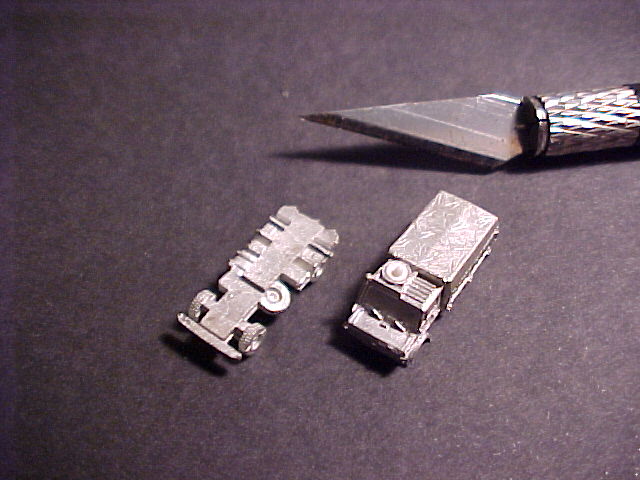
Now I turned my attention to the smaller details. I made a tow bar using stretched sprue and plastic strips, while the maintenance stairs was photoetched using my home made method. I also made some baggage trolleys to be spread somewhere (something ever present in any airport). I wanted to add a couple of vehicles too, but all I could get in time was a GHQ pewter item, the Hannomag truck in 1/285 scale. It was demilitarized and painted in Pan Am colors.
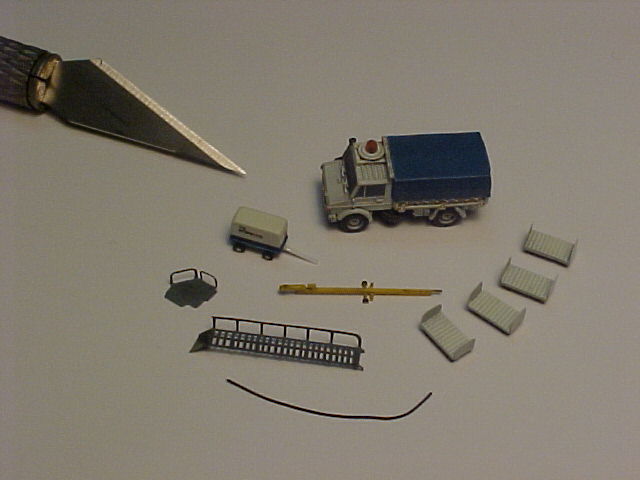
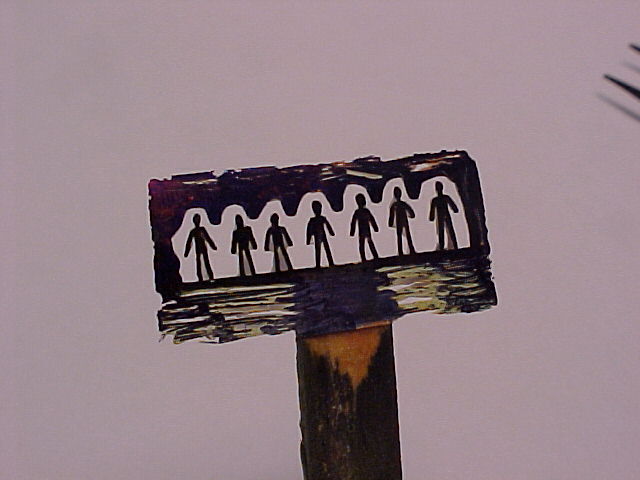
The final touch was to add some life to the diorama. I photoetched some figures in brass, shaped them as desired and coated them with carpenter's glue to provide some three-dimensionality.
And then finally came the fun part: laying everything on the base. At this point of the project, I already got a better camera, so the following pics do more justice to the project.
| Technical file | |
| Kit:
|
-
Revell #04225 |
| Accessories:
|
-
GHQ Hannomag truck in 1/285
scale |
| Basic
colors: |
-
Primer: Gunze Mr. Surfacer 500 - White: Tamiya acrylics - Pan Am blue: mixed from Testors Model Master enamels - Aluminum: Humbrol Metal Cote Polished Aluminum |
| Notes: |
-
All details, except for the truck are scratchbuilt. |
Rato Marczak © 2007
