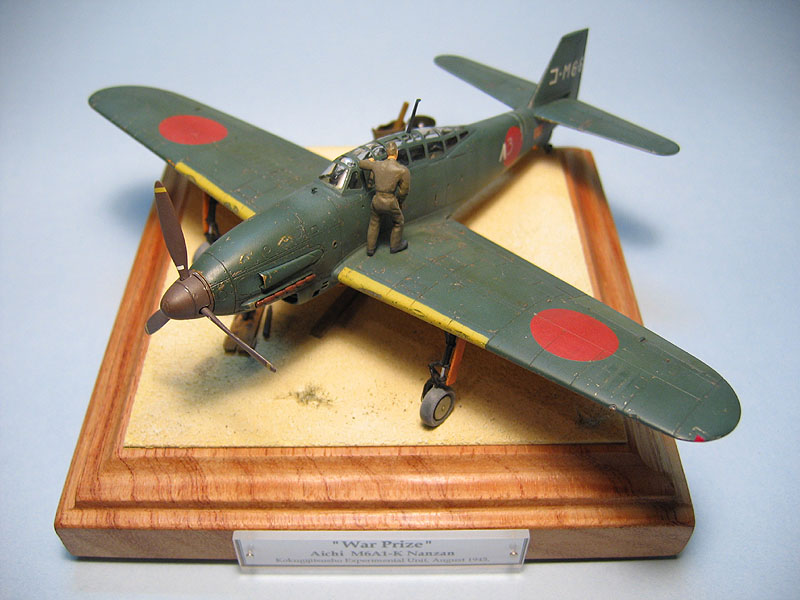
| War Prize Tamiya M6A Nanzan in 1/72 scale |
| Started: January / 2005 Finished: June / 2005 |
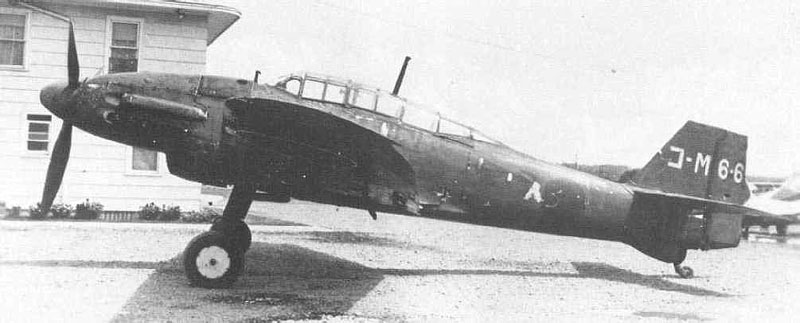
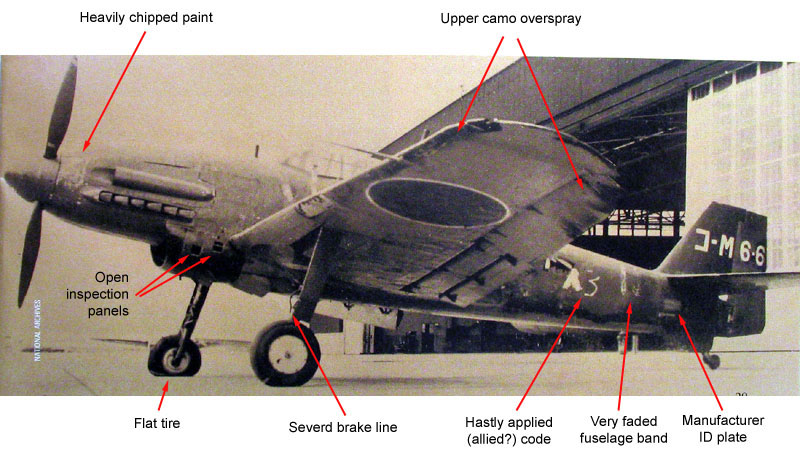
I got this kit in a bargain. Being a Tamiya kit, it was too cheap to let it pass. Tamiya has some strange things... only six of these aircraft were produced. Anyway, by then I had just finished a Ryan Spirt of St. Louis (a truly one of a kind) so I'm getting used to it. Besides, I loved the crisp molding (typical of Tamiya latest releases) and decided to give it a go. The easy part was the research on the subject. Not many photos available, but fortunately I had a couple of magazines showing the Smithsonian restoration of a Seiran (the floatplane older brother of the Nanzan).
Something
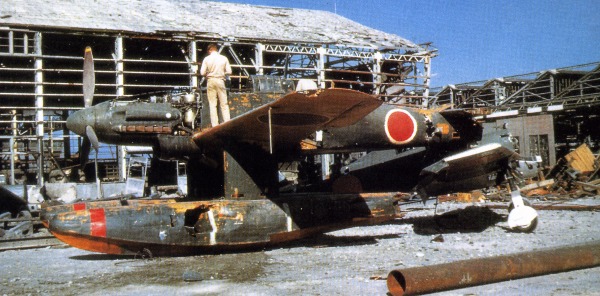
that has catched my attention was a set of interesting photos of a
Nanzan captured by US invasion forces at Kokugijitsusho Experimental
Unit right after the war. These pics showed the sixth (and last) Nanzan
in a miserable state. I found pics of the bird right after capture and
some other a few days after those, with the aircraft somewhat fixed.
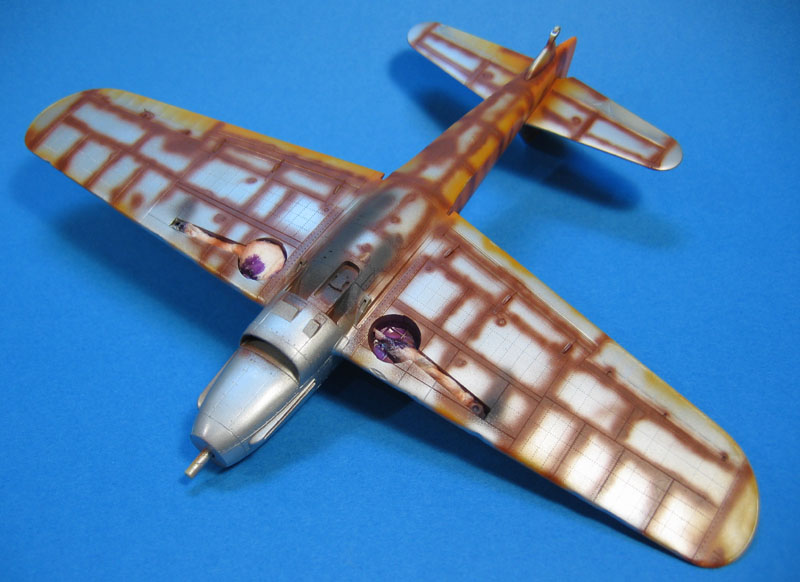
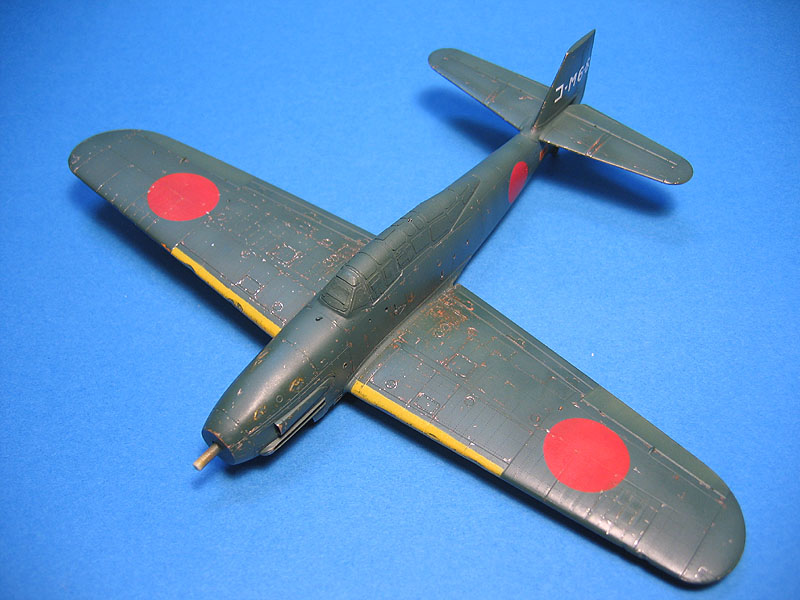
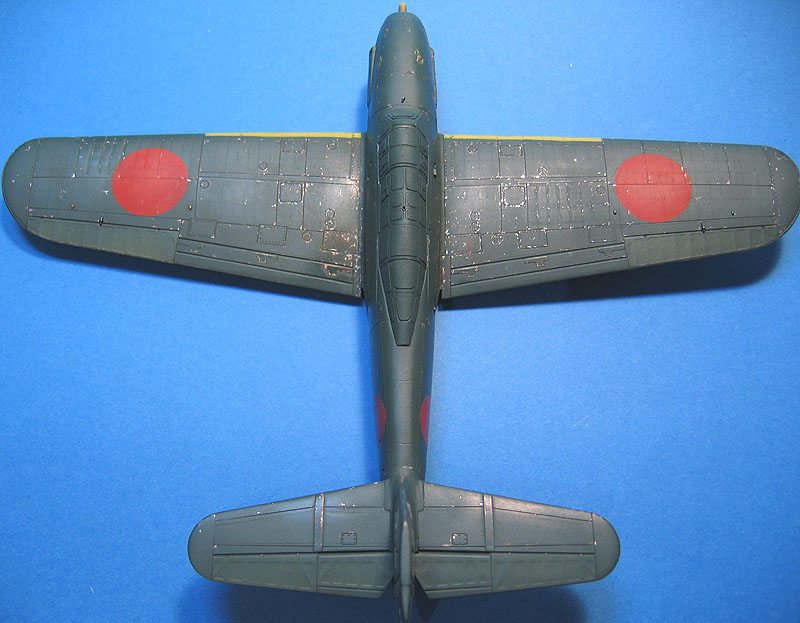
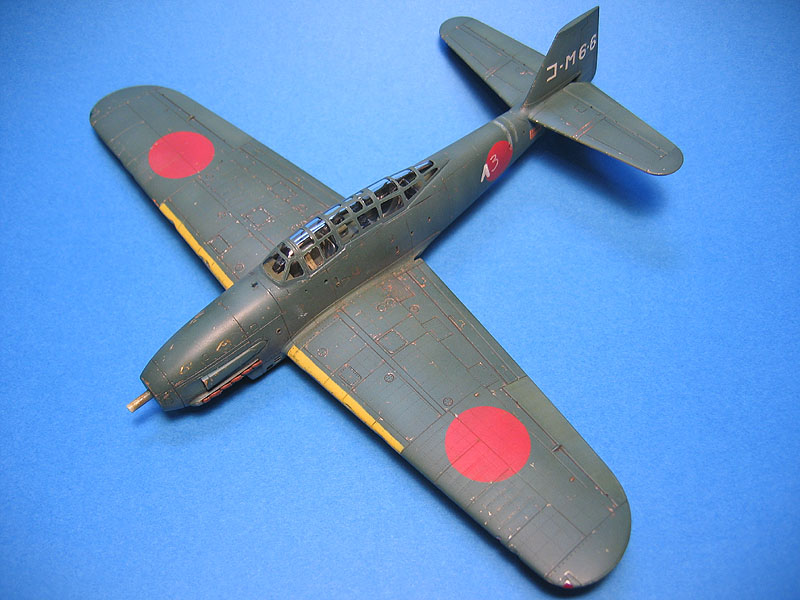
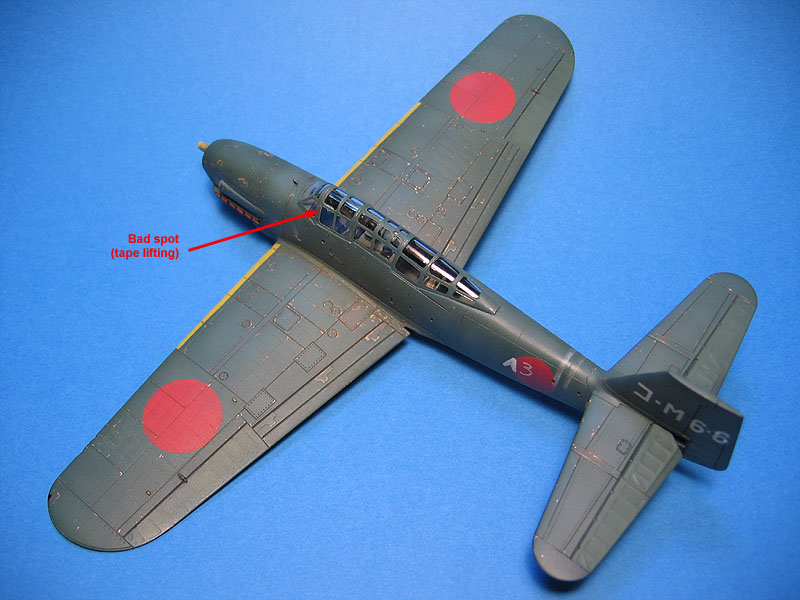
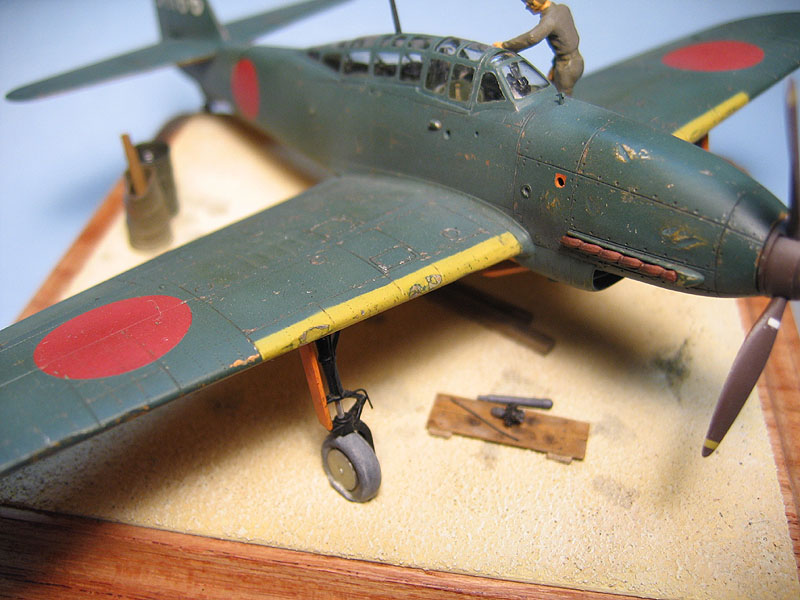
This particular Nanzan had green upper camouflage sprayed over the
original IJN training orange. The bottom of the aircraft was left in
orange except for the nose/radiator. The heavily chipped paint revealed
both, the orange underneath as well as the aluminum skin (on spots
where the damage was more severe). Green overspray from the upper camo
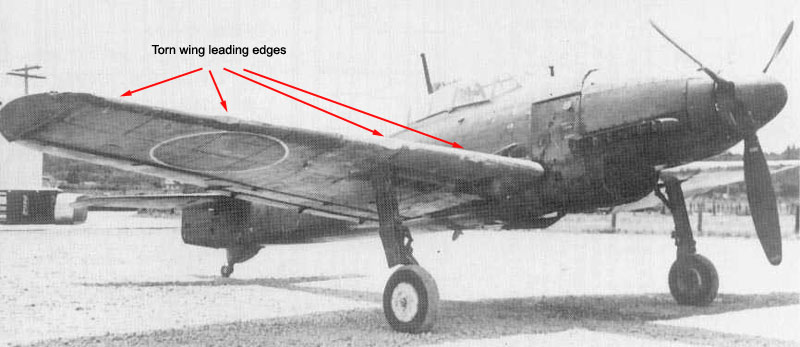
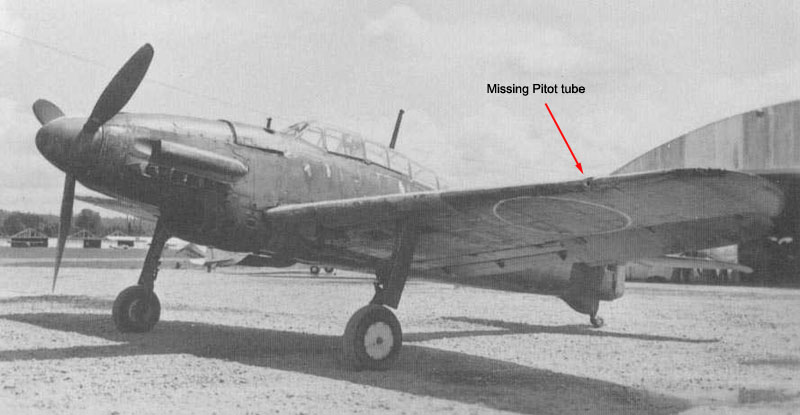
is clearly visible under the wing tips and ailerons, as are several
spots with bent panels and dents along the wings leading edges. Some
inspection panels as well as the Pitot tube are missing, and the
aircraft has a flat tire and brake lines severed. There are also
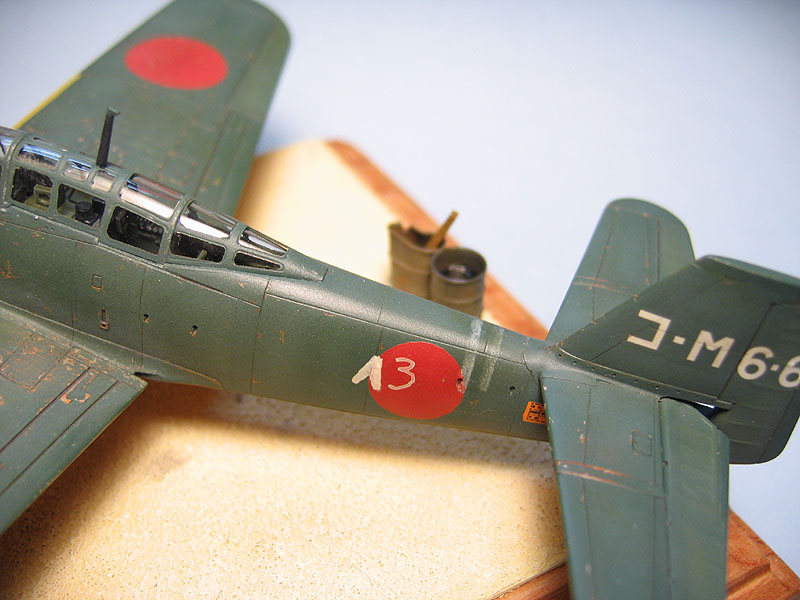
evidences of confiscated material codes chalked on one side of the
fuselage (probably
by Allied personnel) . Not
all these observations are present simultaneously in the same pics, but
I figured that I could use some artistic license to include most of
them in my model. It would be an interesting test bed for new
techniques, too. So the work began...
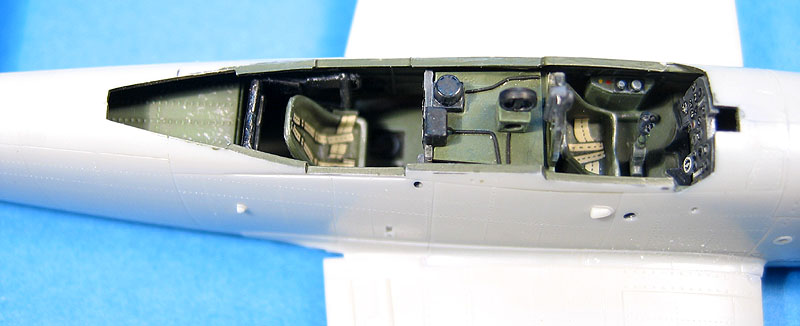
Work started by the cockpit (what you expected?). It is mostly out of the box, except for a few electrical/hydraulic lines here and there. I stuck with the kit decals for the control panel and the seat belts. The later was, however, cut with the backing paper an glued to the seats, for a more realistic appearance.
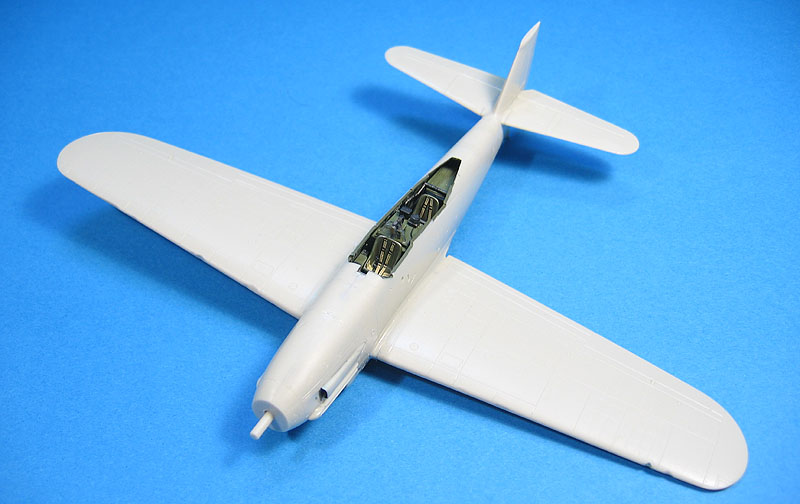
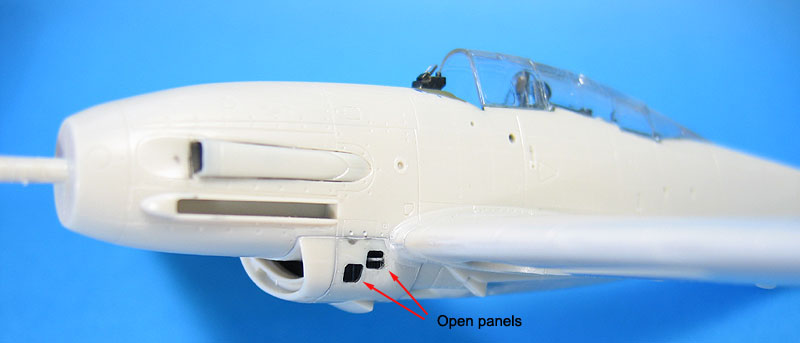
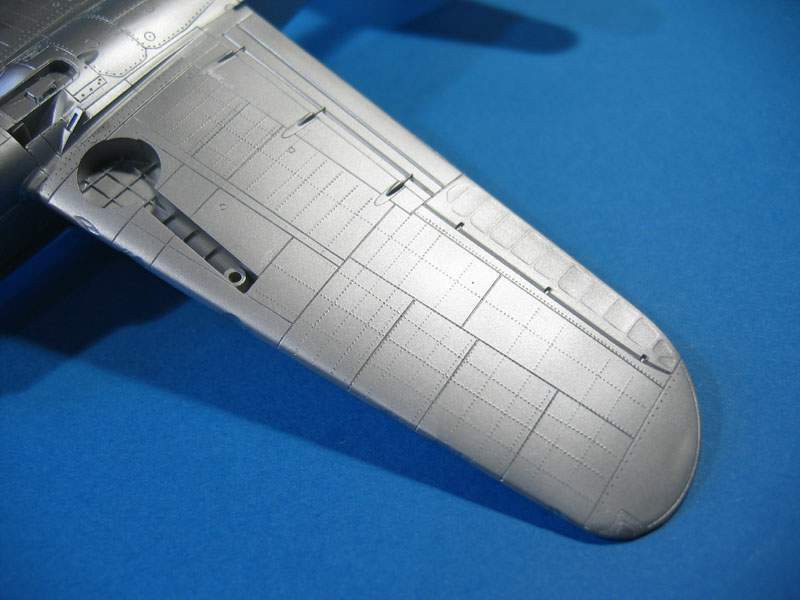
Being a Tamiya kit, the overall assembly went without any problems. At this stage I added the indentations on the wings leading edge, and opened a couple of inspection panels. Several bents were added on the nose panels using a dental tip on my Dremel. Once satisfied, these areas were sanded smooth (but not much).
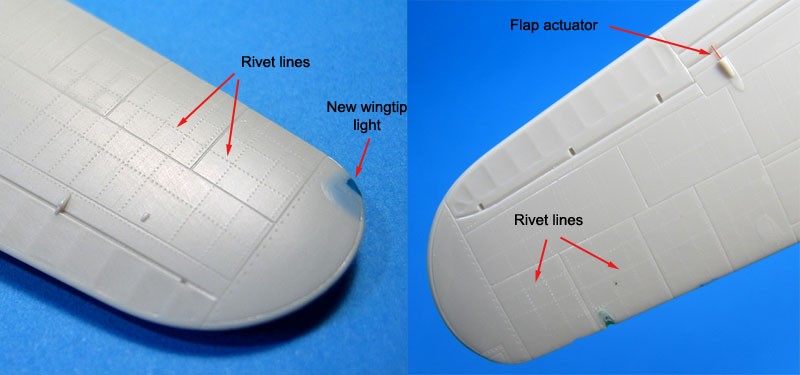
I decided to rivet
the whole model (a first to me) using my home
made riveter. Since I took the decision after assembling the
airframe, the task was not really easy, but I managed to rivet the
whole aircraft in less than an hour, using the Seiran drawings as
reference. More on that later. The wing tip lights were made of
oversized tinted clear sprued in the appropriate colors, cemented in
place, and sanded flush to conform the wing tips. The Pitot tube slot
was also drilled at this stage.
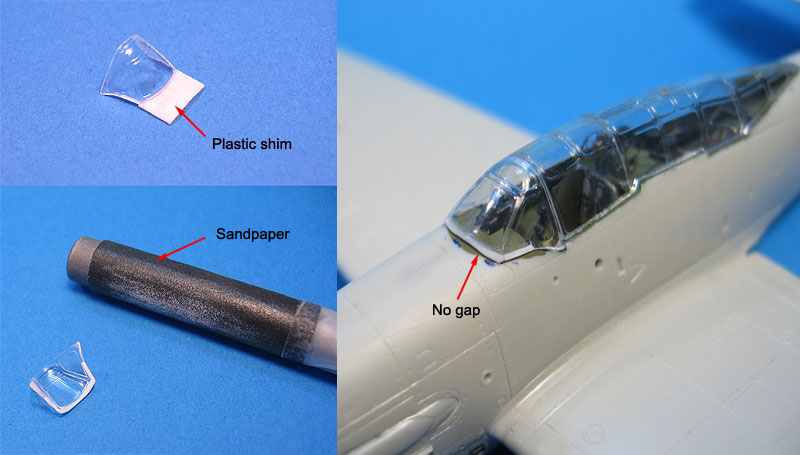
A test fit showed
that the windscreen would leave a large gap if used as is in the kit. I
solved the problem cementing small pieces of plastic card under it.
After trimming the excess, the windscreen was sanded over a piece of
sandpaper rolled over a handle of suitable diameter.
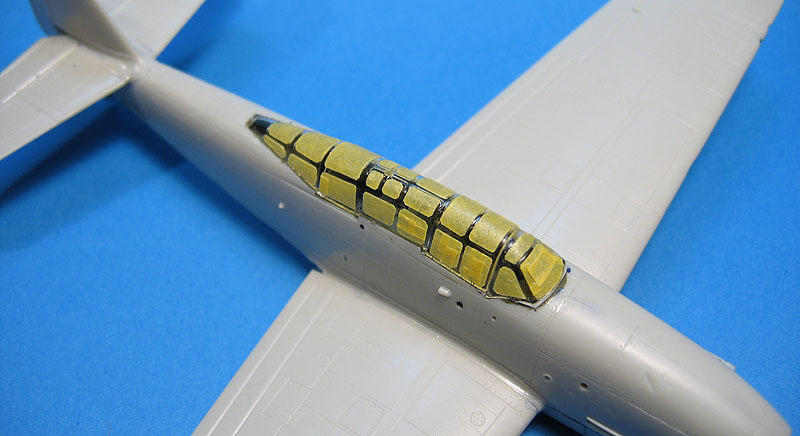
Masking the canopy
was a hell, to say the least. I spent a whole afternoon producing the
masks with my usual method (make three, use one). I wasn't really
satisfied with the result, but since this was part of my AMS therapy, I
decided to leave with it.
Once all those rivets
and damages were done, I applied a coat of Aluminum color. Besides
being the base color of the real aircraft, it serves as an excellent
medium to reveal any blemishes:
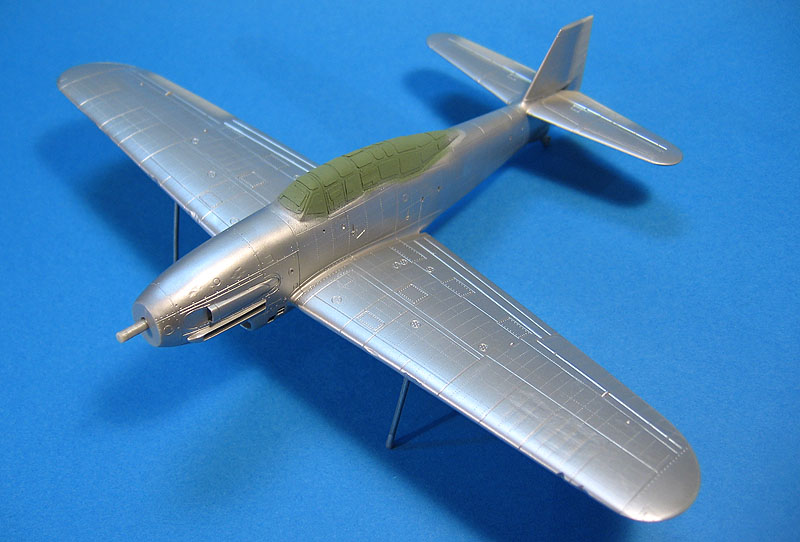
As a by product, I
was able to check my riveting work much better than in the bare plastic.
Next, I applied a
coat of IJN trainer orange. I mixed my own color using Tamiya acrylics,
but don't ask me the recipe (I don't remember). Photos like the one
below helped me a lot to find a good match for both, the orange and the
green as well.
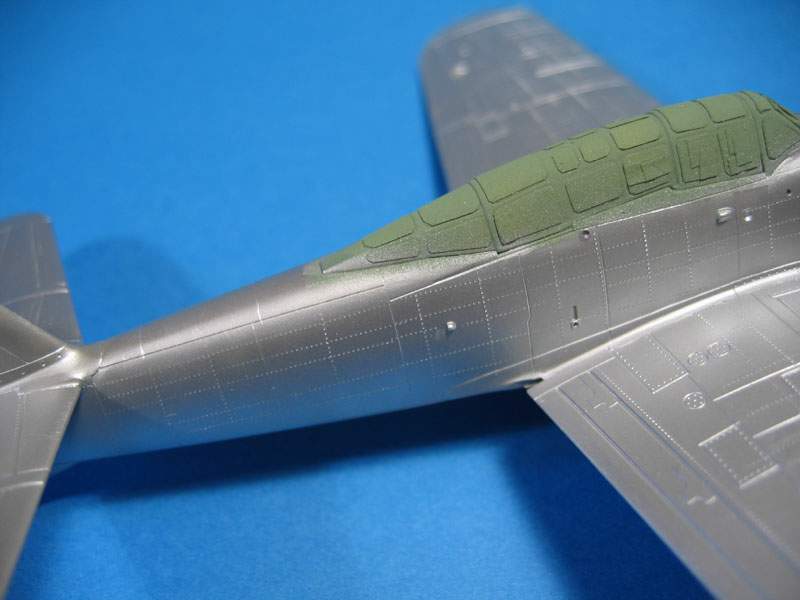
I also applied a
heavy pre-shading using a dark brown color. In retrospect, the
pre-shading worked all right on the bottom surfaces, but the green
practically killed the effect on the top side. Some "exhaust
stains" pre-shading was applied on the belly of the aircraft, and later
this proved to be a good measure for heavily weathered surfaces.
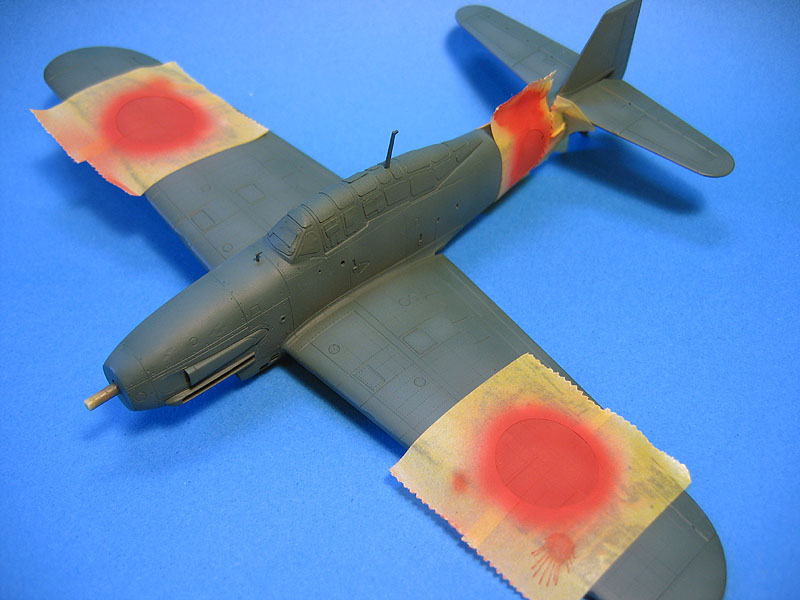
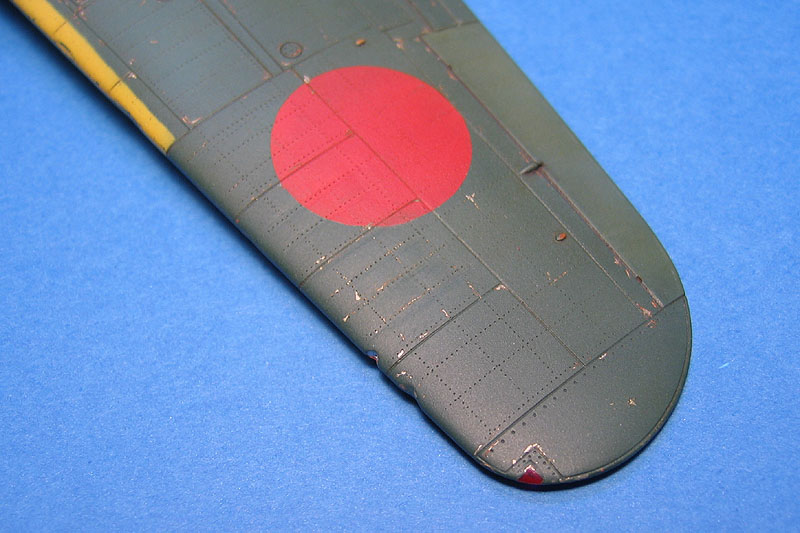
I'm always afraid of
Tamiya decals. They're too thick and I judged they would oblitarate the
rivet details. The top wings and fuselage Hinomarus didn't have the
white outline, so I decided to paint these on. An old bottle of Testors
Insignia Red acrilic paint was
used, and I almost destroyed my airbrush trying to avoid the stubborn
clogging. Lesson learned: don't use those old Testors acrylics (Acryl
is fine, though)!
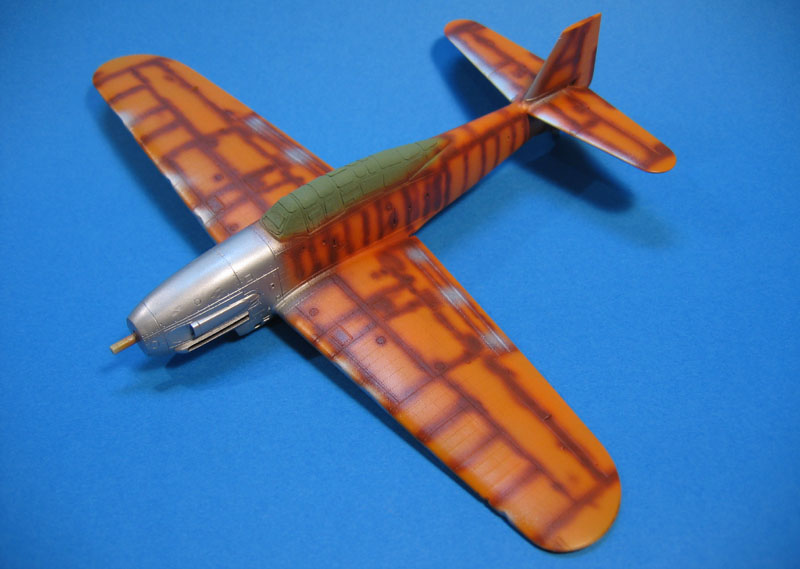
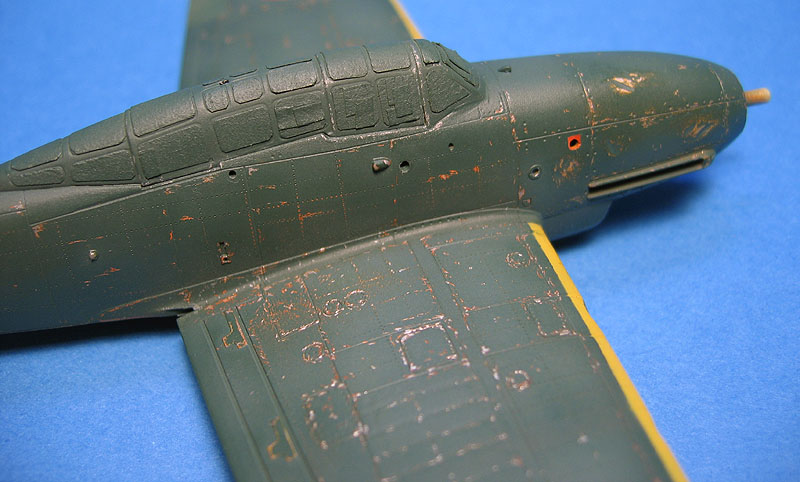
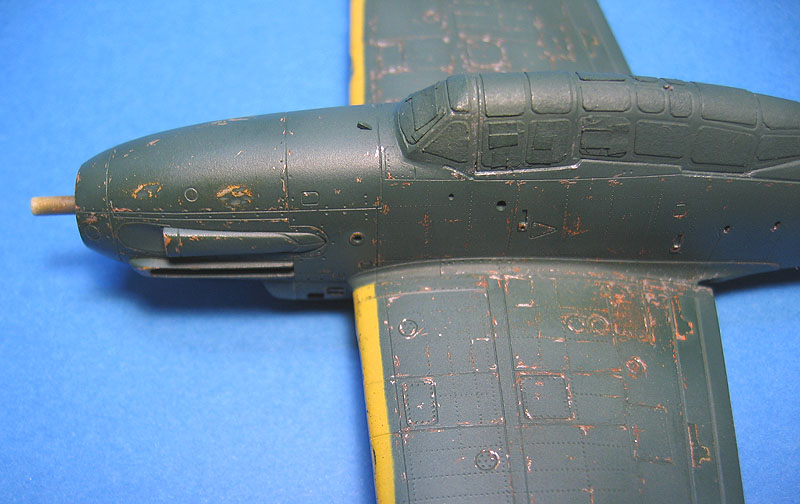
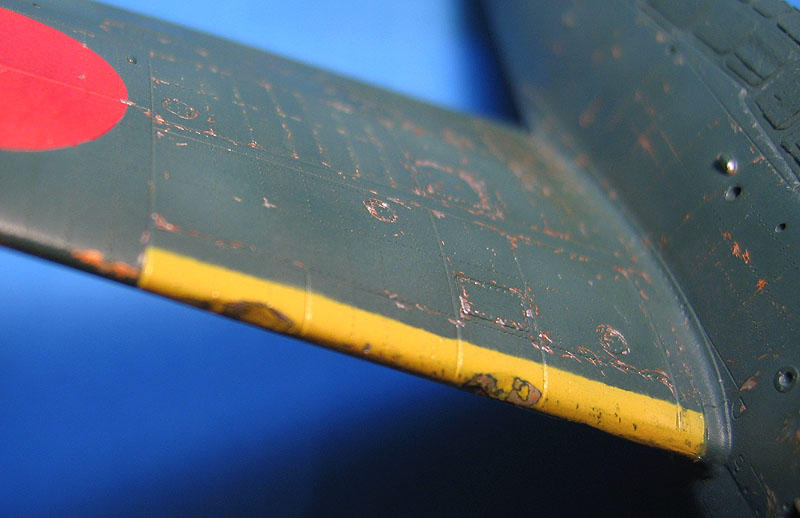
I then started to
chip the paint. I used a needle and a sharp toothpick for that. The
first was used when I wanted to chip the paint all the way through to
the Aluminum coat, while the later was preferred when the intention was
to show the original orange camo. Of course, the effect was
concentrated around the wing roots, nose and belly, and reduced on the
remaining areas. Sometimes I followed the chipping with some gentle
sanding, particularly over bent panels. This also helped to highlight
some rivet lines. I can't remember the last time I abused so much of a
model...
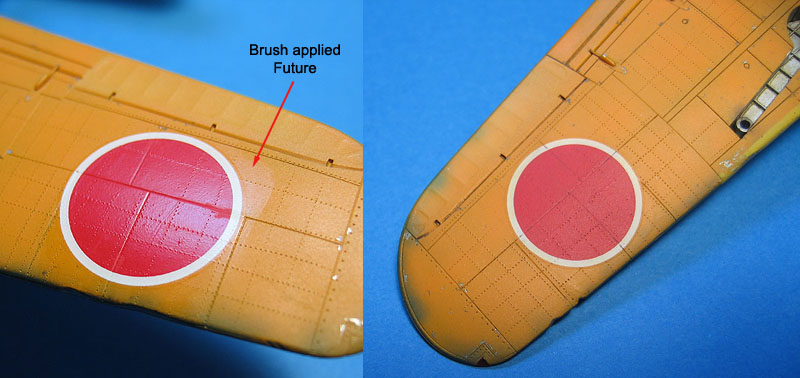
The Hinomarus on the
bottom of the wings would be too difficult to pain (for me, at least).
There I stuck of the kit decals, but before applying them I brushed a
layer of Future on their positions. I was worried the brush marks
wouldn't disapper completely after the flat coat was applied, but it
worked wonderfully, as the photos below prove. Lesson learned (an old
doubt of mine): it is not absolutely necessary to airbrush the whole
model with Future in preparation for the decals.
The control surfaces
received a coat of lighter color:
A few more shots of
this stage:
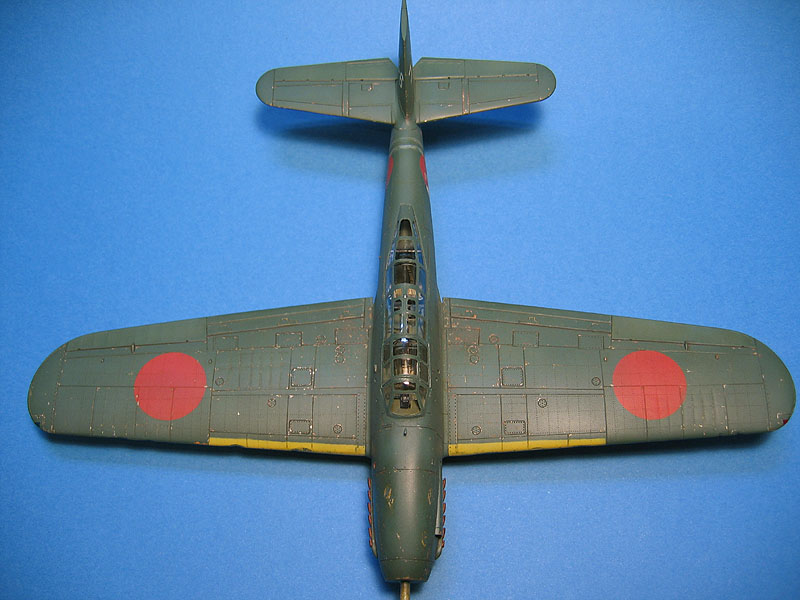
Before proceeding, I
used a 4B pencil and added oxidized scratches here and there, although
they are more visible on the underside. I love this technique: simple
and effective. At this point I airbrushed the exhaust stains, but I
forgot to take a picture of the model after that.
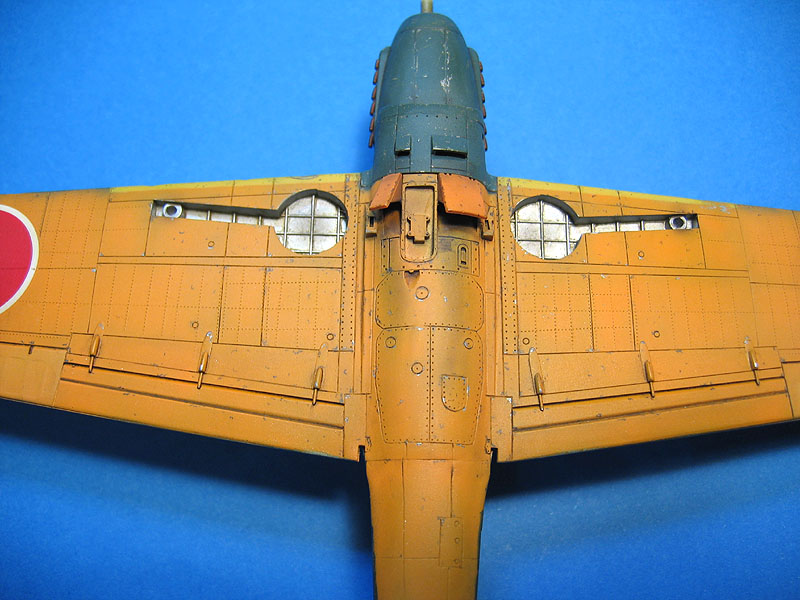
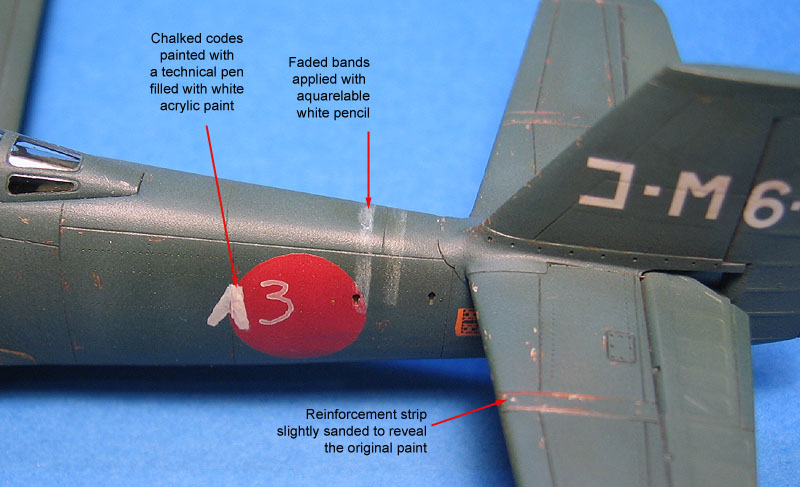
The chalked code over
the fuselage Hinomaru was drawn using a technical pen filled with white
acrylic paint. Combat rules here: one shot, only. The faded bands were
painted with artists aquarelable white pencil, using a Dymo tape as a
guide.
Next, the canopy
masks were removed. Everything was ok, except for a small bleed under
one of the canopy frames. Thanks to my habit of thinning Tamiya paints
with lacquer thinners, the clear part was visibly attacked on that
spot. There was nothing to do about it. My solution was to include a
figure on the wing, with the arm over that spot, hiding the fault.
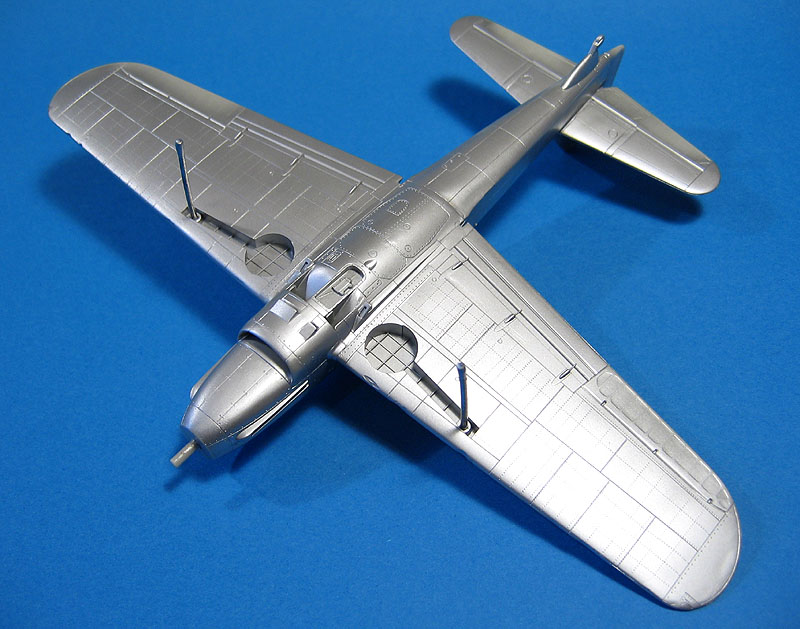
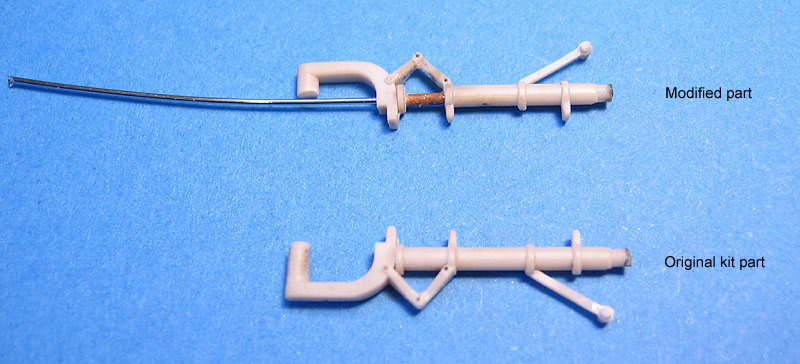
I then turned my
attention to the small details. The landing gear legs were modified by
including small sections of brass tubing to simulate the oleos, since
the original kit part had oleos with the same diameter of the strut:
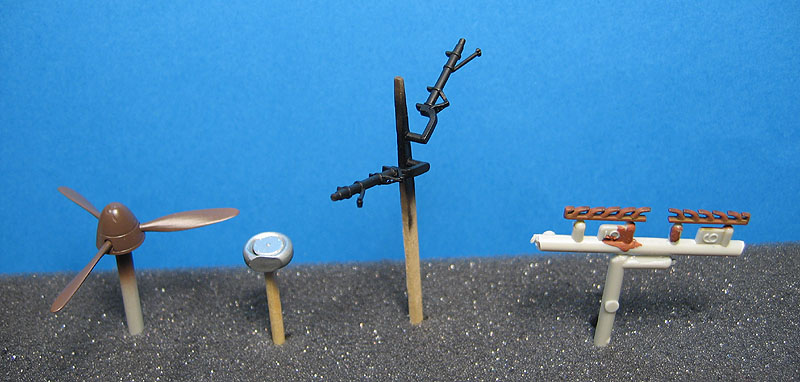
The propeller was
painted with Gunze Mahogany
(H84) and coated with Future. I used Humbrol Semi-Gloss Black (#85) for the
landing gear struts. The flat tire was simulated by pressing the kit
wheel against the bottom of a pan with boiling water, and later sanded
to round things a bit:
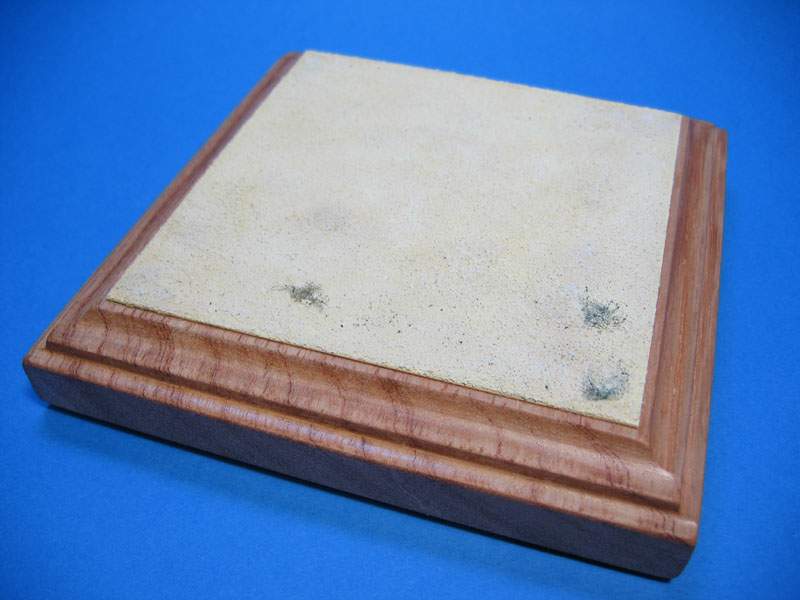
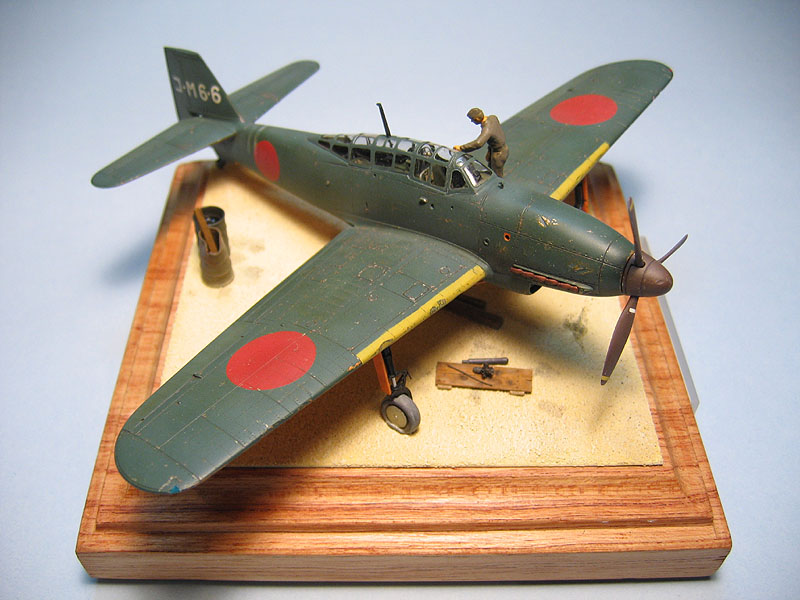
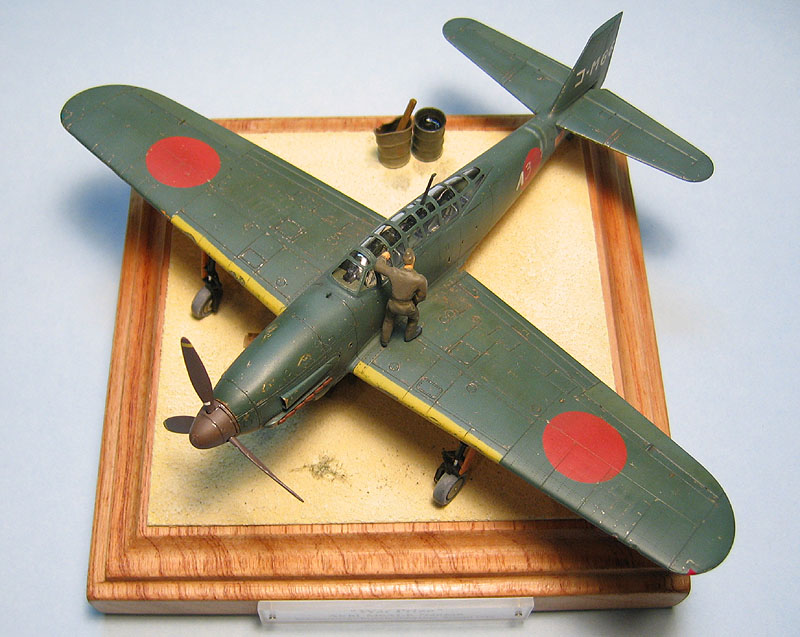
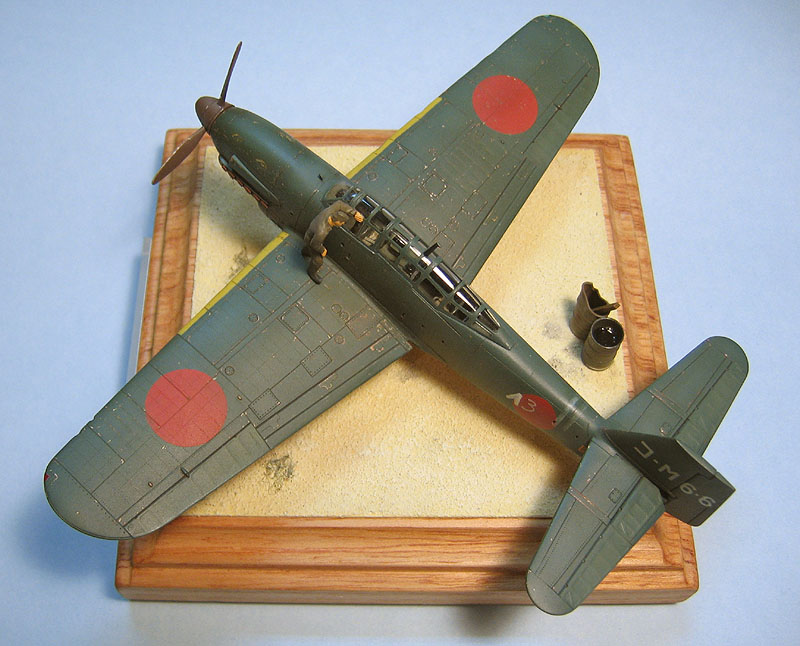
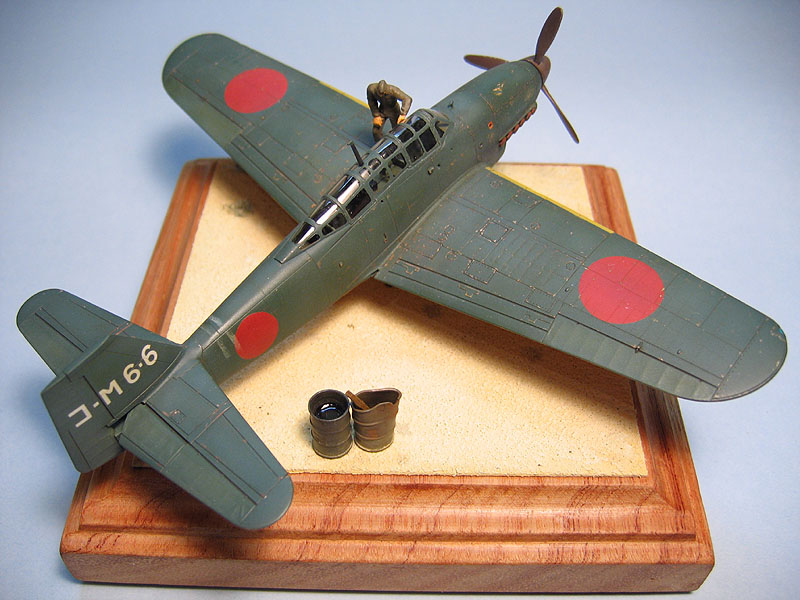
While I was finishing
the smaller bits, a small base was made depicting a portion of sandy
spot of Kokugijitsusho base. Nothing fancy here, just some sand
sprinkled over and brush painted with household acrylics.
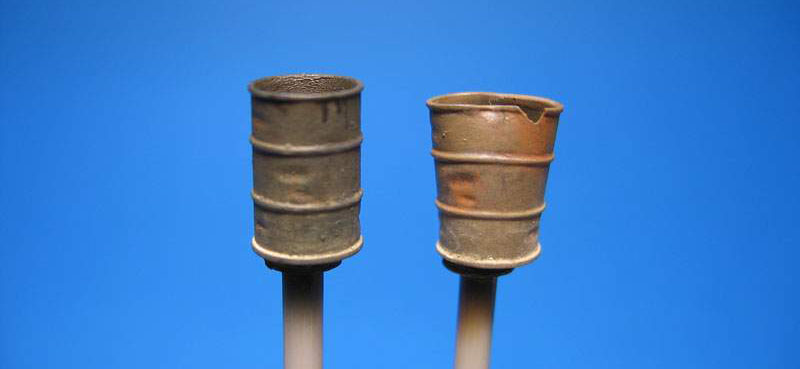
I also added some
small gears from an old watch to add interest. The fuel drums show
below are my from own production, painted and weathered accordingly:
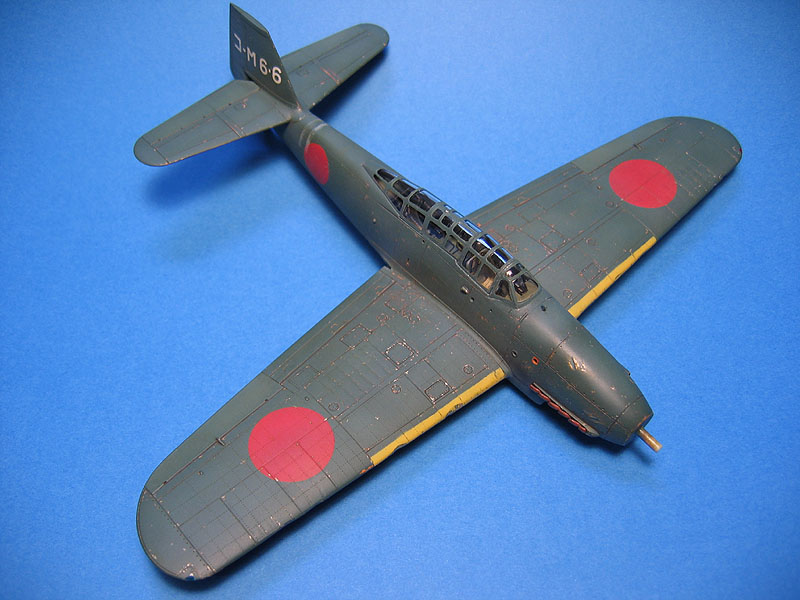
And there you have
it. Although it took almost six months to be completed, the elapsed
time was very low, one of my fastest builds so far. I omitted many
details, but my memory is fading away, and that's why I've written this
report in a rush. I'll leave you with some more pics. Look carefully
and you'll find some evidences of an early ill fated stressed skin
attempt. Fortunately I stopped before it was too late.
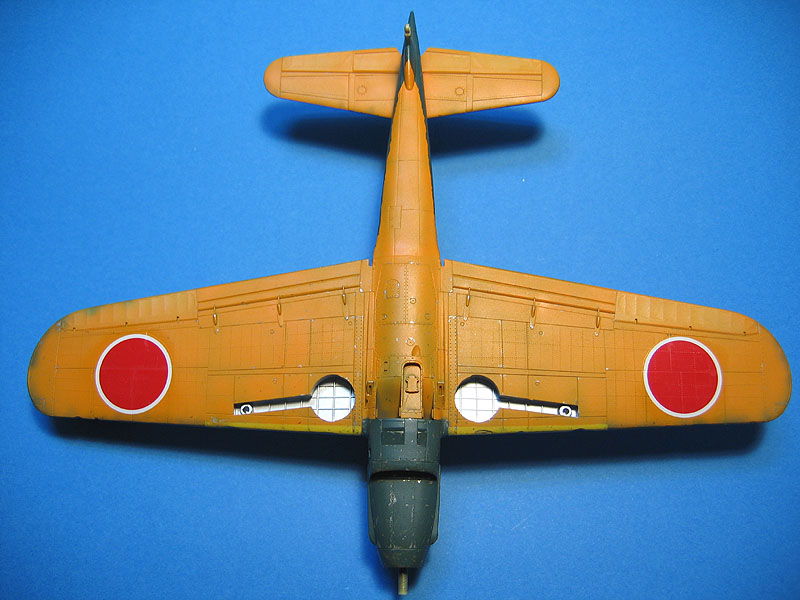
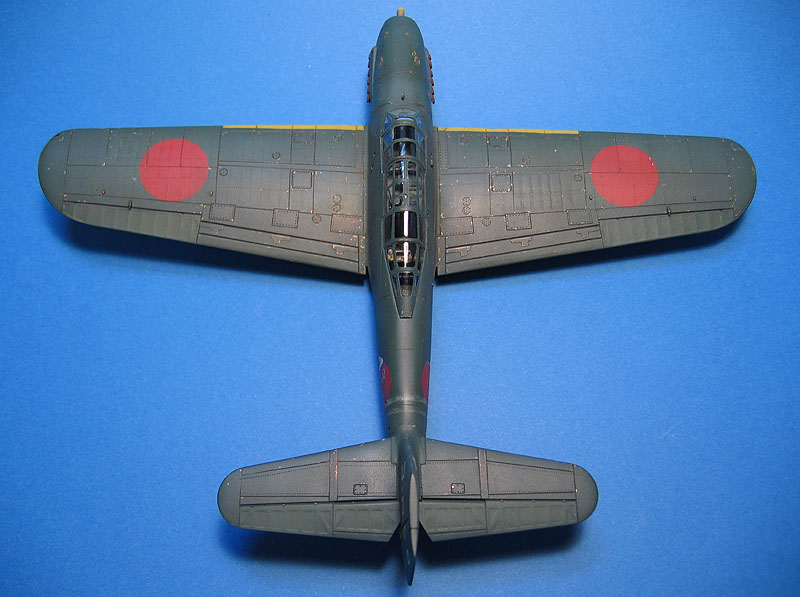
The Nanzan was a strange plane, but I'm getting used to this sort of thing. I like to think on this vignette as a small example of the aircraft industry oddities during wartime.
I entered this model in Brazilian IPMS Nats in 2005 along with my Spitfire prototype, but it didn't rank. Interestingly, I managed to hear the judges claiming that the rivets came originally with the kit. That was enough to make me satisfied...
| Technical file | |
| Kit:
|
-
Tamiya # |
| Accessories:
|
|
| Basic
colors: |
-
Primer: Gunze Mr. Surfacer 500 - Green: Mixed fromTamiya acrylics - Orange: Mixed fromTamiya acrylics - Aluminum: Floquil Bright Silver |
| Notes: |
|
Rato Marczak © 2007

