| Hobby Decal Bf-109 stencils in 1/32 scale |
| Summary | |
| Description:
|
-
Dry transfer (rubbing) type stencils to replace decals |
| Scale:
|
- 1/32 |
| Price:
|
- 14.98 USD |
| Contents
& Media: |
-
Three printed sheets and placement instructions. |
| Advantages: |
- No silvering / no clear film. - Can be applied over gloss or flat finishes - Unbeatable system when applied over natural metal finishes |
| Disadvantages | -
Cannot be moved during application. - May be difficult to appy over tight corners and protusions. |
| Recommendation: |
-
Recommended, particularly if you hate decals. |
I won´t repeat Brad Hagen´s words of the advantadges and disavantadges of using dry transfers. Product ST32004 comes in three sheets, according to the number of printing colors. The quality of the printing is outstanding, and the register is almost spot on, with only marginal deviations that can be easily ignored. The Germans were (and still are) very exquisite in their engineering and documentation. This applies to virtually every Luftwaffe aircraft stencil plan, even during the final months of the war. This set captures virtually every stencil applied to the Bf-109F and later versions. I´m sure most of them can be used in earlier versions too, but it is up to you to check it out. Hobby Decal product numbers indicate the current version of the set, showing that they care about possible future corrections.
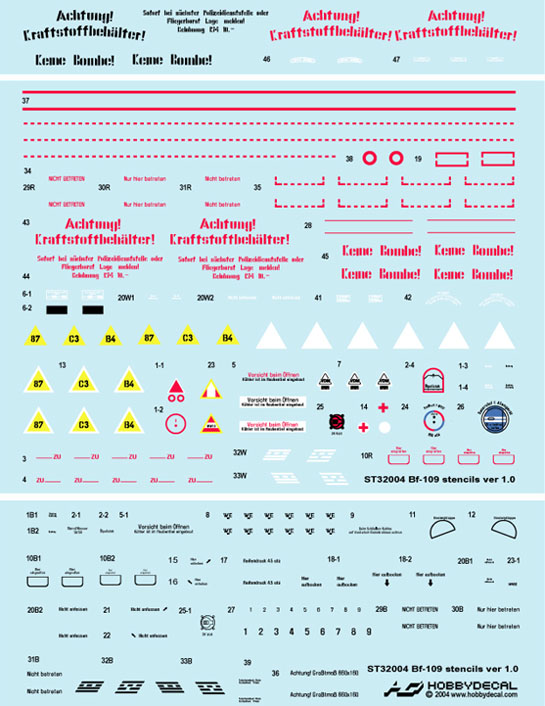
It is important to mention that every single item is readable using a magnifying glass. Some items are duplicated, but most of them are not, so take your time during the application. I included a reduced version of the manuals below to allow a better appreciation the amount of work put on this set.
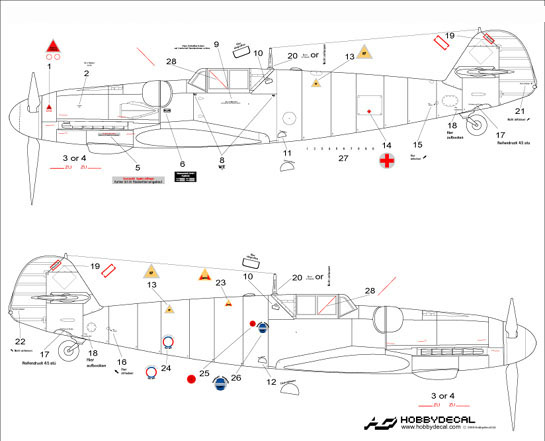
Placement instructions. (image courtesy: Hobby Decal).
Placement instructions. (image courtesy: Hobby Decal).
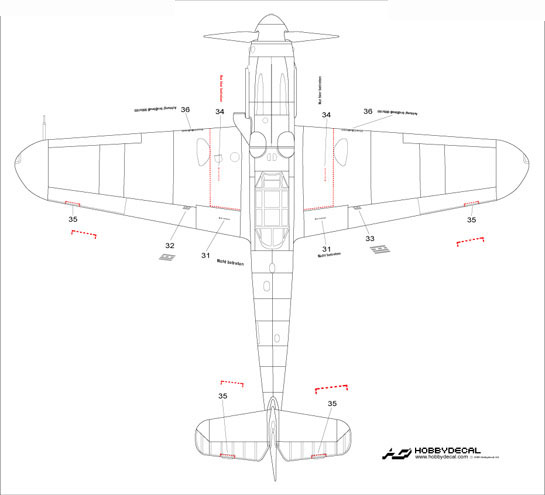
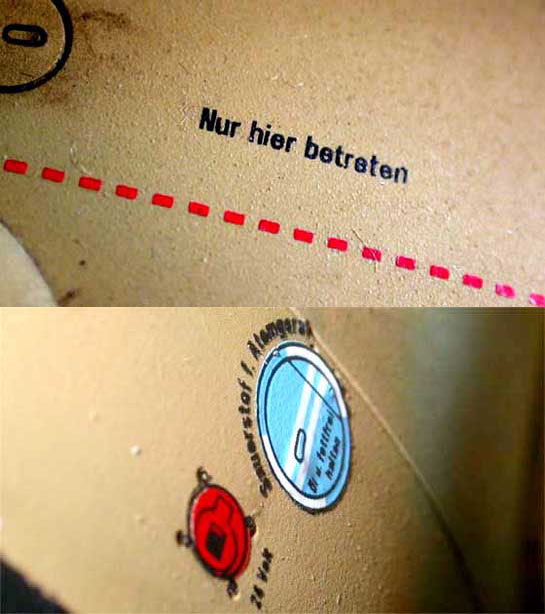
The other good news are the walk-on dashed lines, as well as the rudder and trim tabs lines. These items are very susceptible to silvering, and very fragile in conventional decals (if included). Moreover, Hobby Decal didn´t forget the propeler blade logos (in two versions).
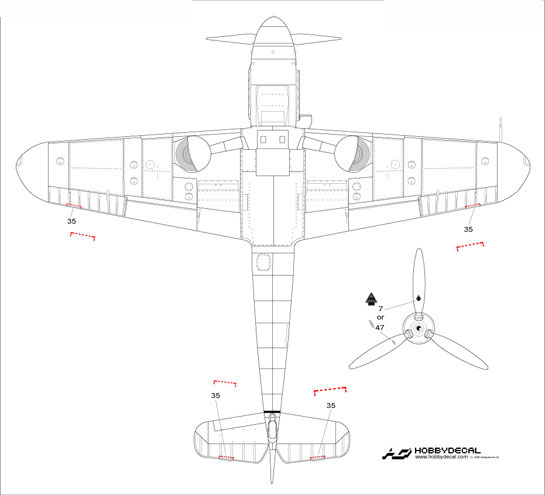
Placement instructions. (image courtesy: Hobby Decal).
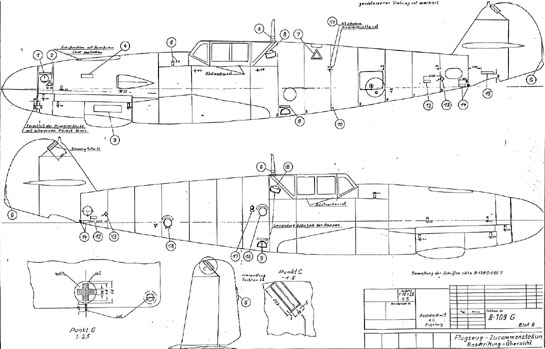
The picture below shows the official stencil map for the Bf-109. As you can see, Hobby Decal instructions are very close, eh?...
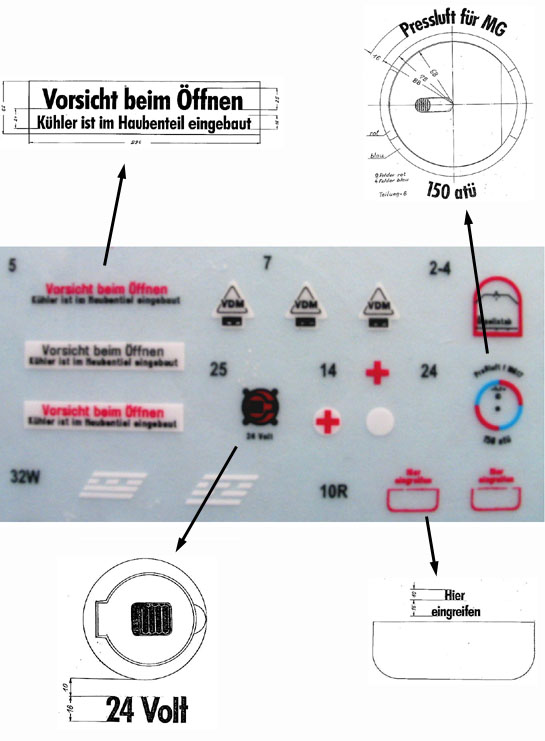
Given the quality of the printing, I dared to check the accuracy of some items. The figures below show a comparison of some items from this sheet against their original factory blueprints. I found some overthick lines, but this is understandable as a limitation of the printing process. Everything else is very accurate (I confess that I have not checked all the colors) in shape and dimensions. The only exception is the 24 V battery electric connection (item #25), whose cap is inverted according to the factory drawings. In some cases, you have more than one option to choose from (all black, colored, different types of text justification, etc.), so check the references about your bird.
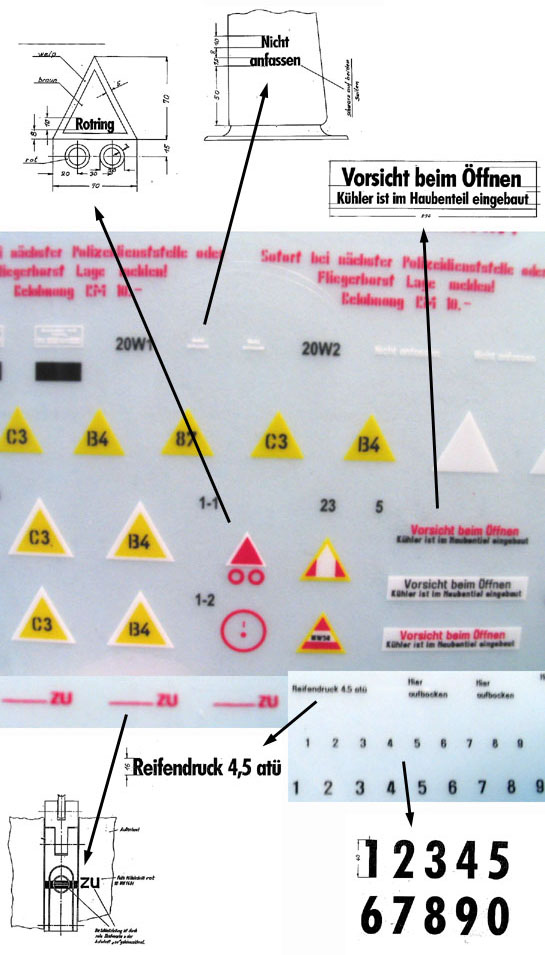
If you pay attention, you will note a row of black numbers (in two sizes) applied at factory to identify each of the fuselage sections. If you want to count rivets, the style of the numbers are slightly different than the official blueprints. Anyway, I doubt you will care that much. In addition, I bet field applied cammouflage would hide them in many cases. At least I had a hard time trying to find them in WWII photos...
The fuel/oil/coolant triangles are offered with the option of applying them complete or the white background triangle first, and then the yellow one on top of it. The last option should be used in case you don´t agree with eventual out of register problems. I didn´t find photos showing them without the white outline.
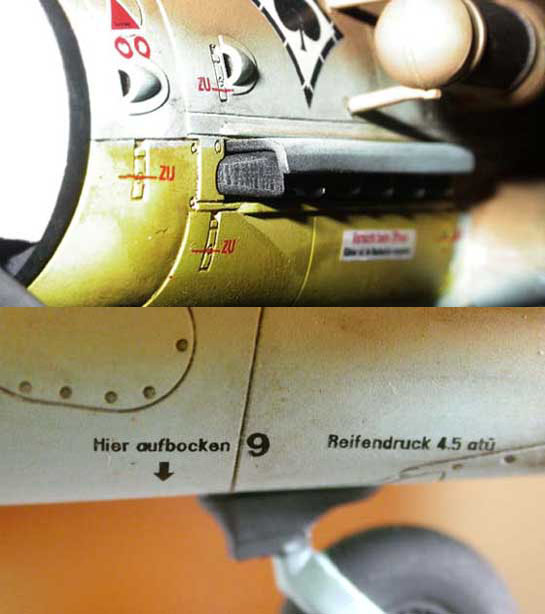
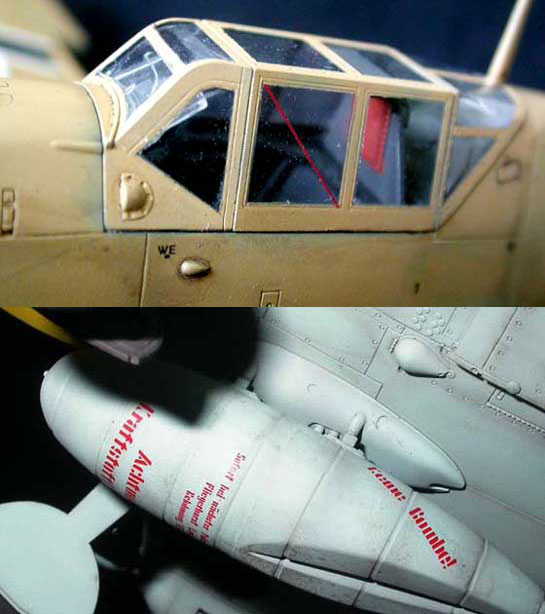
How they go on a finished model, you may be asking? Here are some pics of this sheet in action. I´ve measured some recessed details molded on the fuselage of the Revell-Monogram Bf-109 G-4, and compared with the corresponding dry-transfers to be applied on... they match wonderfully.
Hobby Decal line of dry transfers are not cheap products. You pay about the price of a large water slide decal sheet for something that will cover much less area, one may wonder. But these sets are taking care of those tiny details that are always bugging us: stencils, and in a way which is, in my opinion, unbeatable. I believe a stunning model is made out of a sum of small details greatly accomplished, and that´s why I always enjoyed dry transfers. Hopefully, other manufacturers will (re-)adopt the idea in a near future.
Review sample compliments
of Hobby Decal.
Thank you for your support.
Rato Marczak © 2011
